How We Leased a New Car Without Setting Foot in the Dealership

Volvo XC70 exterior

After a quick mention on Twitter, a number of people have asked how we managed to buy a car without visiting the dealership we bought it from. The answer is pretty simple: email.

With Kate’s old car, a 2002 Volvo S60, having crossed the 210,000 mile mark with a relatively expensive exhaust system repair looming, we’ve been in the market for some time. My efforts at convincing her to replace it with a pickup truck having failed miserably, another Volvo was the default choice. We’ve both been very happy with the reliability and maintenance record of our Volvos, and this is the second in a row for Kate that’s eclipsed 200,000 miles.

So we headed to our local dealership to test drive two models with a little more space than her S60 (new baby, new priorities): the XC60 and XC70. Kate had no real preference, so I went to work finding the best deal we could on either.

Step one was tracking down every Volvo dealership within a reasonable driving distance: 110 miles or so. I would have stretched it further to include Boston-area dealerships, but with a new baby time is at a premium. Interestingly, Google Maps was less than helpful for this exercise, including as it did a host of service stations that weren’t relevant for this search. Volvo’s website gave me a list, however, and I emailed five dealerships in New Hampshire and Maine with basic information: the two models we were considering, the lease terms we expected, the details of our trade-in, and so on. I (eventually) got five replies.

From there, I simply negotiated over email, taking the best offers and seeing whether or not other dealers would match or beat them. It took a couple of rounds of this, because a few of the dealerships were more traditional and wanted to do things over the phone or in person, but eventually one of them (Portland Volvo) was willing to go the extra mile and give us a higher end model at our price target and we were done.

Even better for us, Portland Volvo has a drop off delivery option. The first time I spoke to anyone on the phone was the day before Christmas Eve to put down a deposit. Three days later, I called their finance department to provide the necessary information for the credit application and the car was dropped off at our house an hour later. The driver brought all the necessary paperwork, which we signed and then he drove back to the dealership in our trade-in.

All in all, that’s about as painless a buying process as you’ll find, with the possible exception of Tesla. Not every dealership will drop off the vehicle, of course, but there’s no reason apart from test drives at this point to visit a dealership to talk price. It’s much more efficient to stick to email, engage a number of dealerships and let them compete with one another. If you’re working with one that has an internet sales department, as well, expect them to be much more efficient.

So that’s how we leased our new car without setting foot in the dealership.

November 30

IMG_0372

Many things have happened on November 30th over the years. In 1782, the preliminary peace articles that would later be known as the Treaty of Paris, officially ending the Revolutionary War, were signed. In 1954, in the only documented case in the Western Hemisphere of a human being hit by a rock from space, Ann Elizabeth Hodges was struck by a meteorite while taking an afternoon nap. After it was slowed by the roof, she was bruised but otherwise fine. In 1980, Shane Victorino was born. This later became very relevant. Two years after Victorino was born, Thriller was released on November 30th and went on to become the best selling album of all time.

Shane Victorino or no, however, 2015’s November 30th will always be the best November 30th for us. At 8:33 AM, we welcomed Eleanor Gilman O’Grady into the world. Our first child, and one who brought her share of complications, we are grateful beyond words that she arrived happy and healthy. Well, healthy, anyway. She was a little grumpy post-delivery. She got here a little late for Thanksgiving, but as she was five weeks early (as Kate says, she’s already an O’Grady) we can’t really hold that against her.

Kate and I are adapting to the life of parents of a newborn, which is to say we’re adapting to a life where you measure sleep in minutes rather than hours. Exhausted as we are, though, what pretty much every parent told us has proven true: it’s all worth it. It always was.

November 30th, 2015 was a good day.

The News

rockabye-baby

There is news and there is news. The former is never in short supply. Anyone who’s ever caught up with an acquaintance understands this kind of news. Promotions. Trips. Moves. Stories about friends being trapped in hotel stairwells in Brussels. This kind of news is not mundane, exactly. As Raymond Carver put it, “There are significant moments in everyone’s day that can make literature.”

But there are other moments. Moments you may only experience once in a lifetime. If you’re lucky. This is one of those moments, that other kind of news.

Kate is pregnant. We are expecting a baby daughter in early December.

The proximity of that date may surprise some of you. It certainly surprises the hell out of us when we actually sit down and count the weeks between now and then. We are making this news public at a date later than might be typical in part because we are both superstitious (I blame baseball, not sure what her excuse is). But while we’re all of the adjectives that mean excited, we’re also cautious because it’s taken us a long time to get to this point, and there are many, many hurdles yet to be cleared.

If all goes well, there will be other times and other posts and far too many words to discuss, among other things, how as the product of a household with one brother and zero sisters I am completely and utterly unprepared for a daughter. But for now, we just wanted to share this news with everyone, because there’s news and there is news.

Hopefully we’ll have more of that last kind soon, but in the meantime keep your fingers crossed for us if you would.

How to Build a Woodshed

IMG_20150711_151107046_HDR-ANIMATION

When Kate and I bought our house, we knew going in that it had two primary heat sources: an oil furnace and a fireplace. We weren’t thrilled about the former due to the cost of heating oil and a host of environmental concerns, and while we both enjoy a roaring fire, the unfortunate reality is that fireplaces are by and large better aesthetically than they are at actually serving as a heat source. Taken together, our heating situation was less than ideal.

To address this, we first invested in making the house more efficient at retaining the heat it did have. We had blown insulation installed in the attic, we tore out and replaced the existing insulation in our basement, ripped out an old front door and sealed it, replaced the remaining entryway with a new efficient model, installed storm windows where they were lacking and more. This did have the desired effect of cutting our oil consumption substantially – anywhere from a half gallon to gallon per day during the winter heating season. Which was a good start. But it didn’t address the core problem that our heating system – systems plural if you want to count the fireplace – was extremely inefficient. And so we set to evaluating a wide variety of heating options.

Why Wood?

Natural gas, the option involving the fewest compromises both economically and environmentally, is unfortunately not going to be coming to our neighborhood. The cost of a propane-based alternative wasn’t prohibitive, but the payback period versus our existing oil infrastructure was lengthy. My preferred option of a ductless minisplit heat pump, meanwhile, was interesting, but given that they’re less viable in extreme cold and more problematically will not integrate into an existing thermostat system, they’re not quite ready in our eyes. We’ll probably go down the heat pump route eventually, but only when they’re guaranteed to play nicely with our Nest units.

With gas, propane and heat pumps out, we were left looking at wood. Which in turn led us to look at converting the fireplace into something more efficient – both as a heat source and environmentally. After a lengthy research process, we ended up buying a new EPA certified Jøtul fireplace insert – the Rockland 550, specifically. Manufactured here in Maine, they essentially convert your existing leaky fireplace into a woodstove, which a) is capable of heating an entire floor and b) burns wood far, far more efficiently.

Like every other heat source, wood comes with environmental tradeoffs, but it’s the best choice for us at present.

What Does it Mean to Heat with Wood?

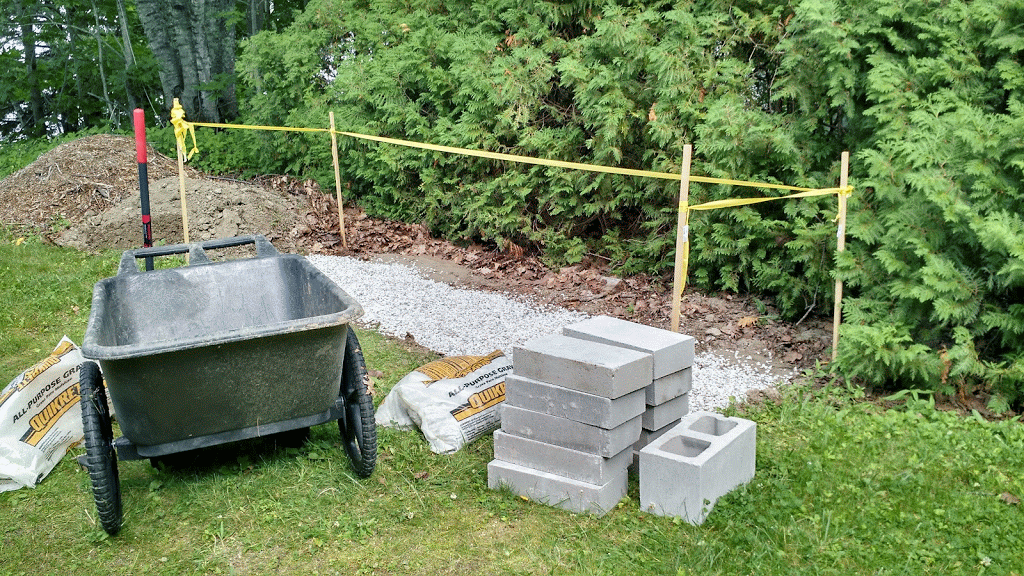
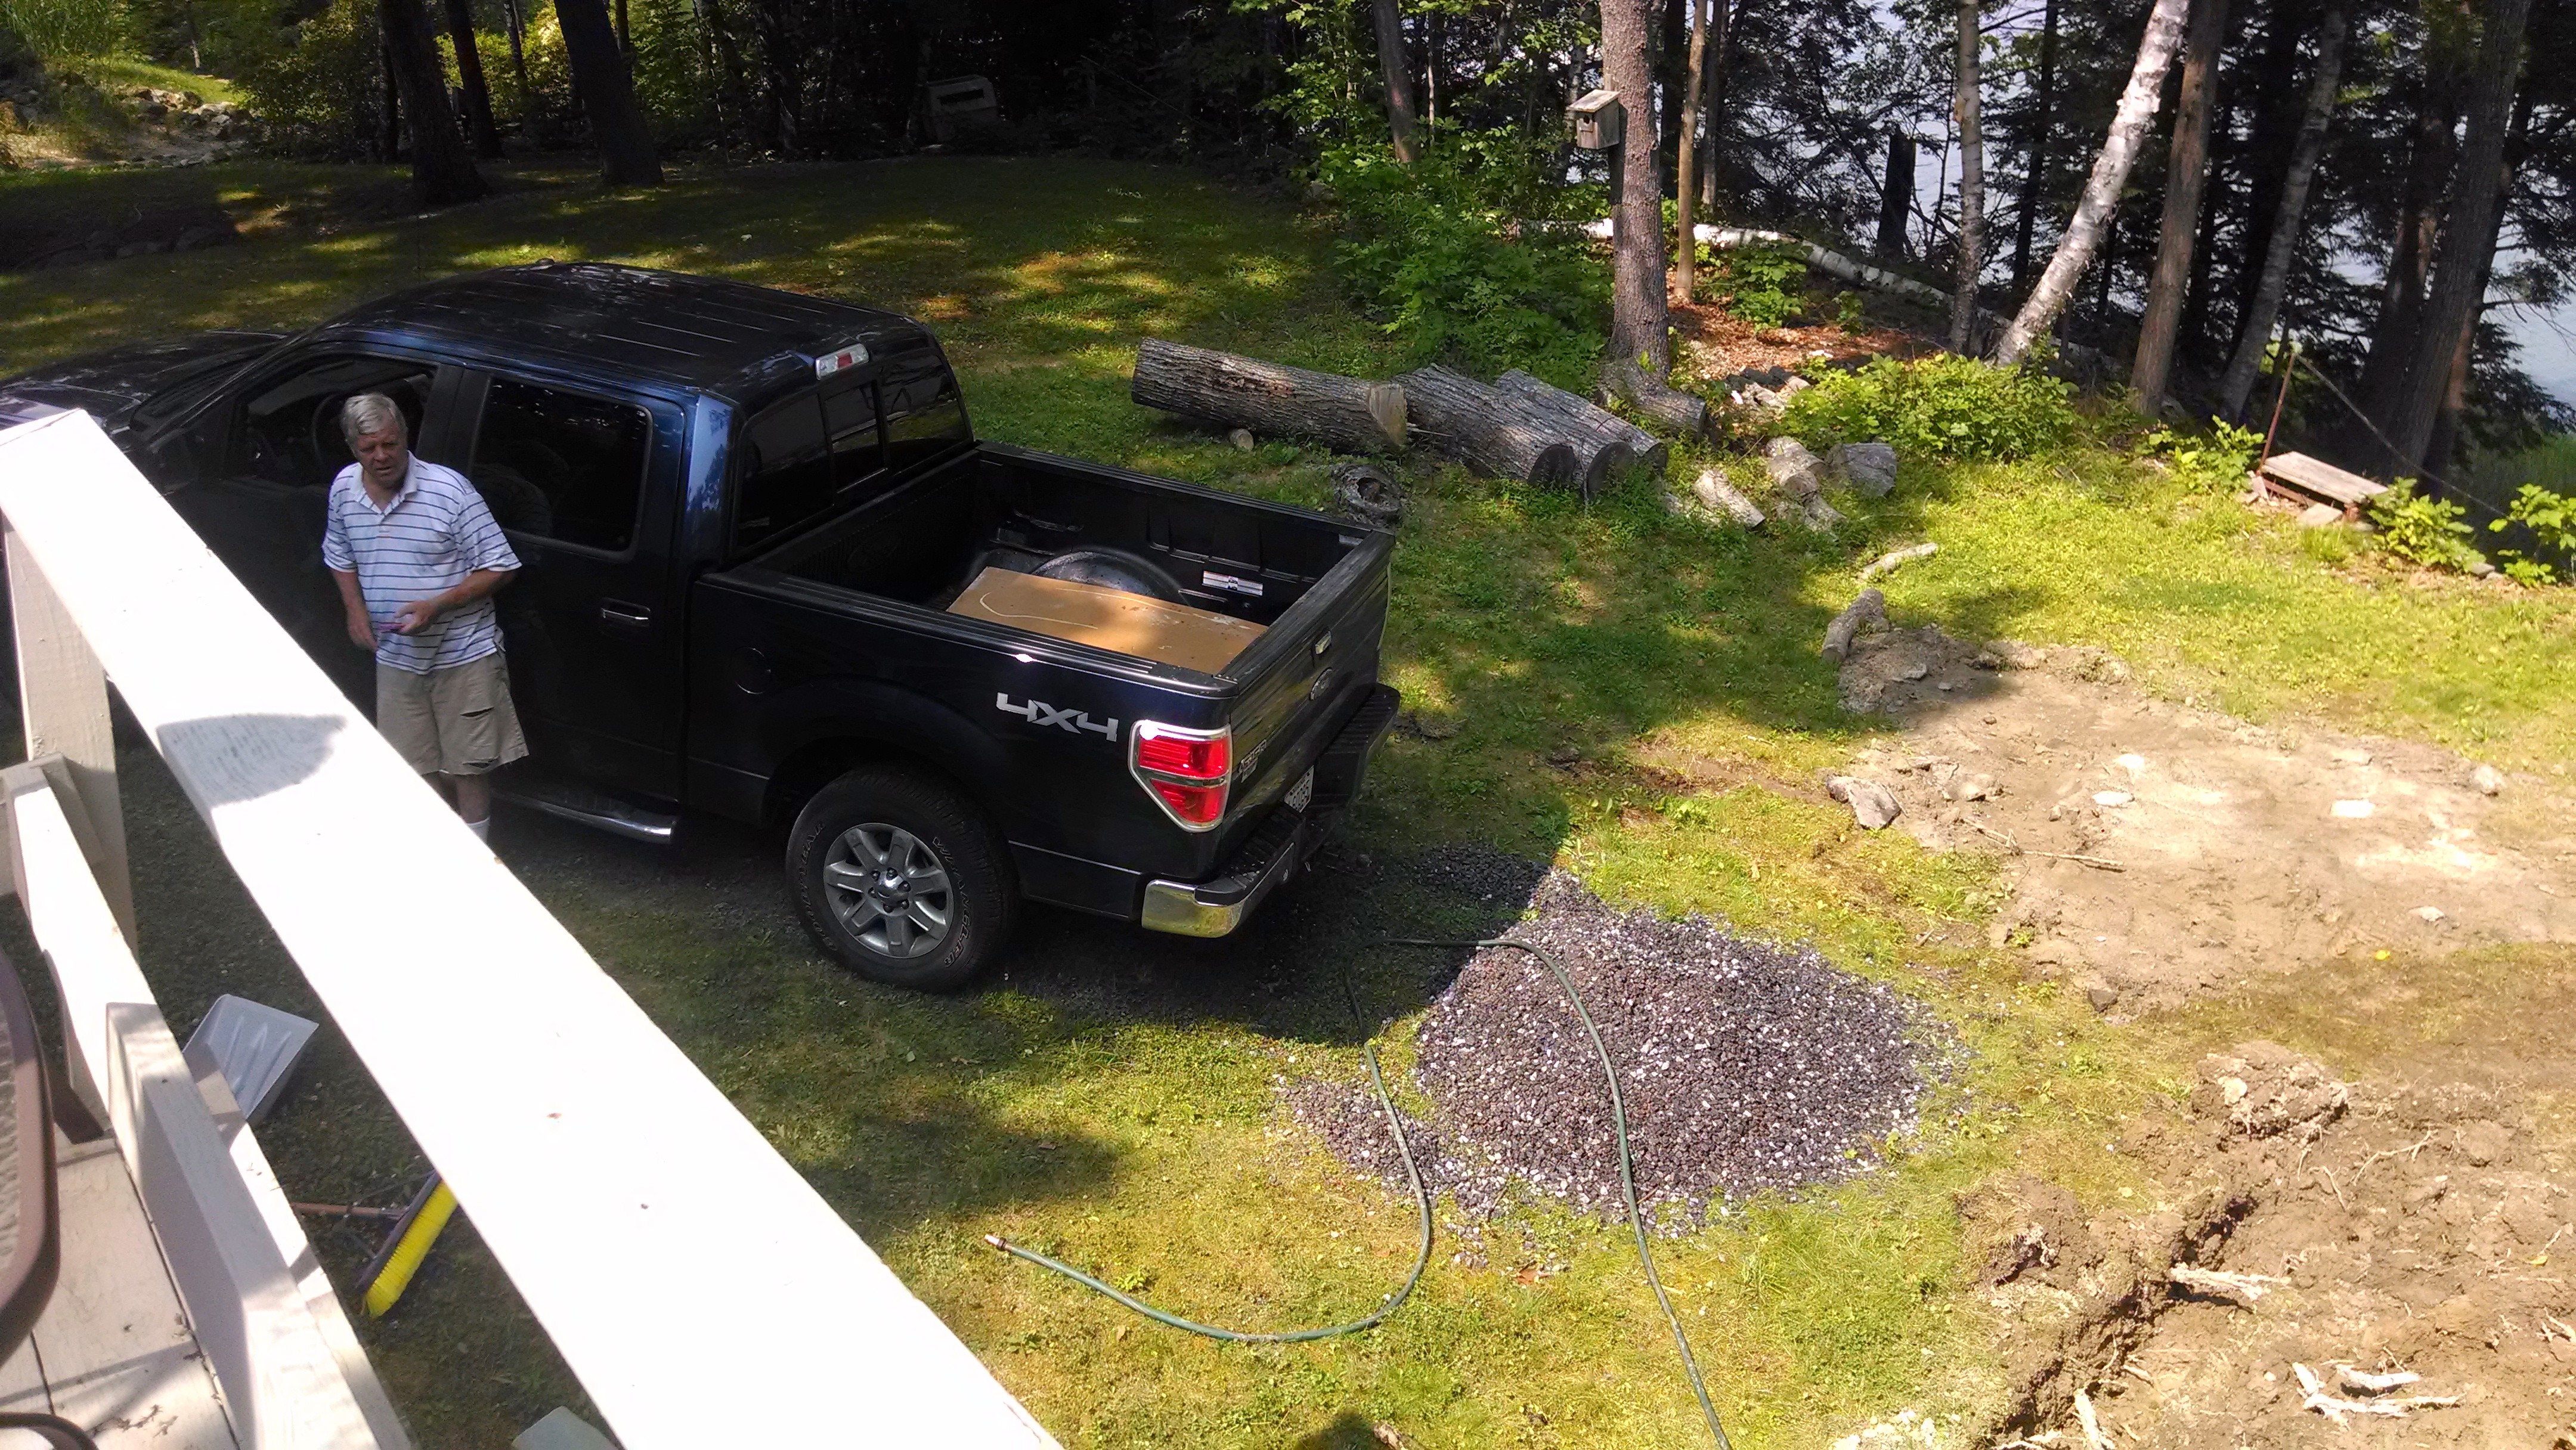
Most obviously, you need wood to burn. Given that stacking it inside is impractical for a variety of reasons ranging from space to insects, it also means that you’re going to be making regular trips outside in the winter cold to bring in wood for the stove. Which in turn implies that you have somewhere to store the wood outside, preferably someplace close to a door.

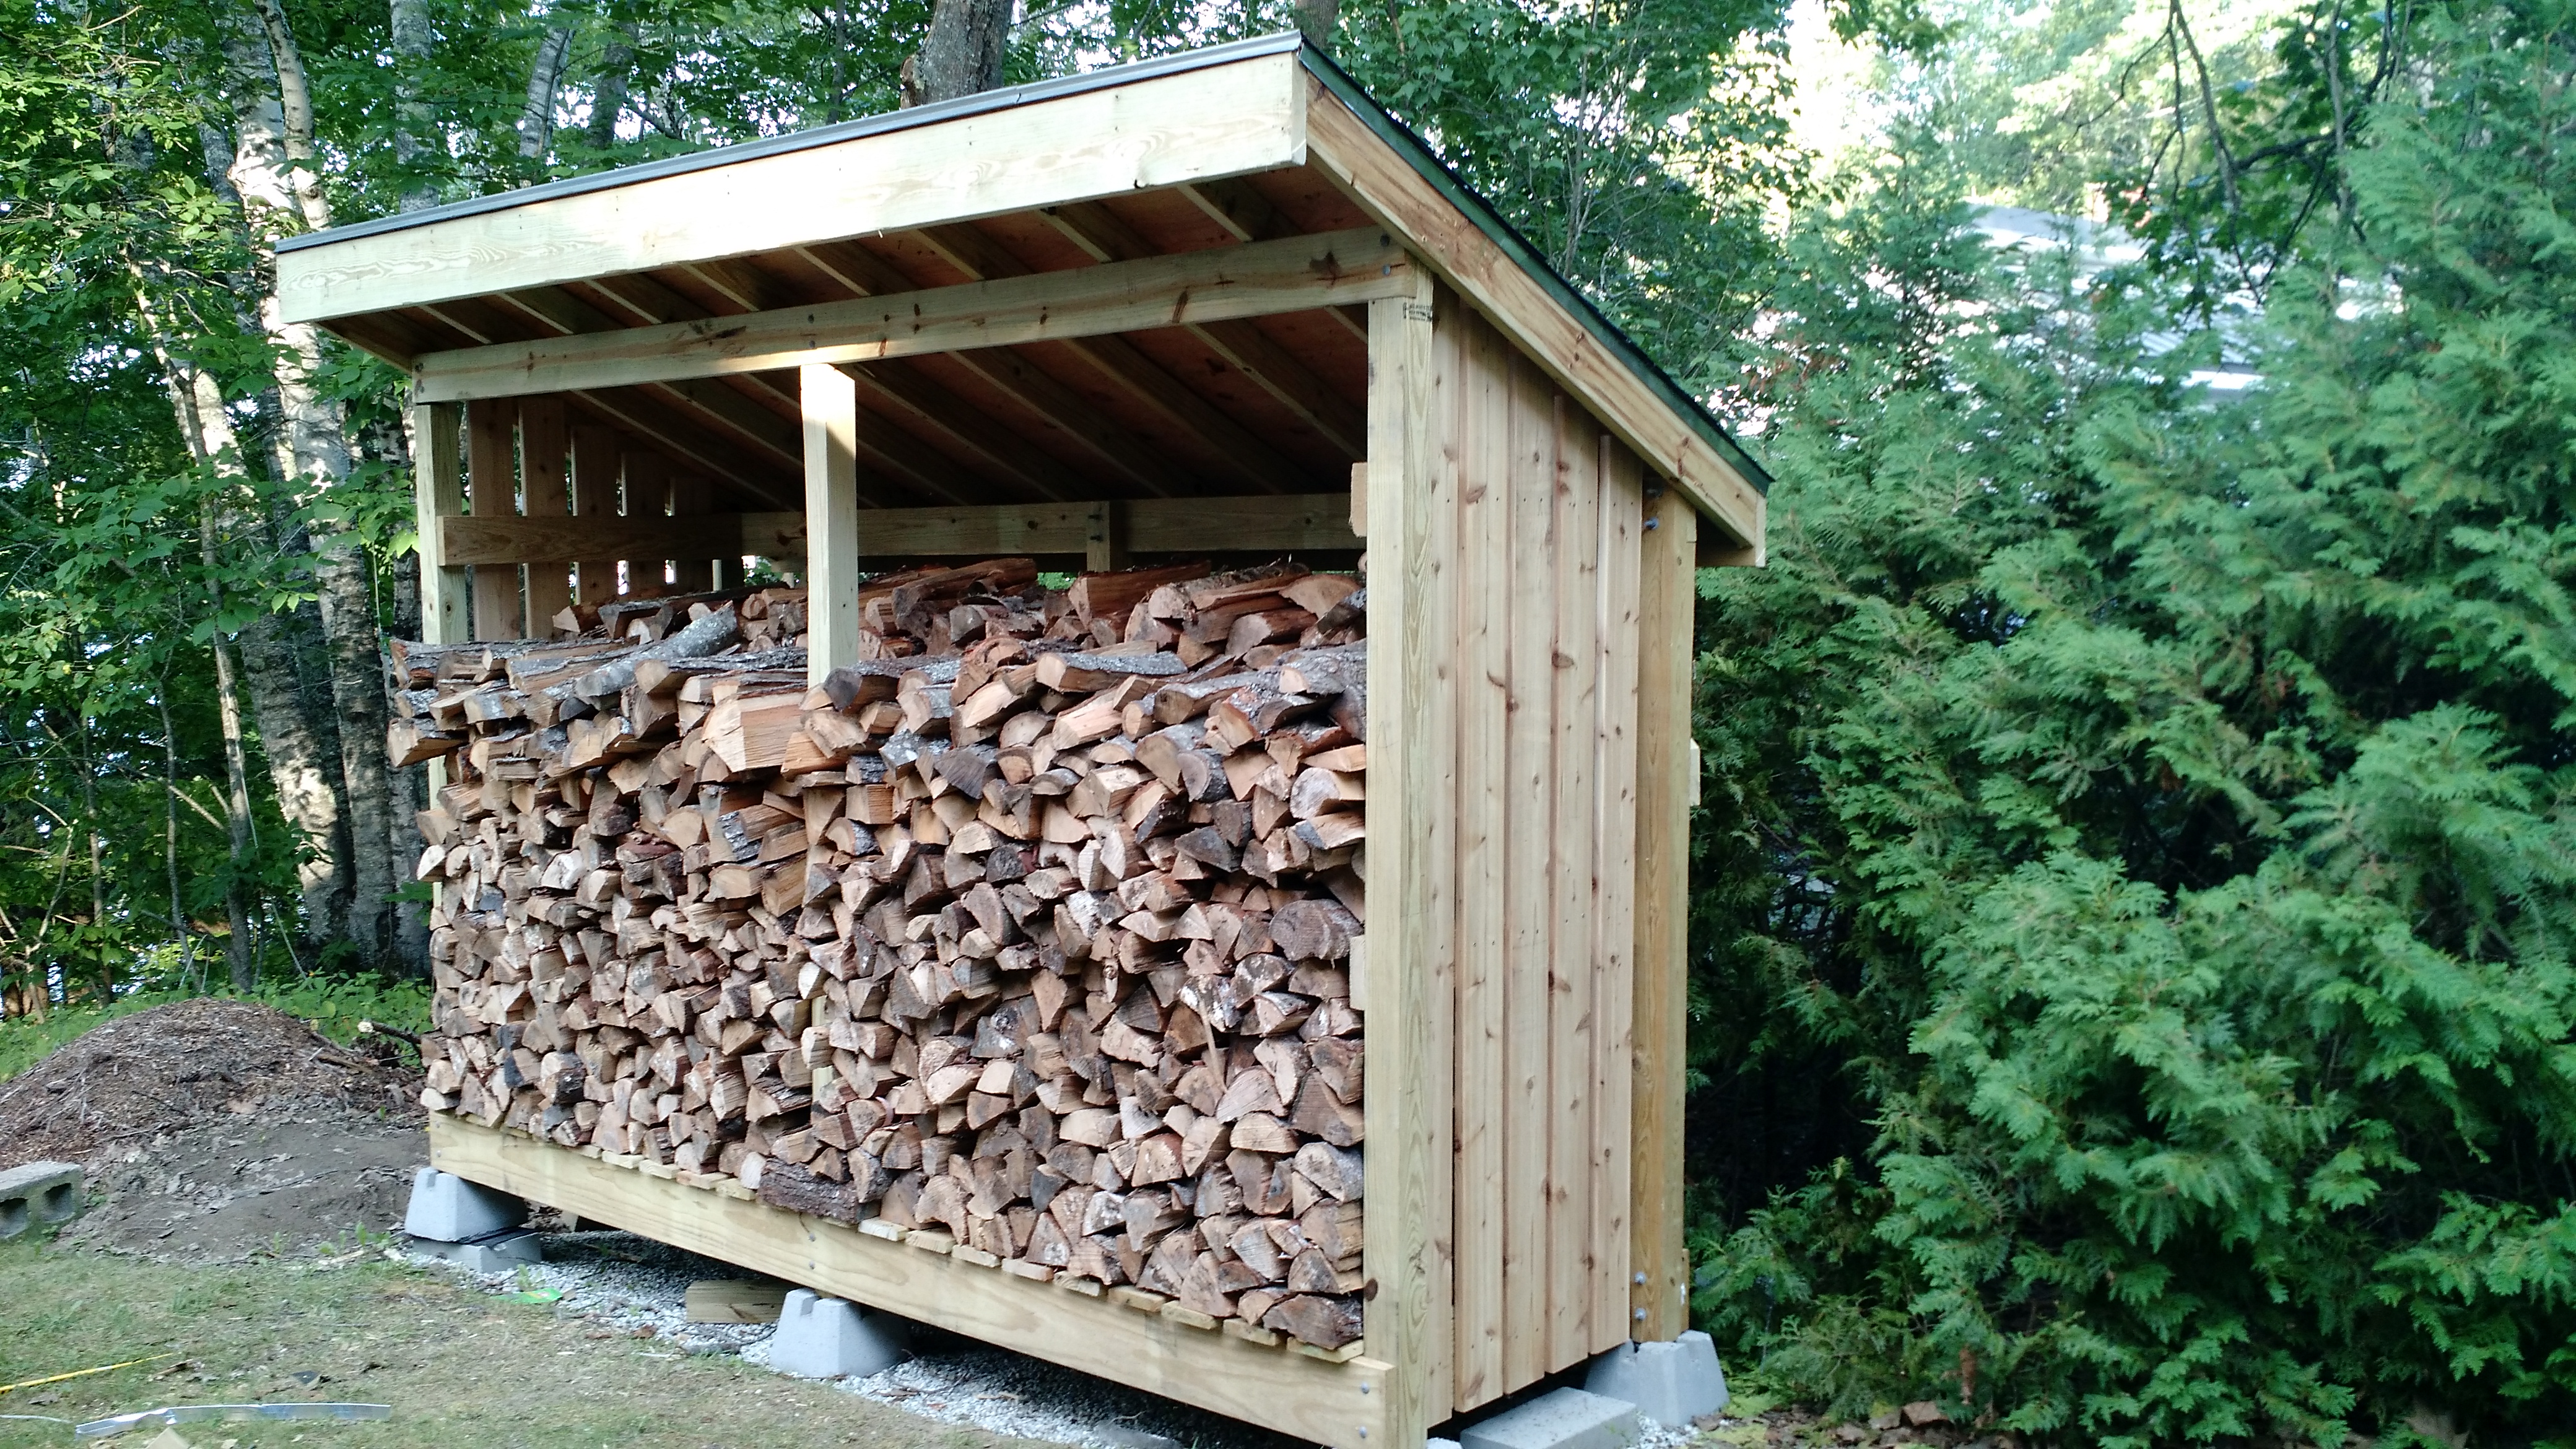
In years past we’ve made do with makeshift wood racks that consist of two metal frames that you attach to the end of a pair of 2×4’s. Given the more primary role wood will play in this winter’s heating plan, however, we needed more wood than was practical to store in this manner. This much wood, in fact.

IMG_20150630_154103527_HDR

We needed a wood shed, in other words.

What Kind of Shed?

One of the things you figure out quickly when you Google “woodshed” or “firewood shed” is that there are a lot of woodshed plans online. Many hardware stores, in fact, sell packaged shed kits that you assemble like a piece of Ikea furniture. Both because none of these quite fit our needs and because I wanted something a little more challenging, I eventually ended up basing my shed plans on this post and beam design I found on Popular Mechanics.

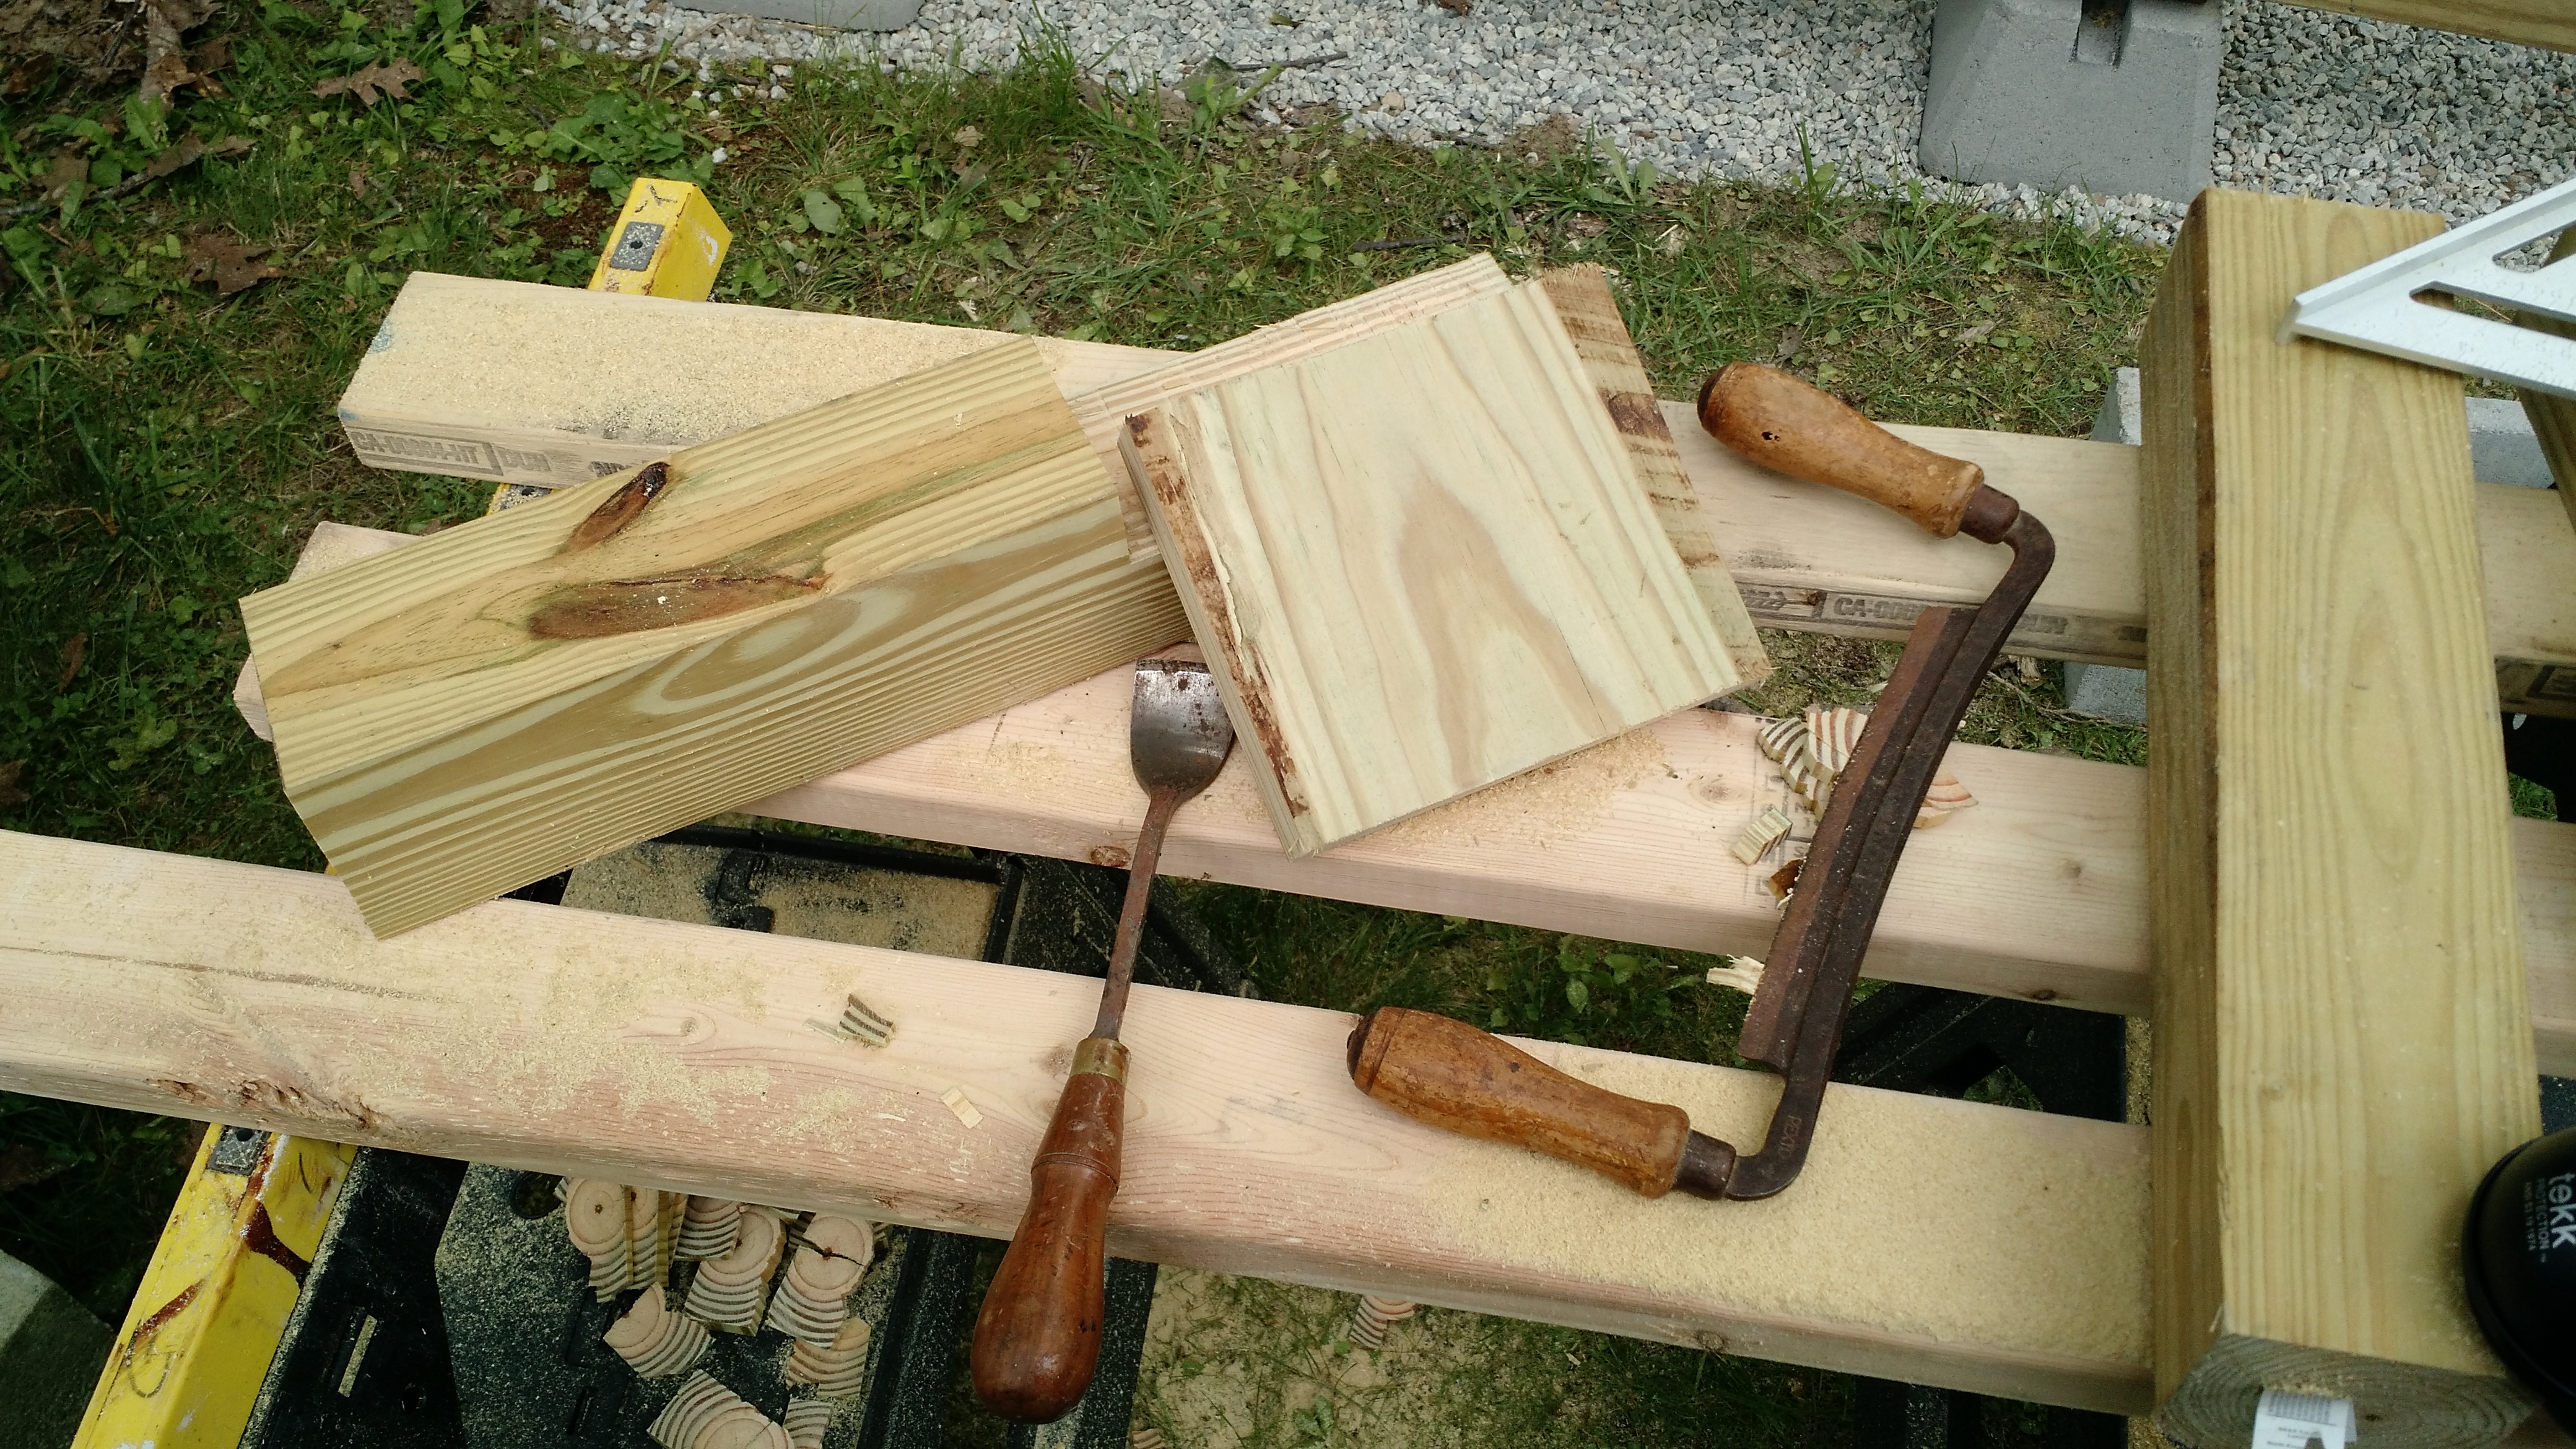
This design involves a bit of actual carpentry such as cutting notches in the posts to seat beams, which made it more interesting than putting together some pre-drilled lego-style pieces. It also gave me a chance to use a set of hand tools like the chisels below that belonged to my grandfather and have been passed down to me to complete the project. This made the experience special for me in a way that something more straightforward would not have been.

IMG_20150714_143412999

As a side note for anyone interested, the Popular Mechanics link does not include the PDF plans, and as they’re not mine I can’t post them here, but the PDF schematic which includes a detailed lumber shopping list isn’t too hard to find.

How to Build It?

Particularly if, like me, you’ve never built anything like this the natural question is where to start. The answer, as always with DIY projects, is YouTube. I watched a dozen or more different videos about building sheds. No matter what your question is, from foundation to roof, there is a YouTube video that covers it. For this project, as an example, I wanted to put on an asphalt shingle roof instead of the corrugated metal one the plans called for. The tricky part was that while I worked construction in high school and college, I’d never so much as looked at a shingle previously. Thanks to videos like iCreatables’ “How To Build A Lean To Shed – Part 7 – Roofing Install,” however, it wasn’t as technically difficult as I expected. It was much, much worse in other ways, but we’ll come back to that.

The other important recommendation is that advance planning is your friend. Even with plans in hand, it’s necessary to work out a host of details – and doing them ahead of time is far preferable to trying to working them out while you’re scrambling around on a roof, for example.

IMG_20150725_123324360

It’s nice to have a cutlist, for example, so that you’re not cutting each piece one by one in the middle of the project. Understanding the precise spacing between beams, joists, posts and rafters is also important. I also liked to have a diagram for myself not just of how pieces fit together, but with which fasteners. 3″ screws? 16d nails? How many per location? The plans I had included a list, but having them laid out on a diagram is much easier to refer to while in the middle of things.

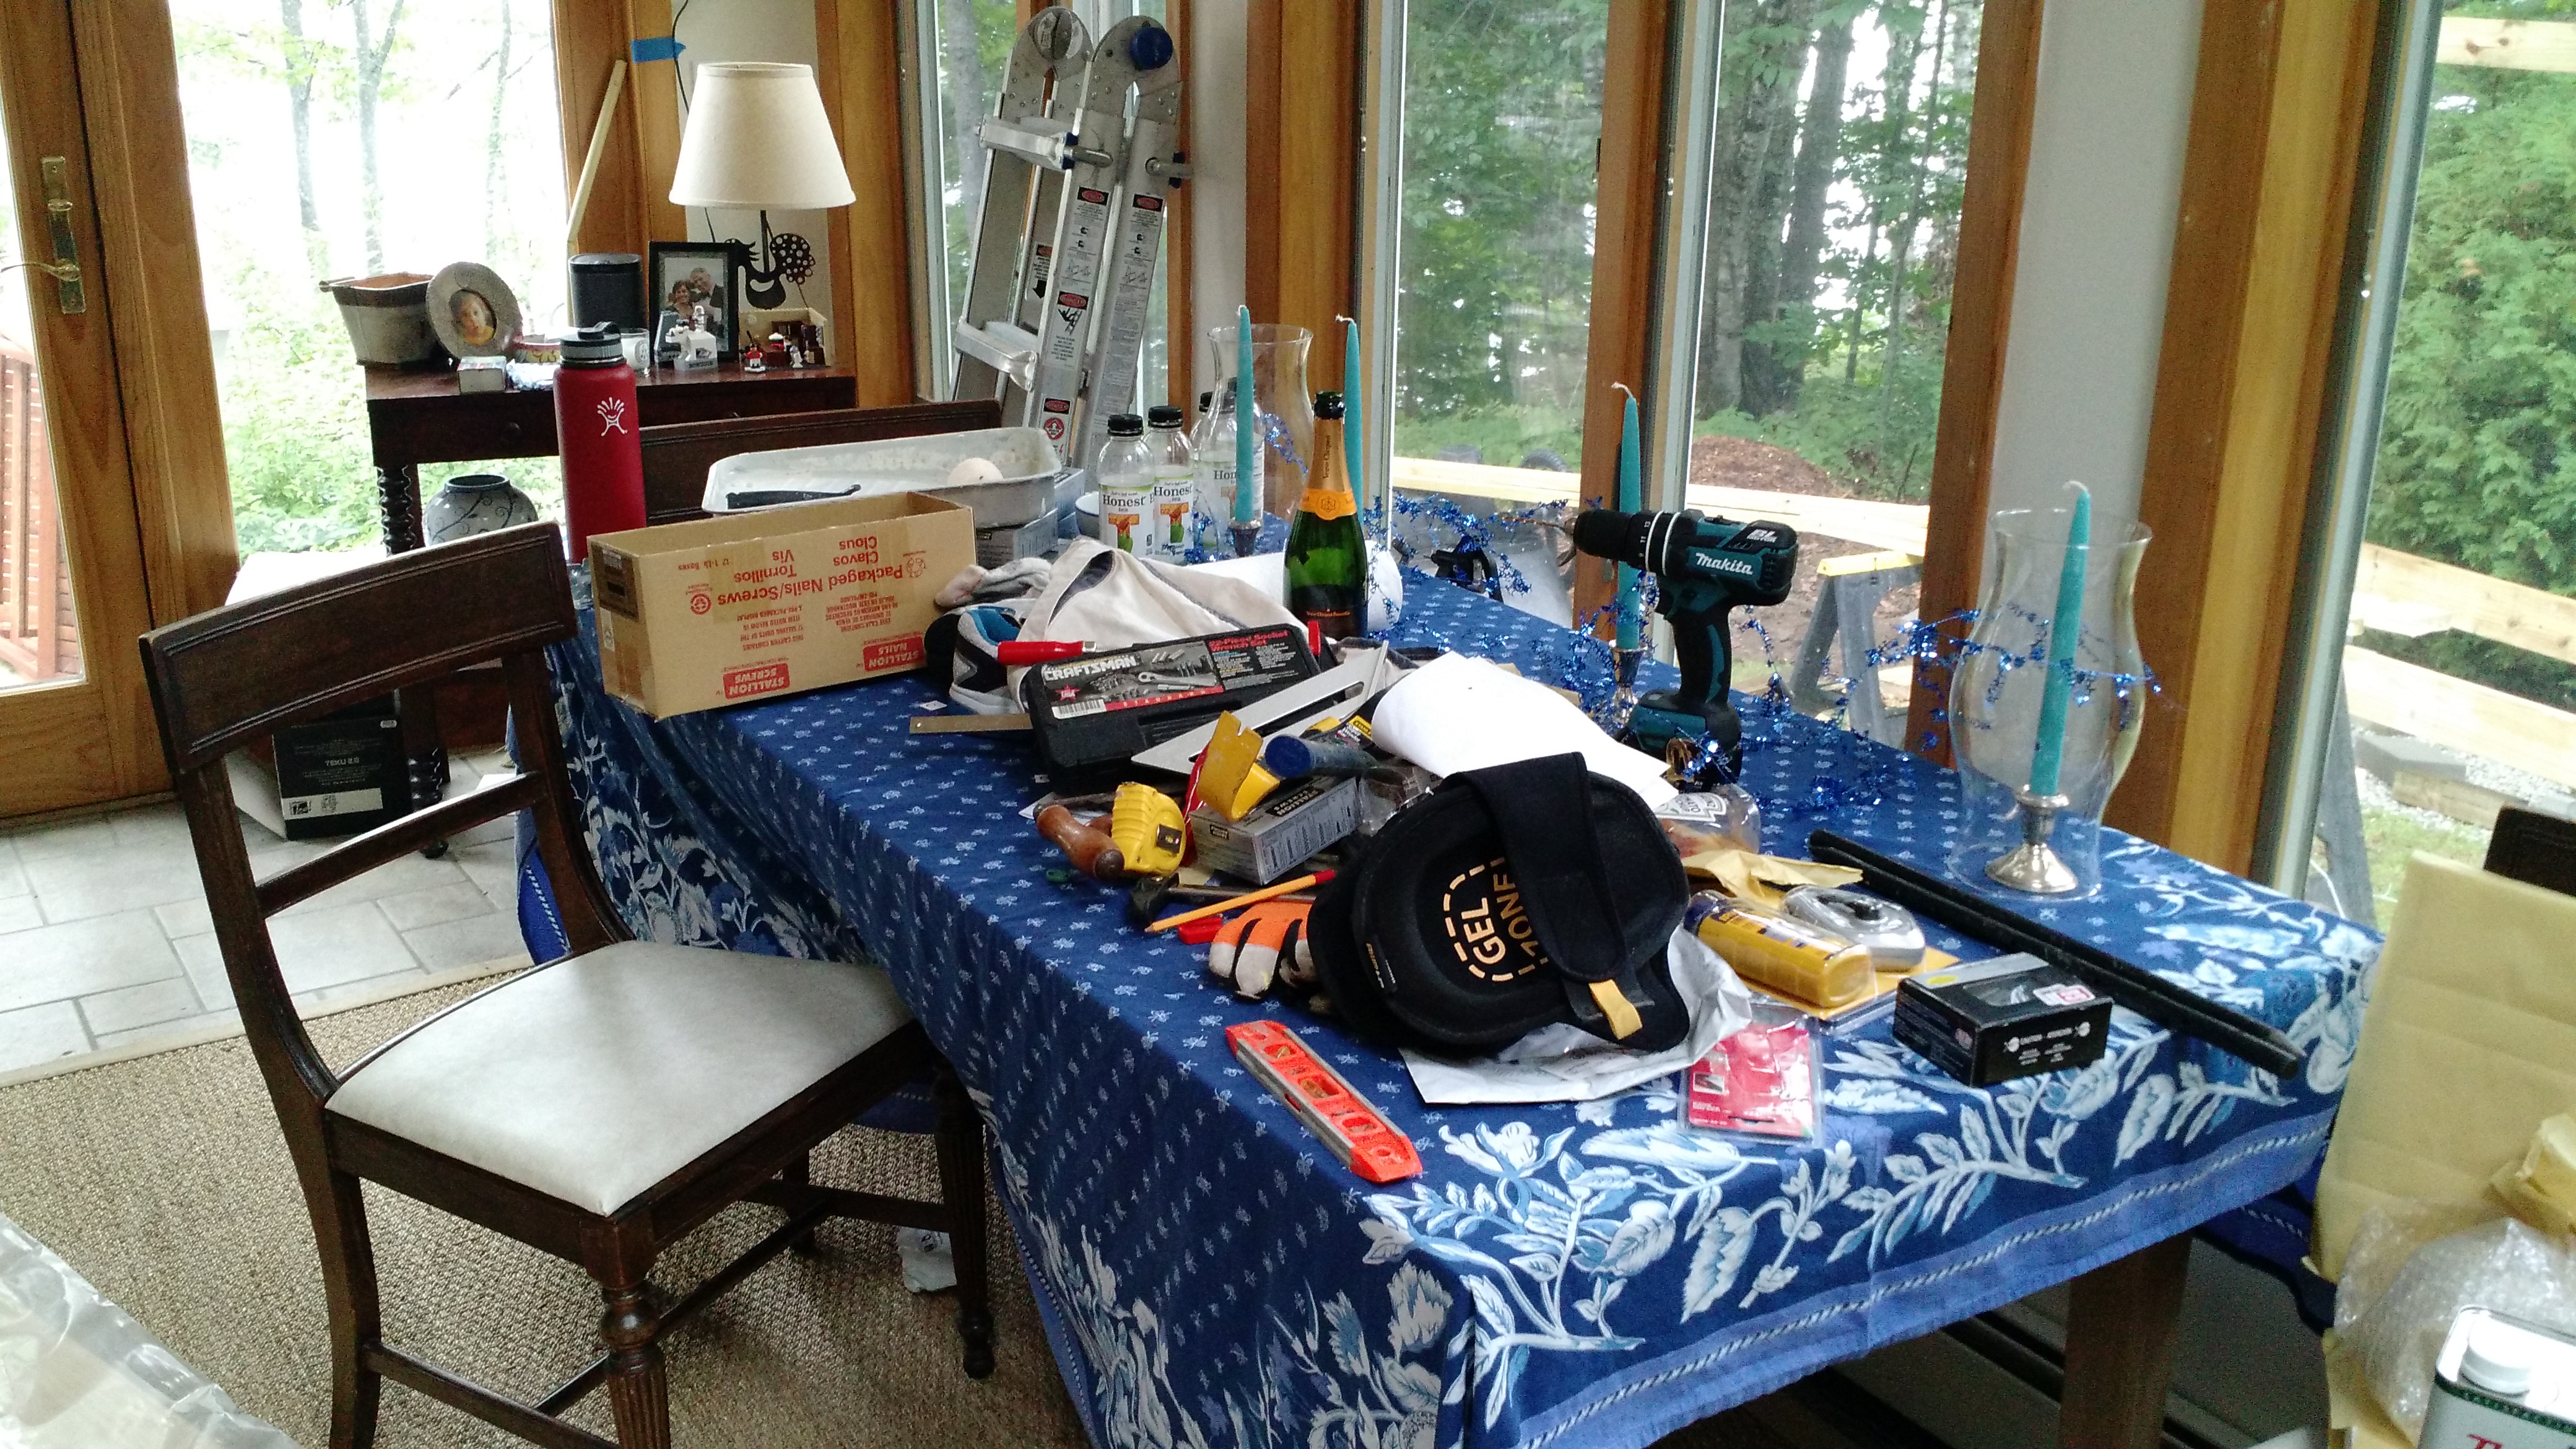
It’s also useful to have a wife patient enough to let you turn her kitchen table into a construction site for a month.

IMG_20150718_121736364

How Long Does it Take?

It depends in part on your skill level: I had to figure out how to do several of the steps from scratch which took longer. The tools you have on hand also make a difference, as does the site choice. Also, weather is a huge factor, because standing on a 12′ metal contractors’ ladder holding thin sheets of aluminum is not what you want to be doing when a typical summer pop up thunderstorm rolls overhead.

All told, this project took me the better part of three weekends, with a bunch of lunch hours and evenings thrown in as well. Your mileage may vary, however.

Lessons Learned

Without walking through the entire construction process, which would be tedious even for me, here are a couple of notes for anyone else who builds this or something similar. It’s also worth getting these down for my own benefit, because while they’ll likely come in handy on other projects later I’m unlikely to remember all of this by that point.

Don’t Do This On Your Own

I picked a bad time to build my shed, as the friends who would normally be up for this kind of thing were either traveling for work or away at the usual summer slate of weddings and so on. And while either my father or my father-in-law would have been happy to help if asked, it’s a longish drive for both of them and the weather was unpredictable enough with sudden thunderstorms so as to make that impractical.

Which is how I ended up building this by myself. I figured out how to do the things that were hardest solo, as I’ll talk about below, but I don’t recommend it. If only because it’s more boring.
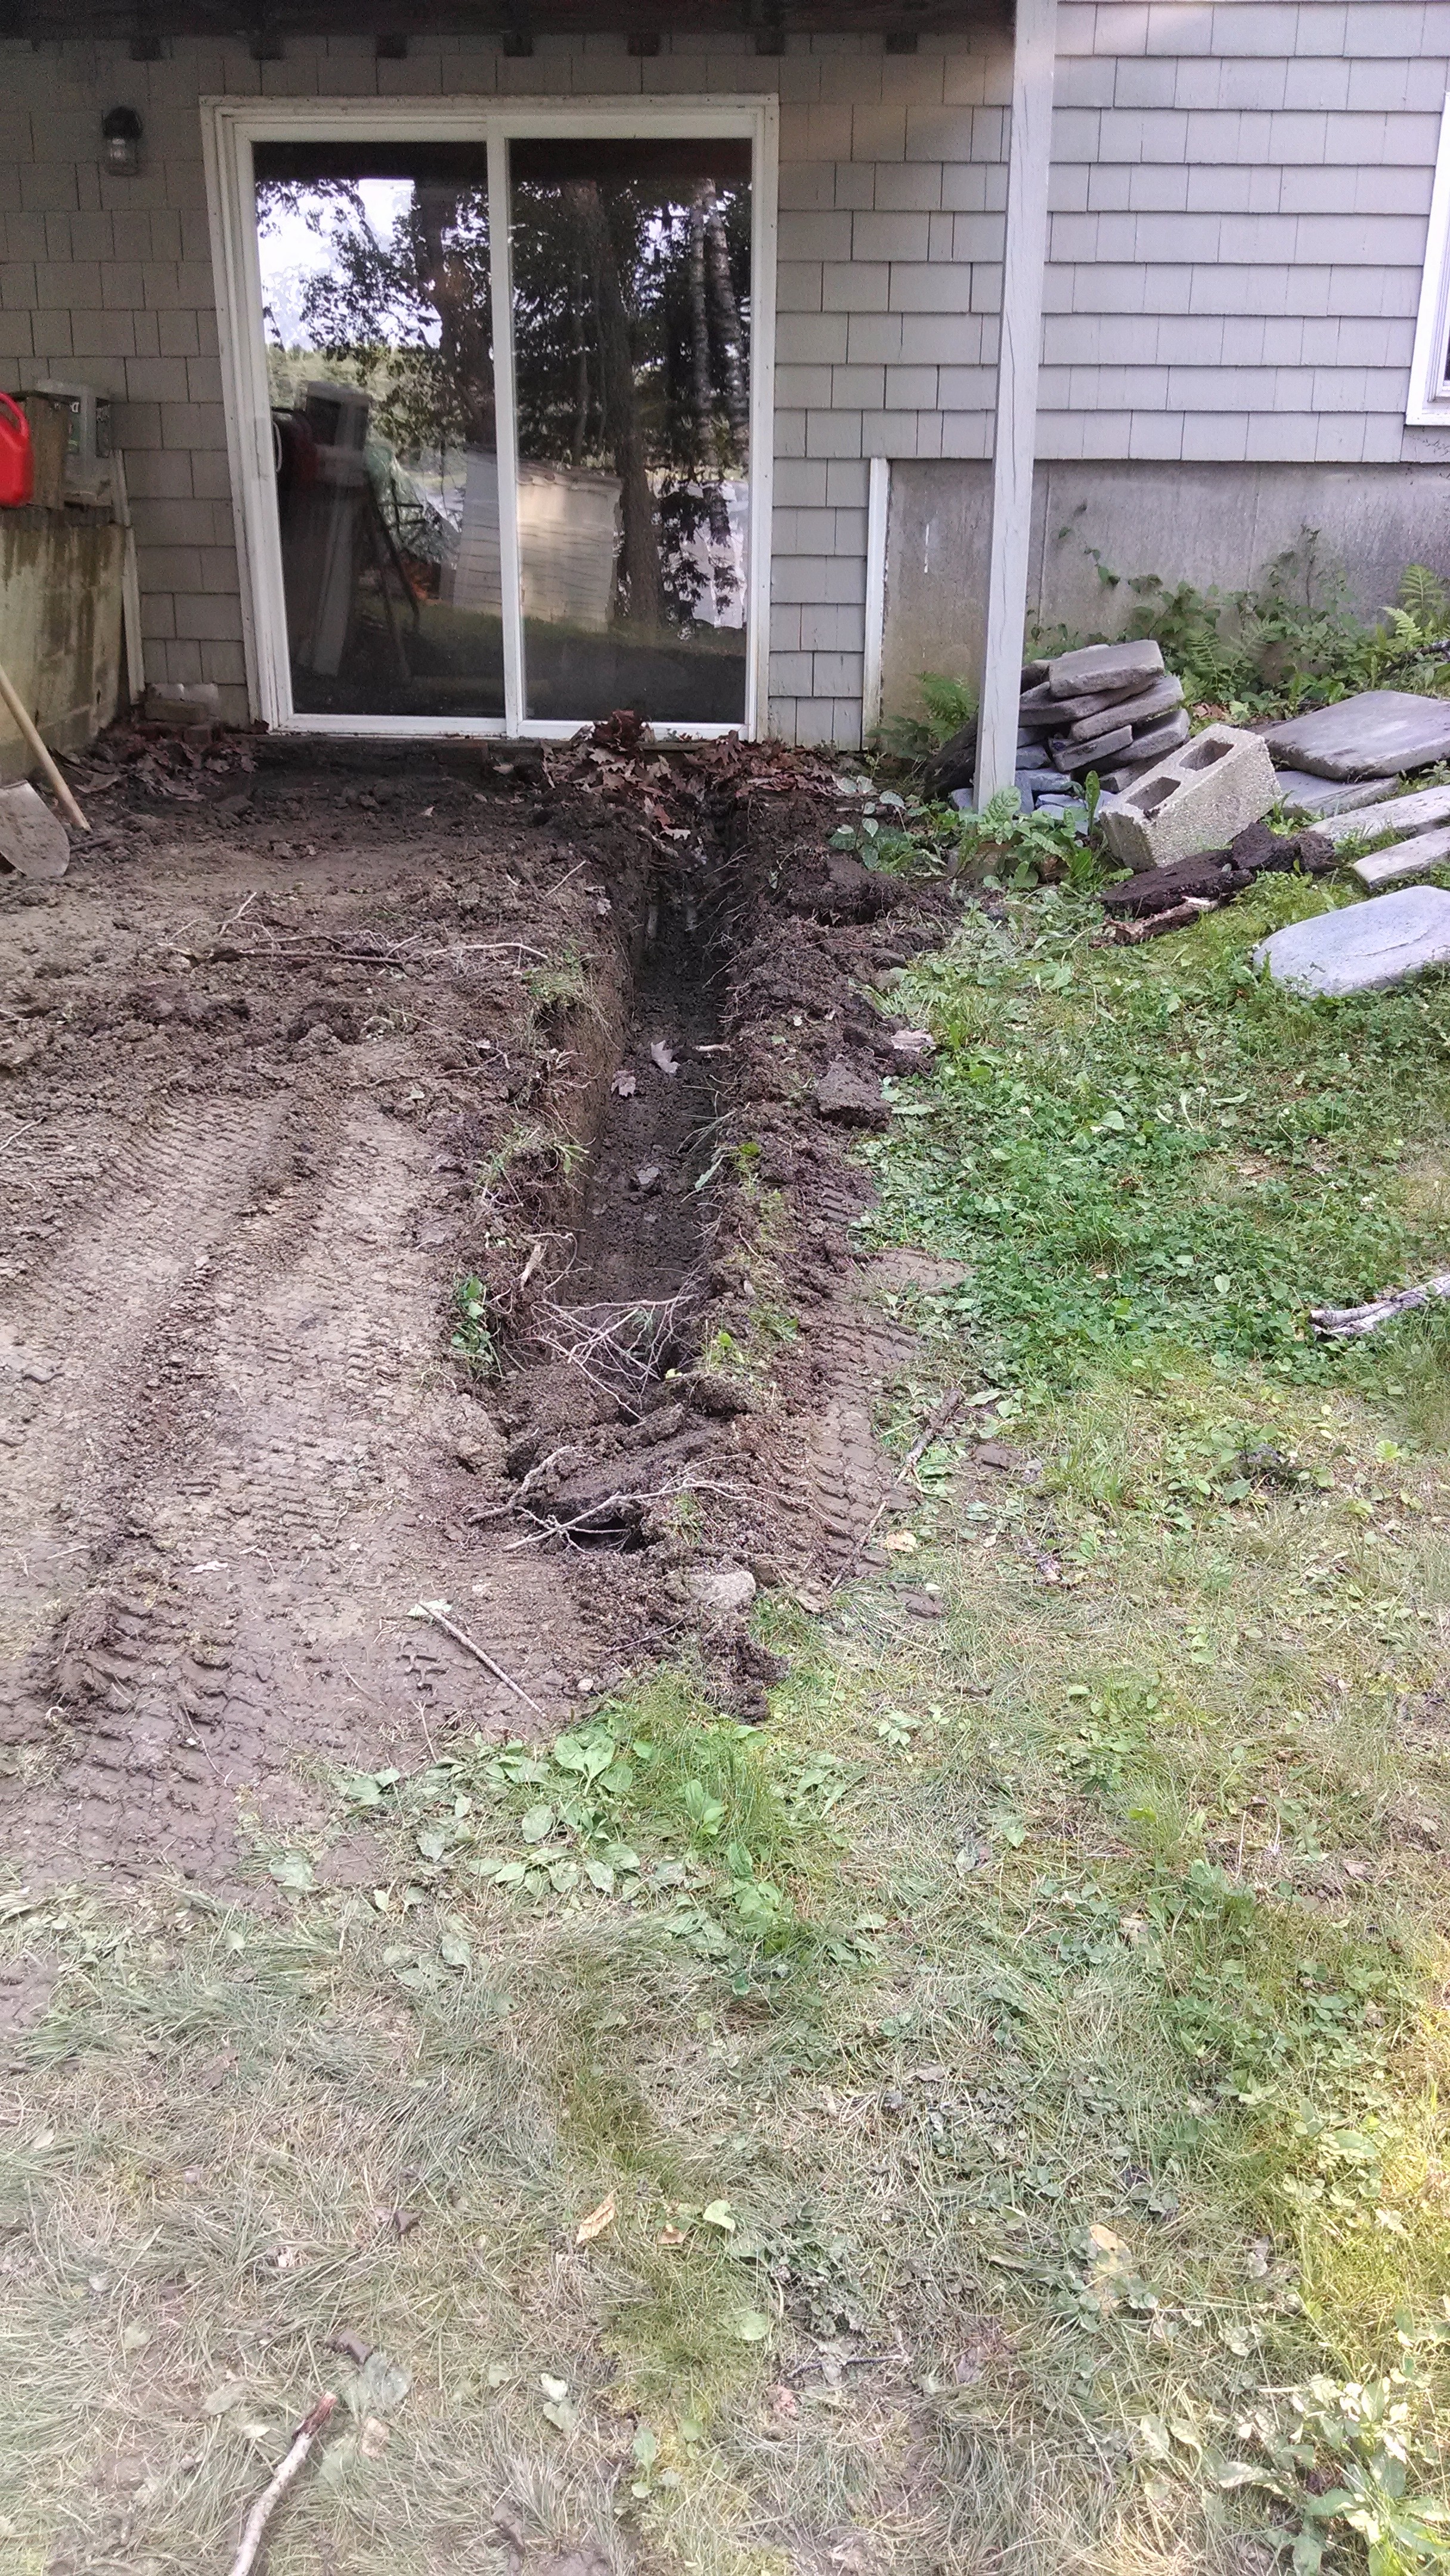
Foundation Choices

Basically, you have two choices: on-grade (i.e. concrete blocks or similar seated on the ground) or poured concrete footings. While I had to go the former route due to zoning restrictions, I highly, highly recommend you not do the same. Poured concrete footings are substantially easier to level, less vulnerable to things like frost heaves, etc. Speaking of leveling.

IMG_20150711_171237

Leveling Sucks

There’s a reason they always skip over the leveling process in YouTube videos, and the reason is that leveling sucks. In my case, I was working with six concrete footings. One of the videos I watched, unfortunately, recommended leveling down from your highest point to the middle footing and then to other end. This, as it turns out, is idiotic. If you’re working with six footings, Level your four corners and figure the middle out later. You should also be prepared to work hard, have everything level, and have all of that thrown away instantly when you add a new post, move a foundational piece slightly or similar.

IMG_20150713_162644538

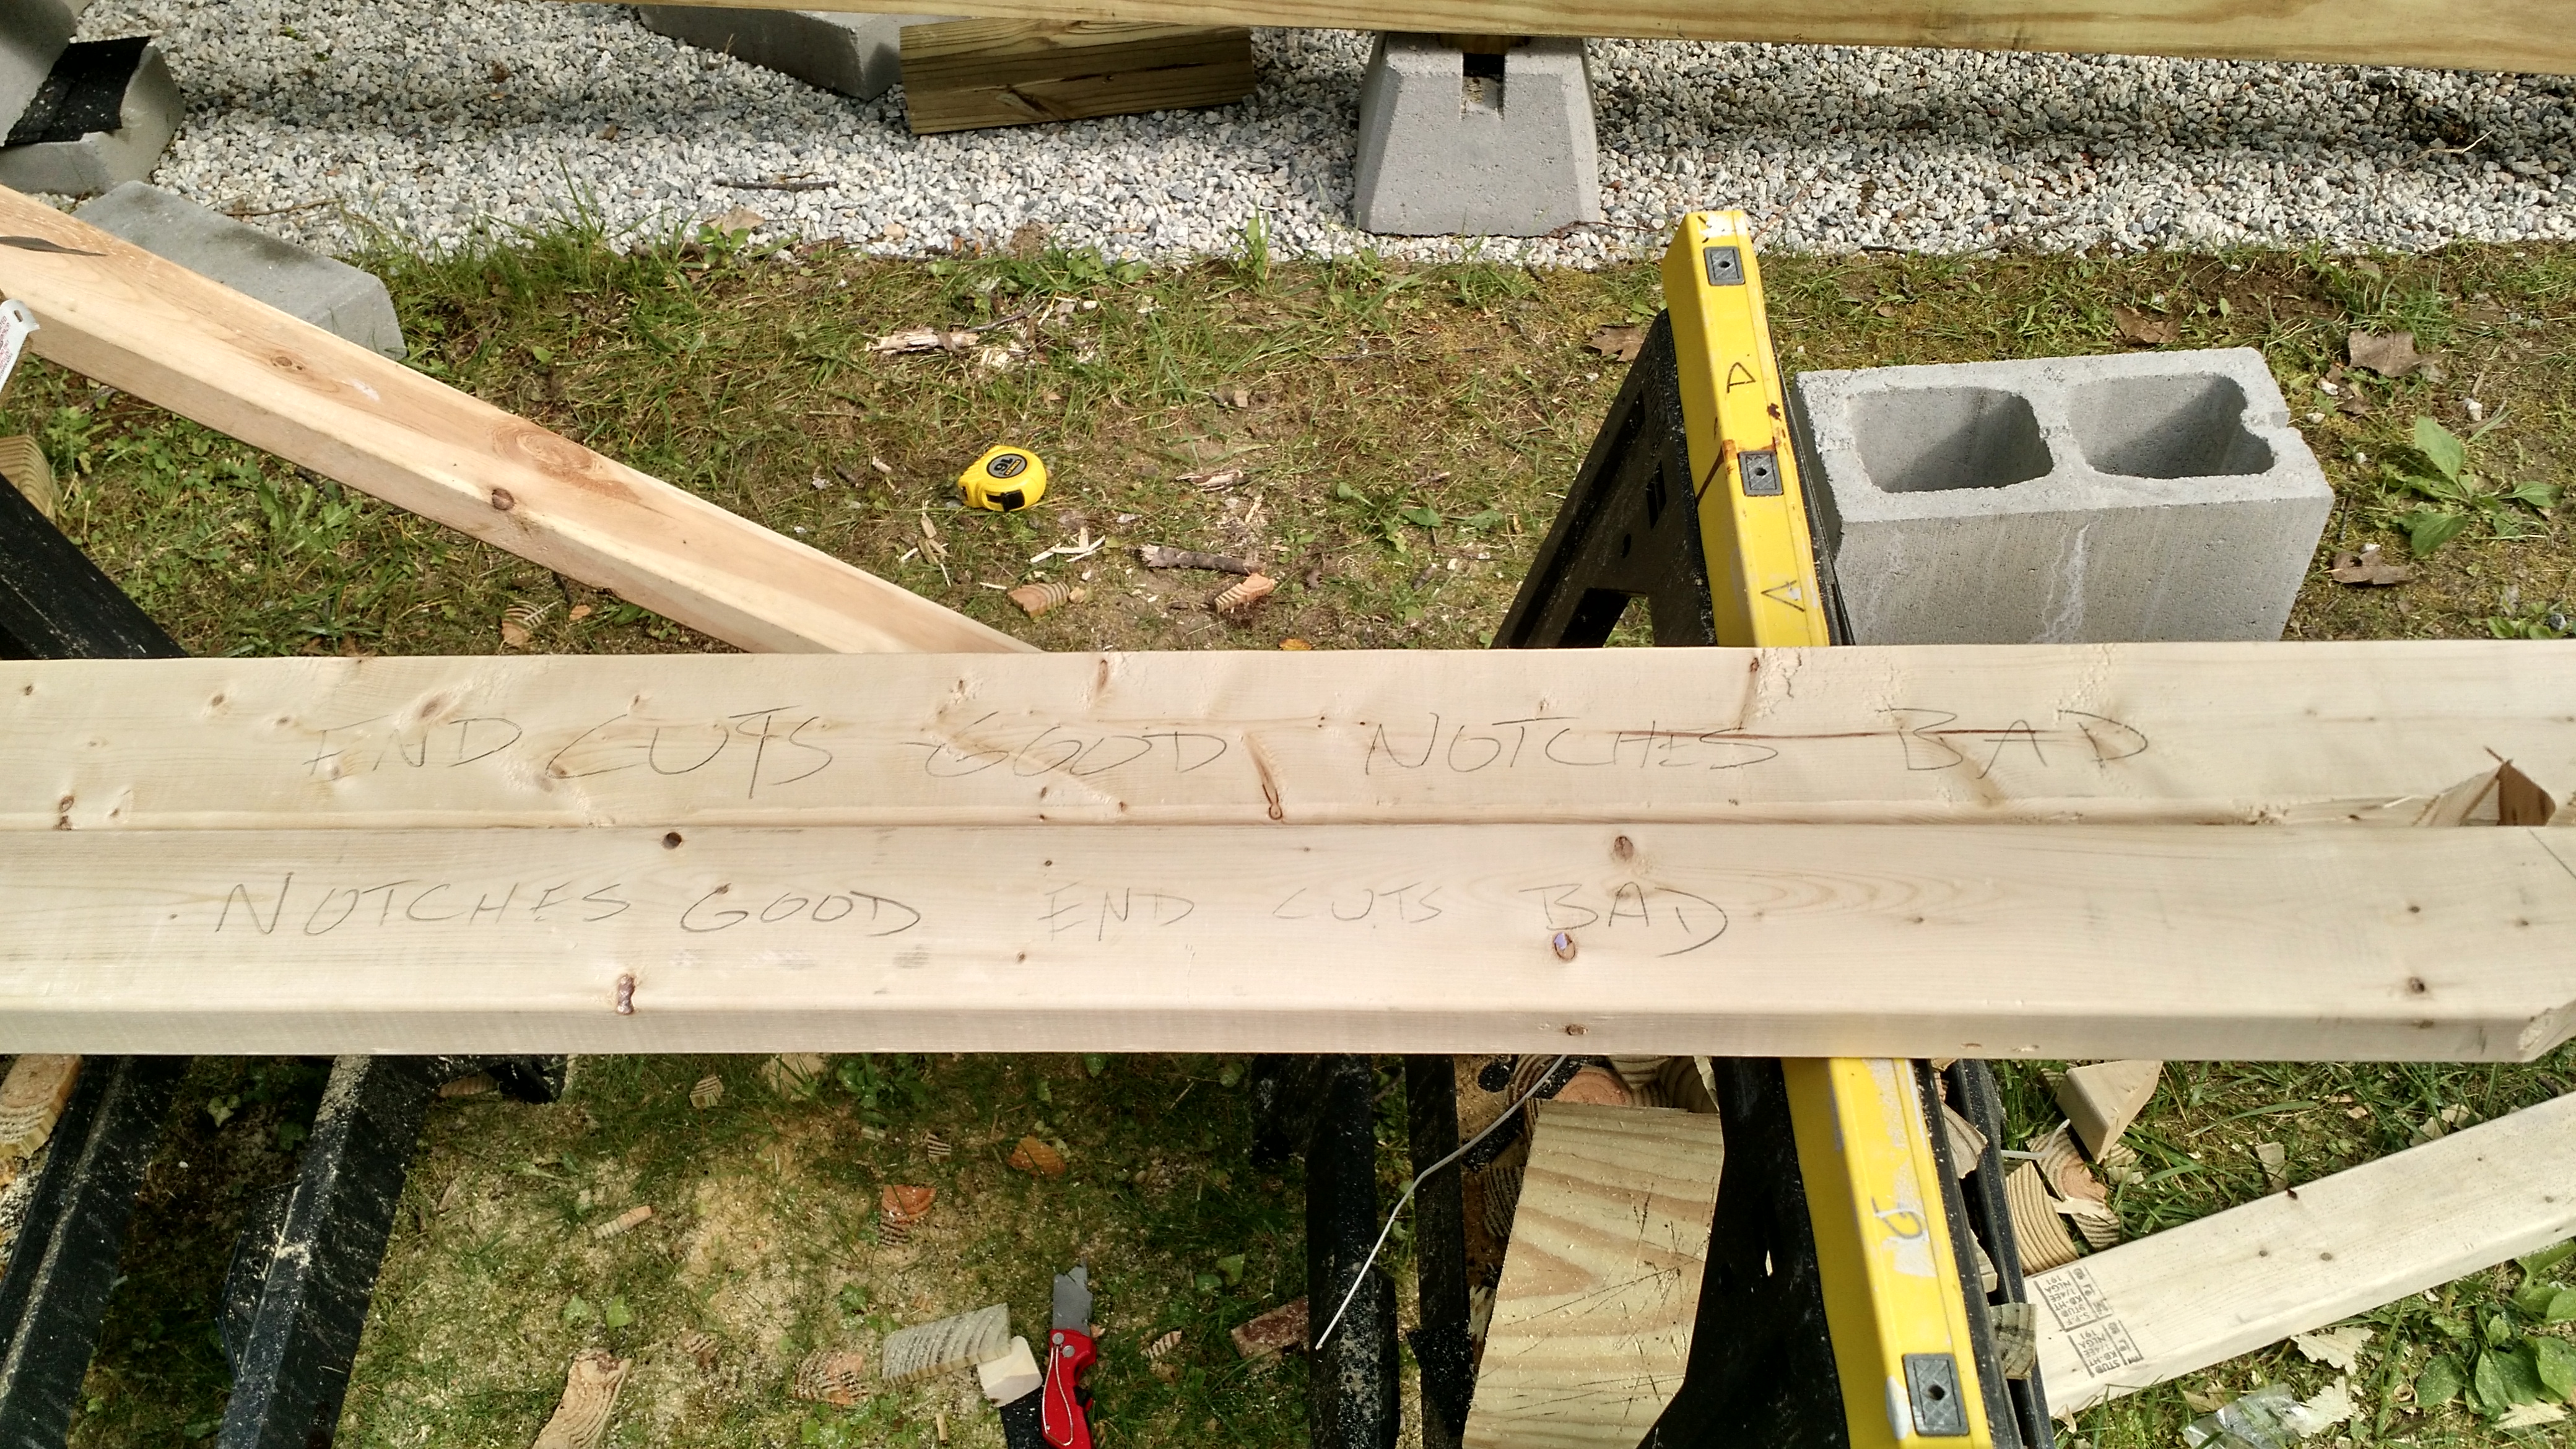
How to Notch Posts and Rafters

As mentioned above, this was a post and beam type project, and so the roof beams actually sit in notches cut into the posts themselves. The simplest way to notch a post, I’ve found, is to set a circular saw to the appropriate depth (1.5″, for example, if you’re seating a 2xX piece) and make a straight (shoulder) cut at the bottom of where you want the notch. Then simply use the circular saw to make a dozen or more cuts above it at the same depth. The remaining thin strips of post are then easily removed with a chisel.

You can kind of do the same thing in notching the bird’s mouth of rafters, but it’s tricky. Make sure you have spare lumber on hand.

IMG_20150719_160747948_HDR

How to Hang End Rafters Solo

This seemed challenging because the end rafters were pressure treated 2×6 strips that weren’t light, and not only needed to be fastened to the shed wall but at a particular angle and height to match the rafters. Even solo, however, this was pretty easy: use two clamps to attach them to the wall, adjust as necessary, tighten the clamps and fasten them permanently.

How to Hang a 2x8x12 Fascia

When writing up the instructions for this step the night before I was to hang the fascia, the last bullet was “How?” I couldn’t figure how – or even if – I was going to be able to haul a heavy pressure treated 2×8 over 12 feet long and hang it levelly between two end rafters 12 feet off the ground. After several failed attempts and one crushed pinky, I worked out how to do this. Using two clamps, create a stand or brace of sorts perpendicular to your fascia using a spare 2×4 or similar in the middle of the shed. Make it as close to your ideal height as possible. Then, when you haul the 2×8 up to temporarily fasten it to one rafter, you rest it on the foundation that’s a foot or two shorter than your rafter and you have one end temporarily attached and held up by your 2×4. The stand you’ve created acts sort of like a second set of hands would, holding the fascia up. Then when you move the ladder down to the other end of the structure, the fascia is already near the height you need and thus easy to level and attach.

Simpler still, of course, is simply having someone help you. But if you have to do it this way, it is possible.
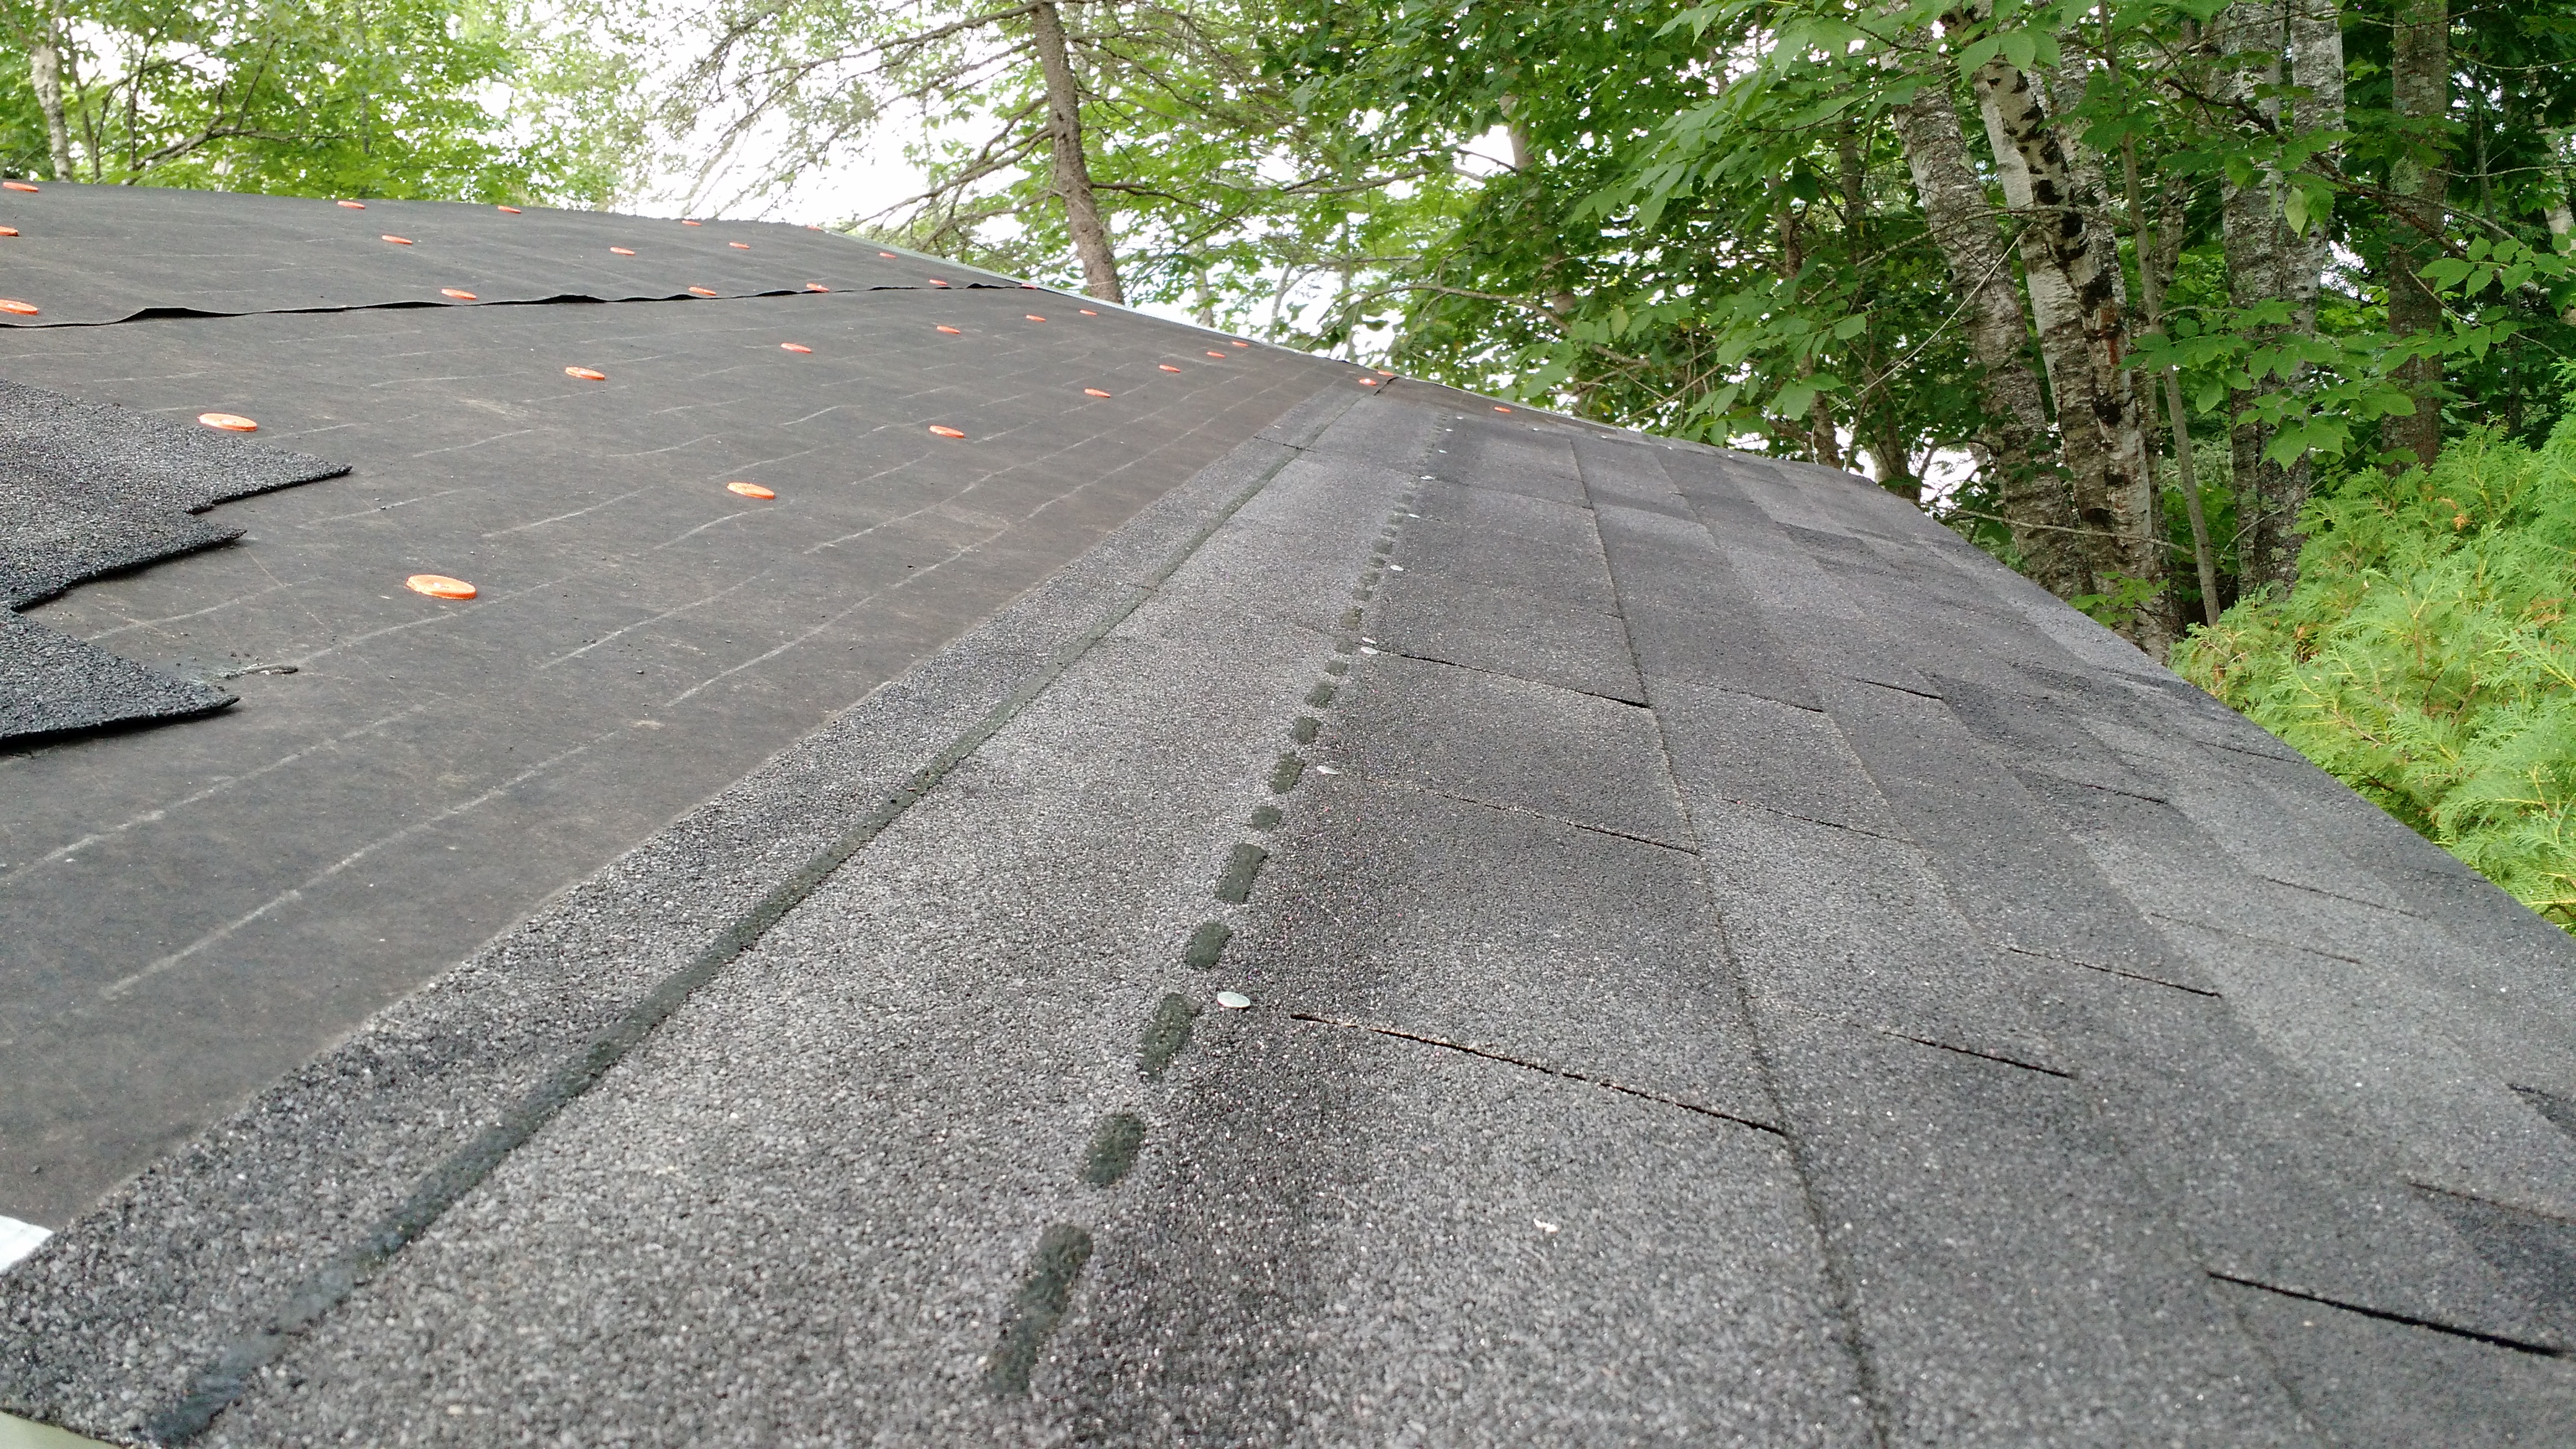
Shingling is Awful

After watching all the YouTube videos, I mistakenly thought shingling wouldn’t be all that bad. I was seriously mistaken. It isn’t technically that difficult, as mentioned above. Once you get the idea, the pattern, shingling is straightforward. But there are a few problems. First, the pitch on my roof was greater than in the videos, so I couldn’t walk around like they did and casually use a nail gun to attach the shingles. And not just because I don’t have a nailgun. Best I could do was crab walk around, and then sit sideways on one leg while nailing in a shingle.

IMG_20150730_151008673

There are two more problems, however. First, shingles are like large pieces of sandpaper. By the time I figured this out, I’d sanded most of the leg hair and some skin off my left leg, and I had a fair amount of asphalt embedded in it. Normally, this isn’t a big deal, as you can throw on jeans and be done with it. Because it was pushing 90, however, I opted out of that plan and instead made myself some leg armor using cardboard boxes and duct tape. The other problem with asphalt shingles is that they are deep, deep black, as was the felt building paper under them. So the roof is exceptionally hot as well as painful. Also dangerous, if you were to fall off. Which is why shingling is awful.

Pay Attention to Weather

This is especially true for me, but really for anyone who doesn’t want to be caught holding electrical power tools in the rain, paying very close attention to the forecast and weather radar is important. Otherwise you end up trying to cover the unshingled plywood roof with a giant tarp in 30 MPH winds and driving rain. Not recommended.

IMG_20150729_154731577

The End Product

2015-08-03 18.10.12

A leanto firewood shed certainly isn’t going to win any design awards or be featured in architecture magazines. This is especially true of this one, about which the best that can be said is: “mistakes were made.” As one of my friends observed after looking at it for thirty seconds: “little shy on this end?”

But mistakes or no, there’s something satisfying about building things with your hands. Particularly when using tools with handles worn smooth by years of your grandfather’s usage. More to the point, even if it’s not perfect, as another friend put it, its only job is to keep rain and snow off of a pile of wood. So far tonight, it’s been up to the task.

This one’s for you, Gramp.

Three Days in Dublin

Hunting for a picture earlier, it occurred to me that I have thus far neglected to document the trip Kate and I took to Ireland back in February. After quick stops in London and Brussels for the Monki Gras and FOSDEM, we tacked on a quick three day jaunt in Dublin. We’ve both been to Ireland before, but we’d never been with each other. Our original idea was to tour the west and see more of the country, but given the compressed timeframe Dublin was easier to manage.

It was an especially interesting visit for me, because the last time I was in the city – aside from stopovers at the airport – was as a student. One summer in college, I was over for six weeks to take a course at Trinity on Irish history. Unsurprisingly, I loved my time in Dublin. The class, too.

Here are a few of the things Kate and I saw while we were over.

IMG_20150203_134446153

The Trinity campus was as impressive as I remembered, and we were staying at a Westin that was a short walk away.

IMG_20150203_134508506 (1)

Turning around, we headed over to see the book of Kells.

IMG_20150203_143703481

Pictures are prohibited of the book itself, but the Old Library you pass through on the way out is at least as impressive. They just don’t make rooms like this anymore.

IMG_20150203_145210837_HDR

After the book of Kells, we took a walk down to the Pavilion. It was quiet, almost empty, but the summer I was over it was always packed. A couple of us students would get pints and sit out on the deck to watch cricket played on this field.

IMG_20150203_144652003

I had no idea then and still have no idea now how cricket is played, but sitting outside in the sun watching it, Guinness in hand, while old men yelled obscure cricket taunts at one team or the other was not bad at all.

IMG_20150203_154207193_HDR

A short walk from there was the Oscar Wilde memorial, a fitting tribute.

IMG_20150203_155411256_HDR

We also visited the Michael Collins memorial, which was important to us as some of Kate’s family fought with him.

IMG_20150204_160304523

The picture’s terrible, but in the other direction, we walked through the Dubhlinn Garden behind Dublin Castle.

IMG_20150204_161000098_HDR

The administrative buildings built off the castle end up in this courtyard.

IMG_20150204_160641235_HDR

For its part, the castle has been almost subsumed by the city around it.

IMG_20150204_212533256

We made sure to catch some live music as well. Catching Irish acts is always fun, as I grew up on the music. At the same time, it always reminds me of an absent friend.

You are missed, Sean.

IMG_20150202_231905133

No trip to Dublin, of course, is complete without a visit to the Temple Bar.

IMG_20150204_153407816

But while the traditional venues remain fantastic, it’s nice to see craft focused venues springing up. After striking out when one prospective lunch venue was closed, we wandered down one street and ended up at P.Macs. The servers were great, and knew their craft beer.

Overall, it was a great trip, if too short. Look forward to getting back over, and I hope I don’t have to wait as long this time.

Blue About JetBlue

IMG_20150217_071754617

I fly JetBlue a lot. According to Openflights.org, I’m at 34 segments and 48,497 miles so far this year. From 2010 through 2014, I’ve averaged a bit over 86,000 miles a year on the carrier. For the second year in a row, I qualified for JetBlue’s frequent flyer program, Mosaic, by June. With the exception of the odd international trip here and there, the majority of my air travel is domestic which is how I’m able to standardize on JetBlue.

As to why I’ve standardized on JetBlue, that question is just as easy to answer: legroom. There are a lot of reasons to like JetBlue: the planes are in reasonable shape, the staff is friendly and helpful, and they are typically cost competitive. But for me, it’s always been about the legroom. Of all of the major domestic carriers, JetBlue is the only one with regular economy seats that don’t require me to be shorter. My knees will brush the front of the seat in front of me, but I have just enough room that flying coach is not the excruciating experience that it is on, say, United.

At least for now.

It’s possible, however, that 2015 could be my last year as a JetBlue regular – my earned 2016 Mosaic status notwithstanding. The carrier has two problems. First, they’re taking away some of the core features that made flying JetBlue a different, more pleasant experience. Second, their rewards program for those of us who fly a lot isn’t particularly competitive.

In the airline’s defense, it’s not their fault they’re about to get worse – it’s Wall Street’s. Equity analysts covering the carrier got tired of Chief Executive Dave Barger being “overly concerned” with minutiae like passenger comfort and eschewing the nickel-and-diming approach of its competitors. Which is presumably part of the reason why he got to add “Former” to his job title. Under the leadership of Barger’s replacement, former British Airways executive Robin Hayes, JetBlue customers can now look forward to additional baggage fees and 15 additional seats per plane – which is another way of saying less legroom.

This might be acceptable if JetBlue took care of those who flew the airline the most, but its Mosaic program is relatively benefit free. It eliminates change fees, which does save me a few hundred dollars a year when schedules change. Mosaic also allows me to board first, but the extra fee Even More Legroom seats I typically purchase for longer flights board early as well. The program waives checked baggage fees, but if you fly enough to qualify for Mosaic you should know better than to check bags. I certainly don’t.

Nowhere in there, noticeably, is any mention of upgrades. Most frequent flyer programs include the ability to earn upgrades to first class, or the ability to purchase them at a discount. Virgin America, for example, lets its Gold and Silver flyers upgrade to the equivalent of Economy Plus for free, and purchase unsold first class inventory at a fraction of the retail cost. One friend tells me he regularly upgrades to first class on flights in and out of Boston for $200 or less. JetBlue, by contrast, offered six complimentary upgrades to Even More Legroom seats for Mosaic members the first year of the program (which you could not redeem online or at the airport), then quietly eliminated that offering. And there is no formal upgrade path whatsoever – free or paid – to their new first class Mint seats.

Which leaves us with an airline that by all accounts is poised to substantially downgrade its customer experience, removing much of its competitive differentiation in the process. Worse, the carrier is without a competitive loyalty program for frequent flyers to compensate for the reductions in service.

I really have enjoyed flying JetBlue over the years, but it’s about to get harder to find reasons to not give my business to alternatives like Virgin. I’ll be watching how the company behaves through the end of the year, but for the first time in years I’m evaluating my options for standard carriers in 2016 (non-United suggestions welcome). If I’m going to have to shoehorn myself into a seat regardless of where I fly, I might as well pick an airline that will at least give me a shot at the sweet, sweet legroom of first class.

Still, my first choice would be to keep flying JetBlue, provided they can get their act together. You guys listening?

How to Use an Electrical Pump to Make Homebrewing Easier

IMG_20150111_144629278

Because I like beer, I have over the years dabbled in trying to make it. At no point have I had much success. My first attempt came in college, where not having control over the temperature of the dorm, as it turns out, is a problem. Attempts to artificially create the correct temperature with a cracked window in winter led to two cases of frozen beer and very small glass shards everywhere. Subsequent efforts first in Maine and then in Denver were less destructive but best described as not provably toxic.

My willingness and ability to improve, however, was always limited by the soul-killing tedium of bottling. Each time I’d brew a batch, I’d remember why it had been so long since the last time: I absolutely hate bottling. It wasn’t until a conversation with Devin a month or two ago that I remembered that, as the owner of a kegerator, I had an option other than bottling: kegging.

Hence last weekend’s brew day:

The good news is that kegging is substantially lower effort than bottling. The bad news is that it comes with some additional costs in terms of maintenance. To assist with these as well as the brewing process itself, I decided to invest in an electrical pump. Here’s how we use it.

The Basics

Are not very complicated. The basic idea is to use an electrical pump wherever moving water is required, whether for cleaning, cooling or both. After looking around, and one aborted selection of a non-submersible utility pump, with the assistance of homebrewtalk.com user @Mike_kever_kombi I settled on a Flotec 1/6 HP submersible utility pump, model # FP0S1300X. It’s available for $83.28 at Home Depot, which was considerably cheaper than the base ~$165 price I’d seen quoted for wort chilling pumps.

There aren’t too many rules associated with the pump; basically you drop it in, turn it on and it pumps water. But obviously be careful because you’re dealing with electricty and water, never a great combination. Besides the safety concerns, pay attention to the hose diameters on both sides. In my experience, the pump will not operate with 5/16″ tubing – common to many wort chillers – but is fine with slightly larger 3/8″ lines, in spite of what the user manual claims. It’s also critically important not to run the pump dry; pay very close attention, in other words, if you’re doing something other than recirculating water.

Other than that, it’s pretty straightforward. On to the specifics of how we use it.

Wort Chilling

2015-01-11 14.42.56

Whenever I’ve used our copper wort chiller in the past, I’ve always plugged it into a standard garden hose spigot and used your basic cold tap water to bring down the temperature of the wort after a boil. In Maine, in the winter, this is less practical, particularly during brew days like ours where the outside temperature is twenty degrees below freezing. Which is where the pump comes in.

In order to chill the wort, I take a piece of 3/8″ line and connect a standard garden hose connection (see above) to one end, hose clamp it, and clamp the other end to input of the wort chiller. A second 3/8″ line, meanwhile, is clamped to the output. The standard garden hose connection is then attached to the Flotec pump, and pump and output line from the chiller are both added to a six gallon bucket filled with cold water and a ten pound bag of ice.

Fifteen minutes or so before then end of your boil, you add the chiller to your brew kettle to sanitize it as usual. When it’s time to chill the wort, then, you merely plug the pump in. More or less instantly the ice cold water will be pumped into the chiller, which absorbs the heat and recirculates the heated waste water back into the bucket full of ice water. As a closed system, there’s not much to worry about here, and it works very well. We cooled our boiled wort down to the pitch temp in less than twenty minutes thanks to the pump.

When you’re done, simply unhook the garden hose connection, drain the pump, and you’re ready to use it for cleaning.

Kegerator or Jockey Box Cleaning

In addition to using the pump to chill wort, it’s highly useful in cleaning the lines of whatever you’re using to serve your kegs. Basically, I do this in three stages. The idea is to clean the lines, rinse them, then rinse them again.

IMG_20150111_144835256

  1. Detergent Clean: Mix 4 tablespoons with 2 gallons hot water in five gallon bucket (~$3 at Home Depot), recirculate (input and output lines both in the same bucket) through lines for 3-5 minutes. When complete, dump mixture and drain pump.
  2. Recirculating Rinse: In empty bucket, add two gallons of hot clean water. Recirculate this through the lines for 3-5 minutes. When complete, dump mixture and drain pump.
  3. Cleansing Rinse: In empty bucket, add one gallon hot clean water. Pump through lines outputting to sink or other drain until complete, watching carefully not to allow pump to run dry.

What You Need

IMG_20150111_144226363

To make all of the above work, you’ll need a different connector depending on what you’re cleaning. One end of your input line should keep the garden hose connection mentioned above to connect to the pump. If you’re cleaning a jockey box, then, you’ll simply need a 3/8″ barb (middle above) along with a standard 7/8″ hex nut coupler (left above) – the same one you use for keg couplers. Attach and clamp this to your hose, then screw it on to the back of your jockey box as if it was a beer input line.

If you’re cleaning kegerator lines, it may or may not be the same setup. For our usage, we use a male fitting that is the same threading as the tap mechanism (right above). This is fitted to the 3/8″ barb and attached to the other end of the line with the garden hose attachment. We then unscrew our tap assembly using a tap wrench like this one:

IMG_20150111_144559664

With that off, we use the above fitting to attach the tap tower to the pump, and proceed through the steps mentioned above. Apart from the different fittings, the process is essentially identical.

Caveats

In general using a pump is fairly straightforward. Remember, however, that the pump valve is open at all times, and can act as a siphon even when powered off. Be careful of accidentally draining the pump bucket if your lines are hanging down lower than the bucket, in other words.

Also, use the provided handles to lift and move the pump; do not lift it by its electrical cord.

Questions? Make sense?

How to Build a French Drain

When we bought our house, it was pretty apparent that the basement had at one time been finished, and at another time subsequent to being finished, seen a lot of water. Though damp basements are far from unusual in Maine, they are less than optimal. Our inspector, eyeing the three or four inch trench dug along one side of the foundation by falling water, thought the culprit might be a lack of gutters. So leading up to our closing, we scheduled a gutter installation. The week before the gutters were installed, we had a massive thunderstorm and a lot of water in the basement. The week after the gutters went in, bigger storm, no water.

Problem solved. We thought.

As it turned out, our gutters work perfectly at keeping our basement dry when the ground isn’t frozen. When the ground is frozen, not so much. Unable to soak into the ground, meltwater from the roof and elsewhere pooled in front of our basement door, then poured through it. Which is why every so often last winter I’d blow up on Twitter about how much I loved hauling a 12 gallon (at 8.34 lbs/gallon) shop-vac full of near freezing water out the door, ten feet away from our foundation to be dumped down a hill. It’s also why my back hurt for most of last winter.

Rather than deal with this for a second winter, we looked at our options and eventually settled on what’s commonly referred to as a French drain (named after a person, not the country), or more specifically a curtain drain which is a fancy way of saying “French drain with a pipe in it.”

The theory behind this is simple: when water pools outside our basement door, we give it somewhere more convenient to go than into our basement – water being, after all, inherently lazy. I say theory because we’re not able to test the drain until a) the ground is frozen and b) we have a lot of water. We can simulate B with a hose, but A is a little harder. We have absolutely no idea if this is going to work, in other words.

In the meantime, however, I thought I’d document the process of creating one for any of you that might have drainage issues. It could also be a useful reminder for myself if this plan fails and I have to dig several more of these when things thaw out in the spring, but I’m trying not to think about that too much.

So, how to build a French Drain.

Step 1

Download this article from Fine Homebuilding (which is an awesome magazine, by the way). Seriously, it’s enormously helpful.

Step 1A

Call DigSafe. Unless you want to accidentally cut a power line, a water or waste pipe or – worse – you internet feed, call DigSafe. It’s free and they’ll make sure your path is clear.

True, they missed our Spectrum coax cable at the new house, but at least the mistake was on them.

Step 2

1

Get a tractor. You think I’m kidding, but I’m not. Sure, you can dig the ditch yourself, but when was the last time you dug a trench that was two feet deep and twenty or more feet in length? In the heat? Through tree roots, rocks and clay soil? Do yourself a favor and beg, borrow, rent or steal a tractor. We got lucky, as my father-in-law jointly owns one with a friend.

Step 3

2

Start digging your trench. I dug out away from the foundation, and this worked reasonably well. It’s also worth noting that I dug maybe a foot down, then went back and got to the necessary 2′ depth. This was dumb. Dig to the 2′ depth from the start, because going back over a narrow trench with a tractor to dig deeper the second time is a pain in the ass.

Step 4

6

Position your gravel fill (you want 3/4 crushed rock) as close to the trench as possible. Because your back.

Pickup truck sold separately.

Step 5

5

Don’t dig your trench right before a major rainstorm is about to hit. Just trust me on this.

Step 6

7

Get PVC pipe in the appropriate length – I used schedule 40 which is easy to find at Home Depot. Try not to get the flexible plastic kind, unless you want to destroy it when you eventually have to scour out the pipe. Which reminds me, get a sanitary T-connector or similar so that you can blast out the pipe with water easily later. Attached to the head of your pipe, you can dig it up later and snake your drainage pipe if it gets clogged.

The other thing you need to do – unless you can find PVC that’s pre-drilled – is put a bunch of holes in one side of it. I used a 1/4″ or 3/8″ drillbit, I think. I never did find a conclusive answer on how many holes were required, but I probably put in half a dozen per six to eight inches. Enough to allow water entry, but not weaken the pipe.

PVC Protip: deal with PVC cement as little as possible, and do not – under any circumstances – open it indoors.

Step 7

8

With your trench dug, it’s time to get the trench liner ready; I used this stuff. Basically the purpose of this is to keep as much sediment out of the crushed rock and PVC pipe as possible.

Step 8

9

Use your tractor to lay down an inch or two of crushed rock, then position the PVC pipe slanted away from your foundation. Point the holes downward. You need a drop of 1/8″ per linear foot, apparently. And no, I have no idea how you’re supposed to measure that if you’re not a surveyor. I just made sure it slanted down, hard.

Articles like the Fine Homebuilding one will tell you to use the gravel to adjust the pitch appropriately, and that’s what you have to do, but it’s a pain in the ass. Just FYI.

Step 9

10

Cement pipe segments together as necessary. If you thought adjusting the pitch of one segment was a bitch, wait until you try it with two. Also, PVC cement sucks.

Step 10

13

Once you have the pitch correct, begin backfilling the trench with crushed rock. Don’t drop in too much at a time because you’ll mess up the pitch, or if you were dumb and didn’t go with the rigid PVC, you’ll damage the pipe. Once you’re near the top, you can begin folding the fabric over. If you’re an idiot and you dug one section of the trench too wide like I did and you’re short on fabric, just find something heavy to hold the fabric in place. Cinderblock, the giant fucking rocks the goddammned tractor refused to pull up so you had to dig out by hand, whatever.

Step 11

15

Once you’ve filled the trench, and sealed the top by folding over the typar fabric, you can begin covering everything up with topsoil. Tamp it down tightly or it will all wash away with the first good rain that you get. Or so I’ve heard. I used one of these.

Step 12

17

Unless you enjoy the Frankenstein-like scar on your lawn, you might want to plant some grass seed when you’re done. Sadly, Scott’s made the terrible decision to no longer sell Fenway grass seed. We used this instead, and while it’s a completely different shade of green from the rest of our lawn, at least we have grass there now.

Step 13

In our case at least, Step 13 is to pray. This project cost us a couple of hundred bucks, several weekends of effort and some blood – though admittedly much less than in our “get rid of closet debris” debacle that landed me in the hospital. In spite of all of that, we have no idea if it’s actually going to work or not.

If it doesn’t, I’m sure I’ll have some equally harebrained scheme to share with you next winter. In the meantime, hope this helps.