

Four years ago, my wife and I bought a house. In a first for us, the house included a fireplace. This was how I got started down the path that ended with me reading books about how Norwegians stack wood and watching YouTube videos on everything from A/B testing fire building methods to chainsaw bloopers.
Also, I’ve covered half of the front lawn with piles of air drying lumber.
The fireplace has long since given way to a fireplace insert – essentially a woodstove that fits in a fireplace. After debating at length about a variety of heating options, we decided to double down on wood due to the economics, the vastly improved efficiency of modern EPA-approved stoves, its independence from the power grid and a family affinity for sitting around a roaring fire on cold nights.
While it’s a relatively cheap fuel in the economic sense, however, wood comes with other costs. Wood requires a lot of preparation and physical effort, while other fuels typical to the Northeast like oil, natural gas or propane are never touched by human hands (unless something has gone terribly, terribly wrong). The learning curve can also be steep.
Which is why, while I’m no expert, I wanted to capture a few of the things I wish someone had told me when we first started down the path with wood. Queue the firewood Q&A:
Where’s the best place to learn about this stuff?
Two recommendations. First, read Norwegian Wood. Easily the best resource I’ve found, and a surprisingly entertaining read. Second, as always, YouTube is your friend. This channel in particular has a ton of useful information, and the production quality is unexpectedly impressive.
Where do I get firewood?
Obviously, wood is either going to come from your property or someone else’s. Most of us don’t have enough property to provide us with free fuel, which means that we have to buy it from someone else. Your best bet in sourcing wood is to ask around or check lists of the Angie’s or Craig’s varieties. If you live somewhere cold enough to have a fireplace or woodstove, there will be someone selling wood.
What am I looking for in firewood?
You want to know about the quality of the wood delivered (is it largely intact or a bunch of kindling?), whether they’re accurately reporting the level of moisture (is it seasoned or kiln-dried as ordered?), whether you’re getting the species promised (did you expect hardwoods but get soft?) and whether or not you’re getting the number of cords agreed upon.
When do I get firewood?
The short answer: as early as possible. The longer answer is that it depends on what kind of wood you’re getting. There are three types:
- Green: The cheapest option, this is wood that has just been cut, and should not be burned until it’s been dried. If you can, get this early in the spring and dry it all summer and fall and it will be ready by winter (unless it’s Oak, which can take two full years to season).
- Seasoned: This is wood that’s been left outside to dry – seasoned, in other words – to a moisture content of 20% or less (we’ll get to how to test that). Should be burnable as soon as you get it.
- Kiln-Dried (KD): The most expensive option, this is wood that’s been baked in a kiln to reduce the moisture content quickly, with the side benefit of killing insects. This is burnable right away.
If it’s green wood and it’s not oak then, it needs to be drying by early spring. If it’s properly seasoned, summer or even fall/winter is fine. Same with KD.
How do I measure the moisture content of wood?
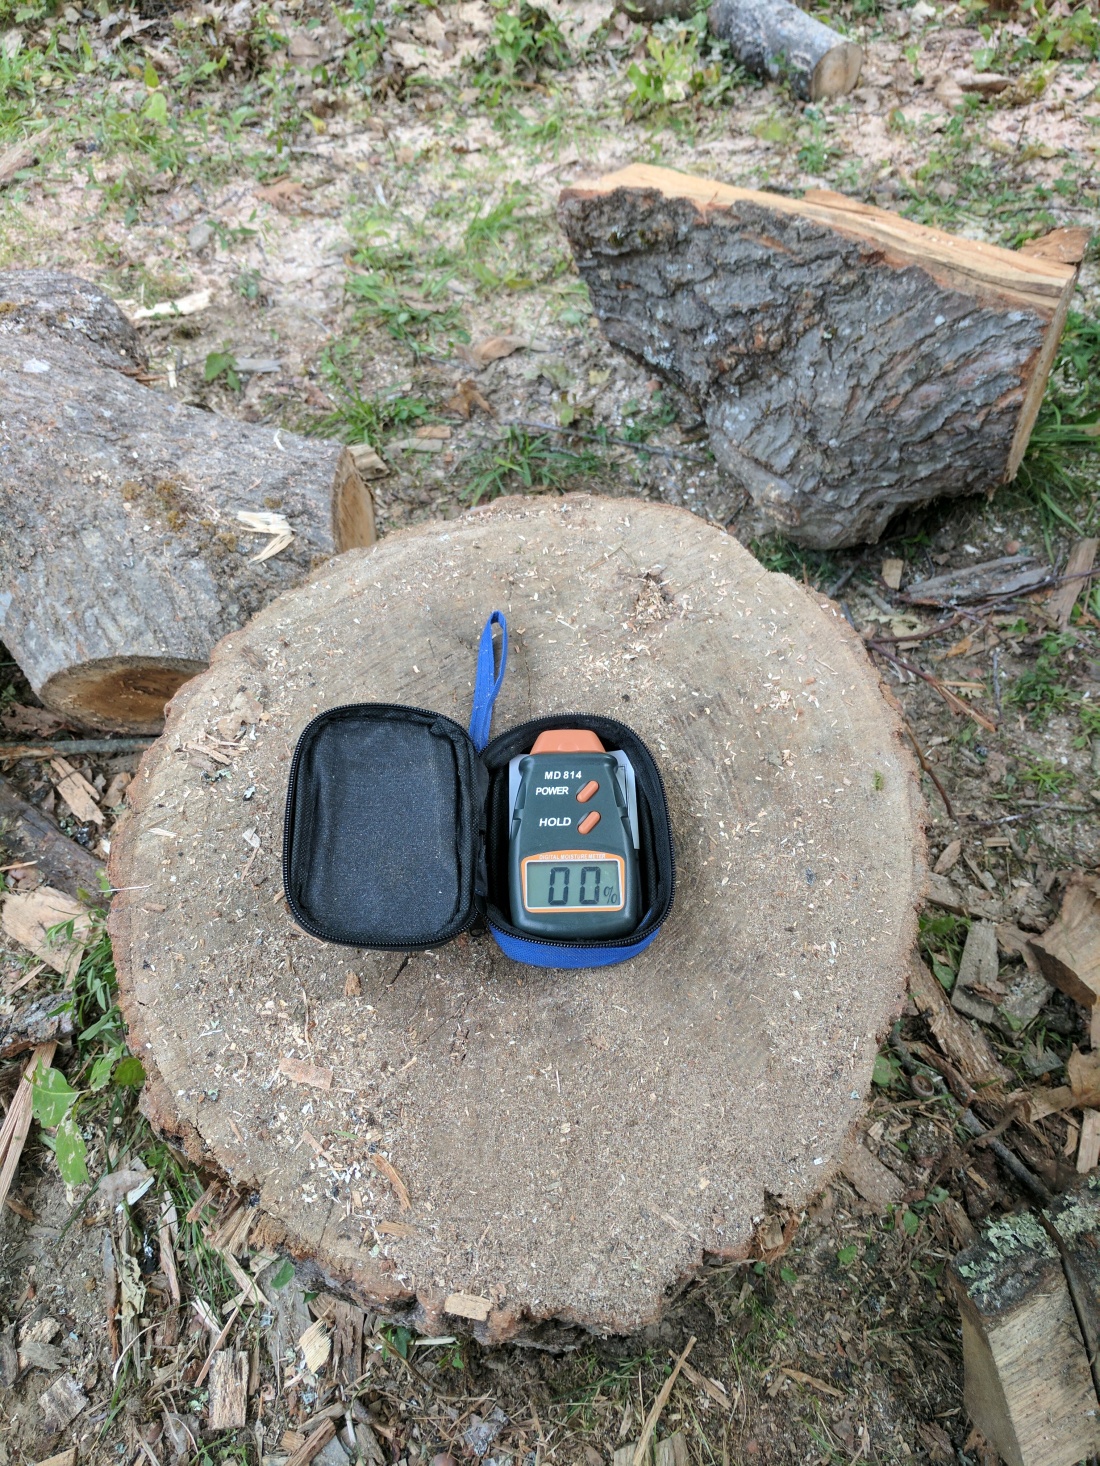
Ideally, with a moisture meter like this one.
If you don’t have one, or if the cursed thing’s nine volt battery has died on you (again), you can take two splits and knock them together. If they crack, the wood’s dry-ish. If they thud, it’s too wet to use.
What kind of wood am I getting?
There are two kinds of wood to burn: hardwoods (e.g. ash, oak, elm, etc) and softwoods (e.g. fir, pine, spruce, etc). The former are generally preferred because they offer more energy on a per unit basis, but either will work. You’ll read from time to time that you should only burn hardwoods, but according to most stove manufacturers, you can burn all of the above.
Here in the Northeast we’re generally burning hardwoods, but in other areas of the country pine and other softwoods are used exclusively.
In Scandinavia, stove owners will often use softwoods to start a fire because they light more quickly and then transition to slower, longer burning hardwoods to keep the house warm overnight.
How much wood do I need?
This is an impossible question to answer precisely, but here are a few of the variables you’ll need to consider.
- Is wood your primary heat source, or a supplementary system?
- How efficient is your stove or fireplace?
- What type of wood are you burning?
- How cold do the winters get where you live, and how long do they last?
- How warm do you want to keep your house?
For a rule of thumb, however, this is pretty reasonable:
So, if you just use your fireplace for romance and relaxation, buy a half cord of firewood each spring and let it season until fall. If you supplement a heating system with a woodstove or fireplace insert, buy two cords. If you heat exclusively with firewood, you’ll need about 4 to 5 cords, depending on the severity of your winters.
We go through between three and four cords per season with our fireplace insert, however.
What the hell is a “cord” of wood?
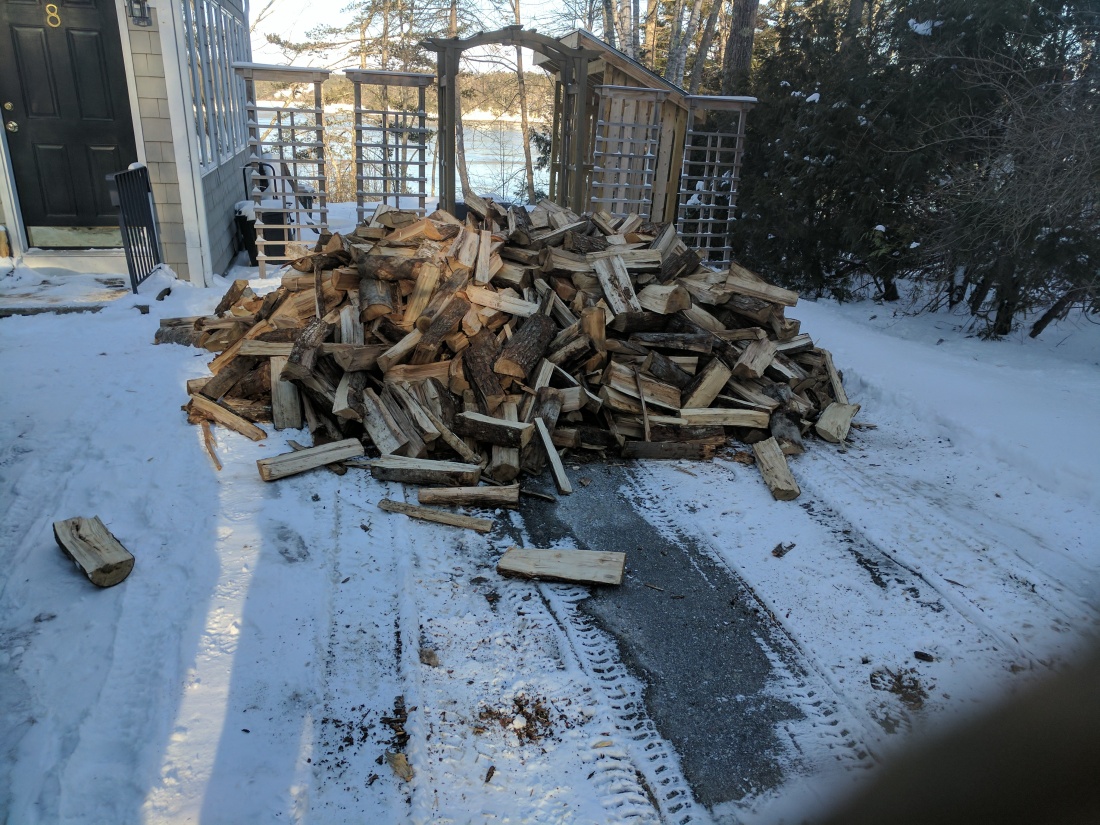
Firewood is generally ordered in units called cords. A cord is 128 cubic feet of wood, or a stack around 4 feet tall by 8 feet wide by 4 feet deep. The weight varies depending on wood species and moisture content, but is generally well over a ton ranging from 3,500 to over 5,000 pounds. It’s not going to fit in a pickup bed, in other words – it’s usually delivered by a large dump truck.
This wasn’t even close to a cord, for example.
How to process the wood?


For those purchasing firewood, it most commonly comes already split. In this case, your only job is to store the wood, which admittedly is the worst part of dealing with wood heat.
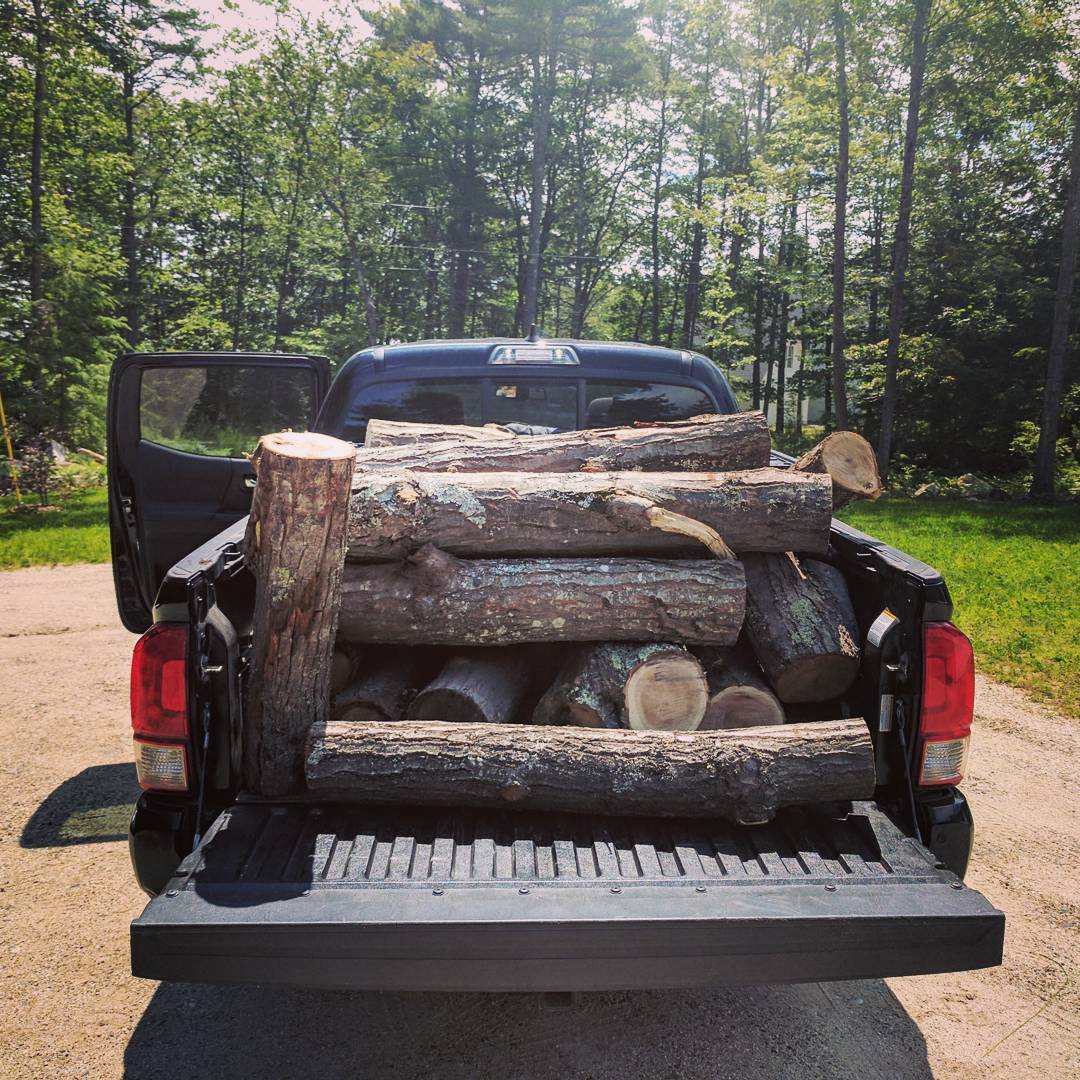
If you get your hands on unprocessed trees, however, you need to cut them down to size and split them. That process is actually pretty simple.
- Determine what the maximum length of log is for your fireplace or stove. Our Jötul, for example, can accept 24″ inch lengths. Not everything needs to be 24″, and it can actually be beneficial to have different lengths, but nothing can be longer than that.
- Cut the tree into the segment lengths you need.
- Split those segments using an axe, splitting maul or wedge and sledgehammer.
What should I know about splitting wood?
Many things. Here are five specifics, however.
- Do not aim for the center of the log. The wood is strongest in the center, aim for an edge.
- The safest approach is to aim for the edge directly opposite you. The bad news is that if you miss you’re going to impact the log with the handle, which hurts like hell. The good news is that the axe cannot continue its arc towards your feet.
- Don’t overswing, but if you snap your wrists on the downswing you can get some extra acceleration and a better angle for the blade strike. See the video here for a demonstration.
- Have a stump or chopping block that’s the correct height. According to Lars Mytting, assuming logs between 12-16″, axe manufacturers recommend that “your chopping block should be no higher than your knees, and probably even lower.”
- It’s fun. There is no domestic task more enjoyable than splitting wood.
What are these splitting mauls and wedges and so on?
You’ll need a couple of things. Here’s my setup, and for full disclosure most are Amazon affiliate links, simply because I’m curious which recommendations are most useful.
- Splitting Maul: Fiskars 7884 X27 Super Splitting Axe, 36-Inch
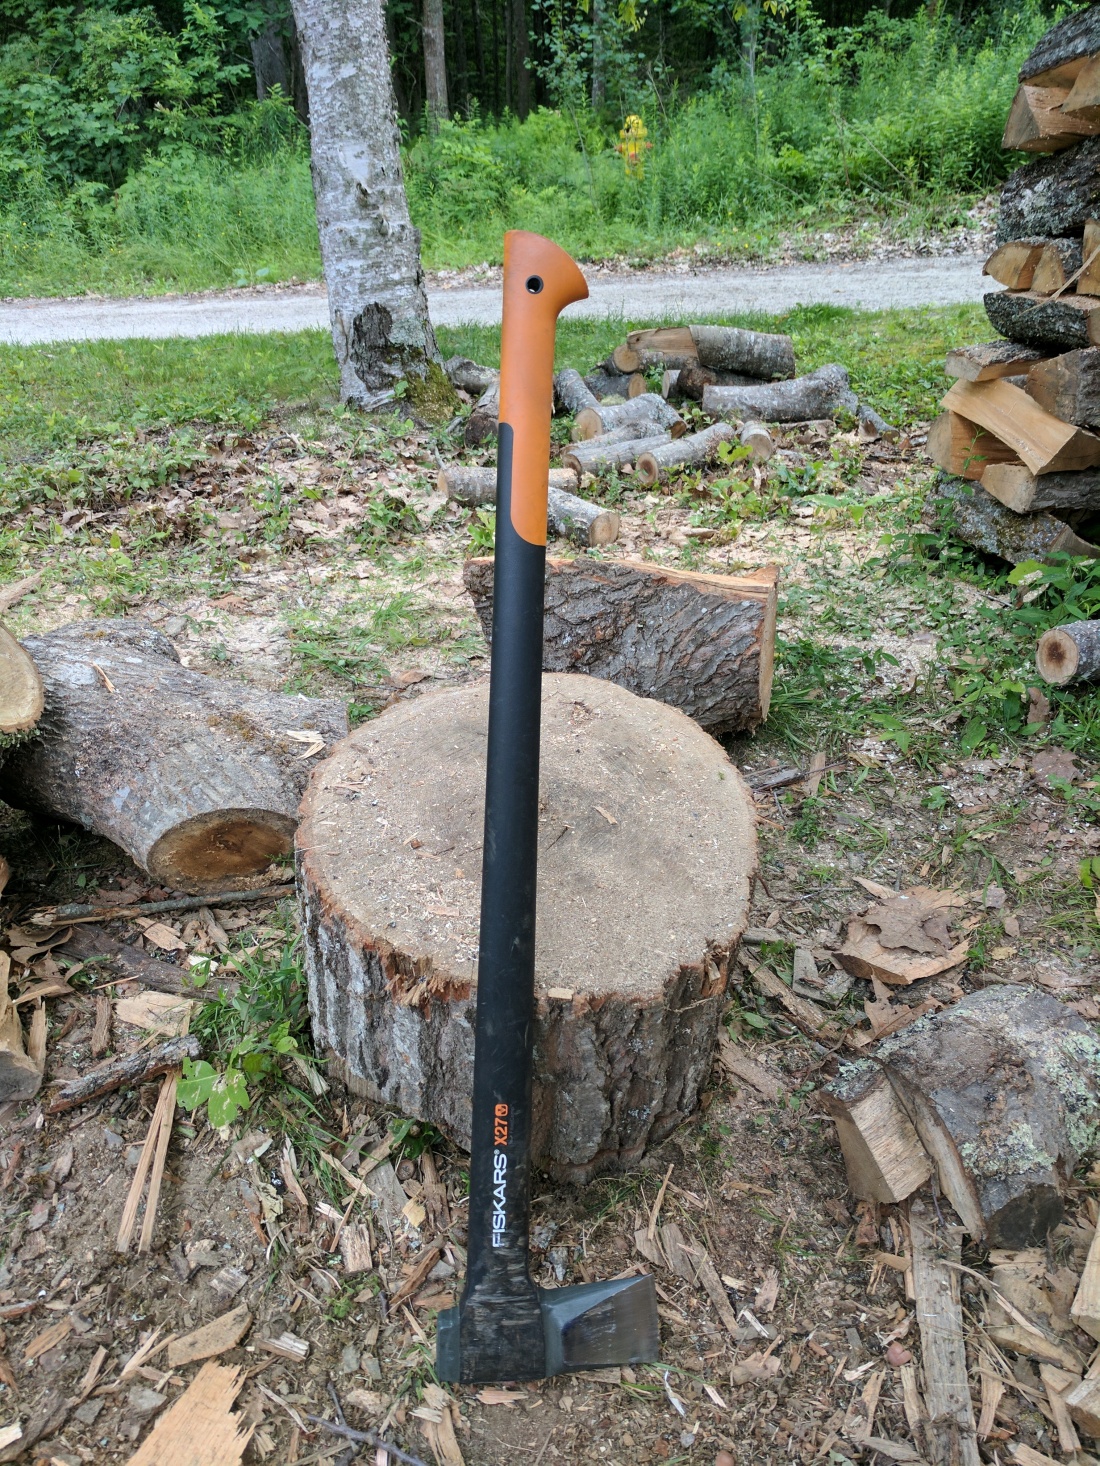
This thing is basically Thor’s hammer. The combination of its axe blade and wedge shape simply destroys wood. If you have relatively straight wood without a lot of knots and branches, this will make short work of it. Even without swinging at full strength, I’ve had logs literally explode with large pieces ending up ten feet away (so make sure no one else is around, and/or use the bungee cord or tire methods). Really can’t recommend this thing highly enough. It’s so good that even traditional axe fans reluctantly acknowledge its effectiveness. - Chainsaw: Husqvarna 141
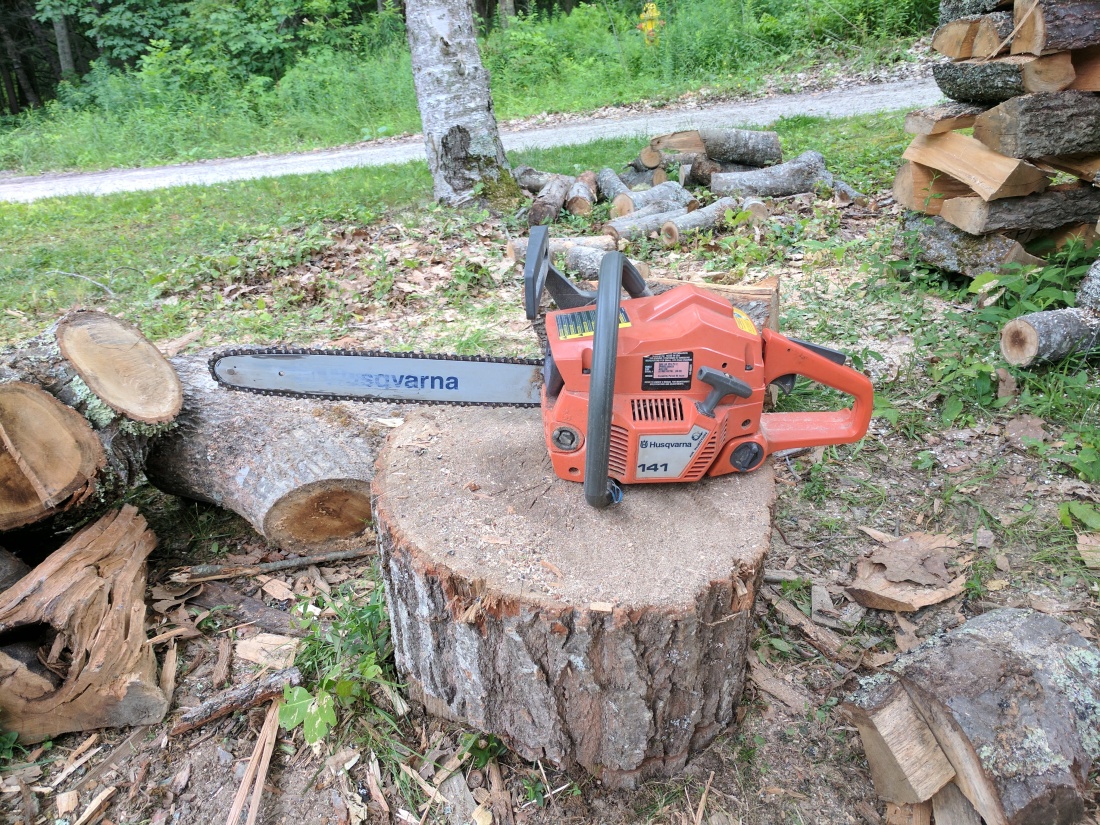
You can spend a lot of money on chainsaws, but for most homeowners, you want something that’s light and will start easily. I’ve generally used a Husqvarna of my Dad’s, a model 141, but they don’t make this one anymore. If I was buying a saw today, I’d get another Husqvarna for three reasons. One, Scandinavians know a few things about chainsaws. Two, Husqvarna dealers are everywhere which makes service and getting parts trivial (the case bolts are $0.94 per, in case you were curious). And last, because this one’s been great. I’d probably get the model 440E. - Sledge Hammer: Truper 10 lb sledge
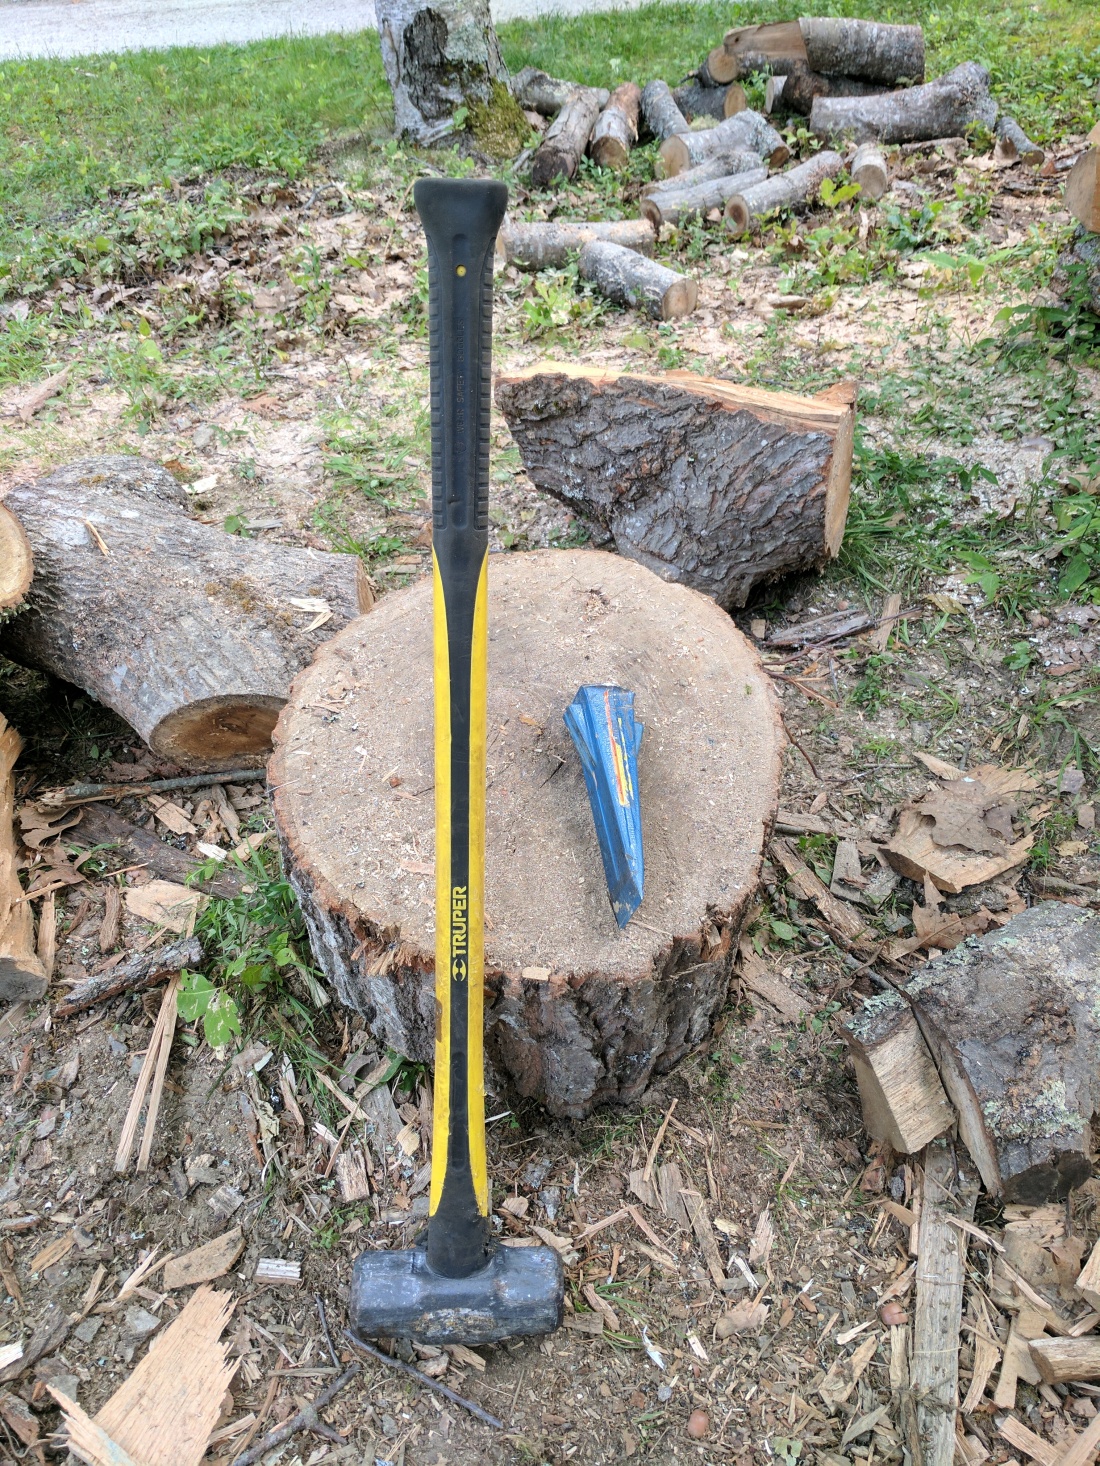 Nothing fancy about this sledge. It’s the same length as the axe, so moving from one to the other is easy. Mine’s a 10 pounder, but lighter would be fine for splitting wood: mine has to do double duty as a demo tool. Again, nothing fancy about the wedge. I picked this one up mostly because I like my Estwing hammer.
 - Gloves: Carharrt Flex Tough:
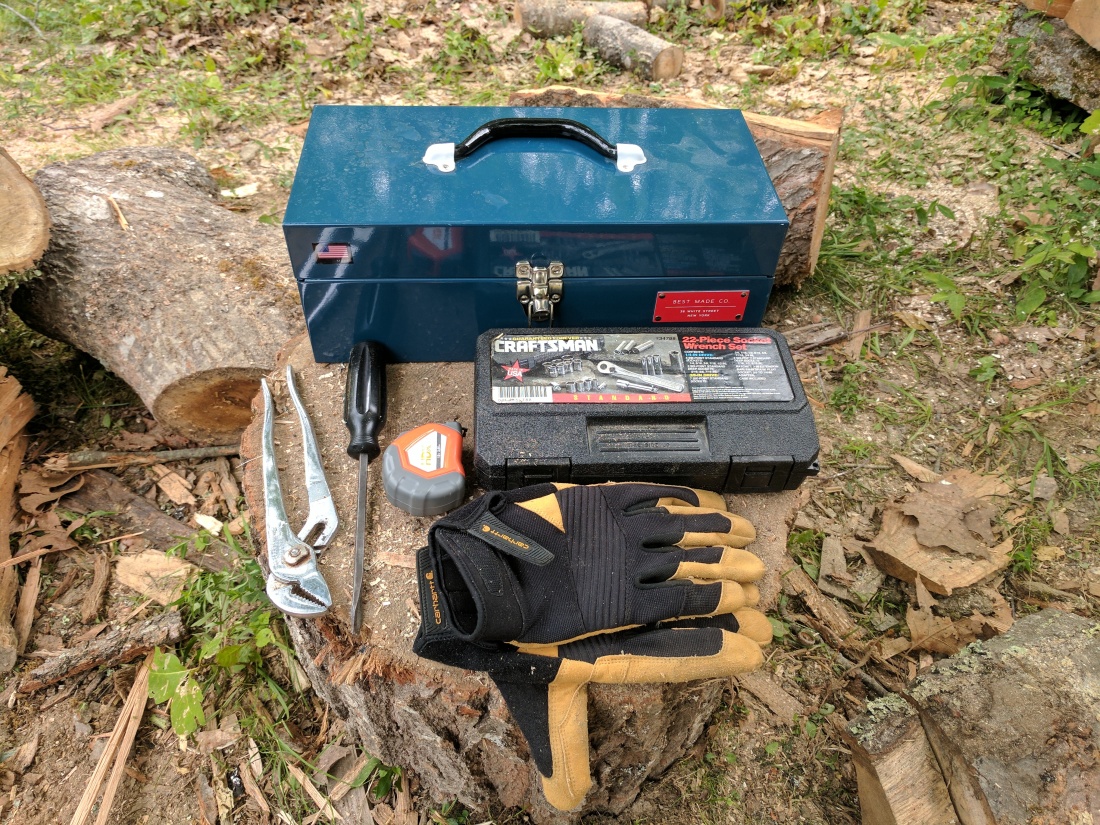
I go through a lot of gloves, and for winter you’ll want an insulated pair, but these Carharrts have been good to me. They breathe, the padding in the palm is useful if you mis-strike a log, and I’ve discovered the cowhide fingertips will work a smartphone touchscreen.
What about kindling?
If you’re interested, there are literally hundreds of videos on YouTube about how to split kindling. Personally, I’ve never needed to split much. First, because I save all the scraps from the cords dropped off or the wood I’ve split myself. And second, because I strip each log of smaller splits or pieces before tossing them onto the fire and collect them in a bucket.
What’s the most important thing to remember?
In a presumably apocryphal story, triumphant returning Roman generals would have servants whisper memento mori – remember that you have to die – in their ear to keep them grounded and remind them of their own mortality.
Similarly, it’s useful to remind yourself every time you pick up an axe or chainsaw that these are tools that can kill you. And death would hurt badly and probably not come quickly.
So be careful.
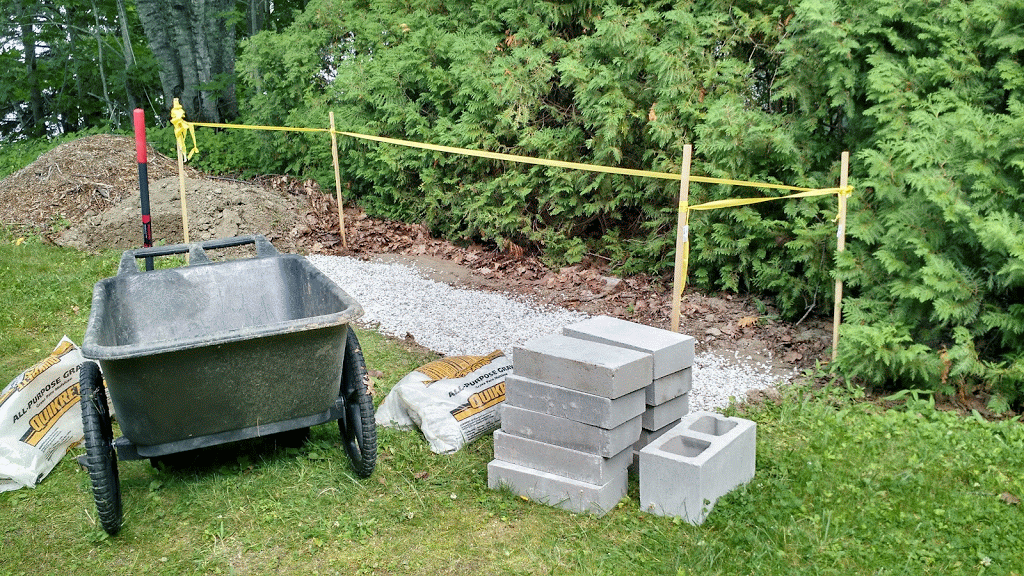
Where to store the wood?
If the wood is green, it’s best off being stacked in loose piles like the ones at the top of this piece to provide better airflow for drying.
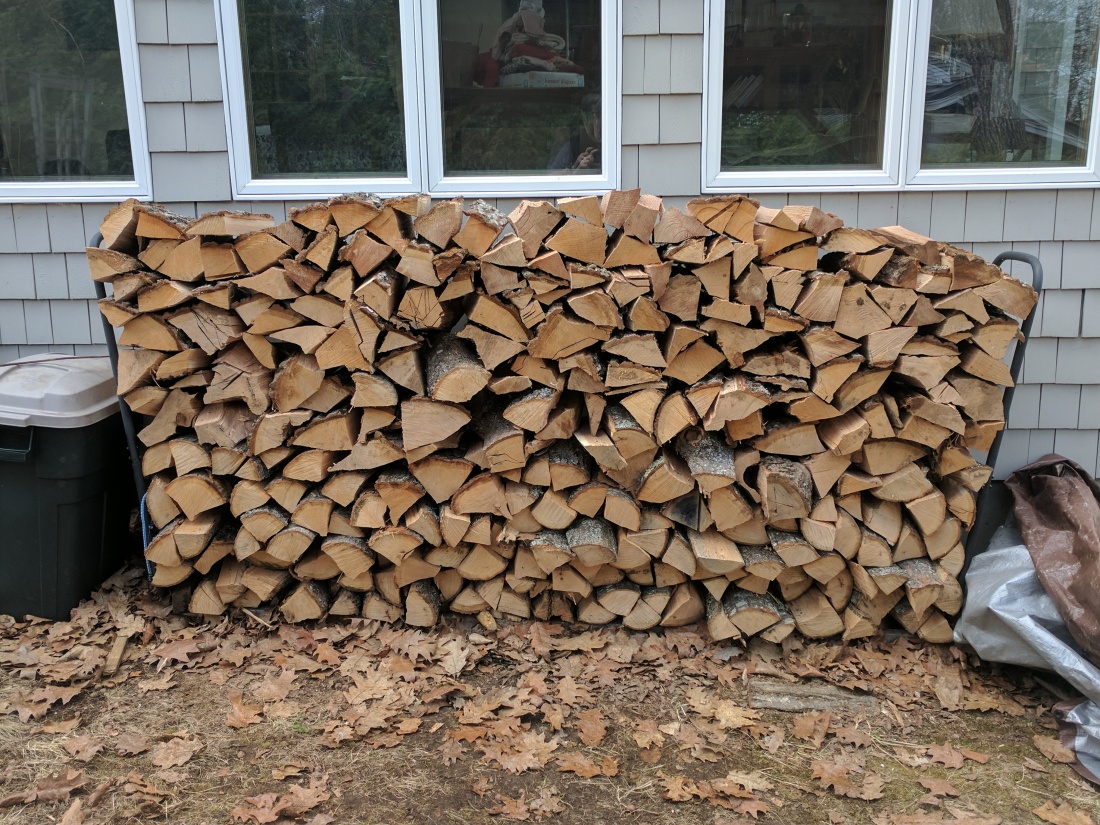
If your wood is seasoned or KD, it can be put up immediately wherever you plan to store it during the winter. Generally, storage inside the house is not recommended for reasons that vary from allergens to insects. There are a myriad of options for outdoor storage, from basic 2×4-and-bracket setups like the one pictured here:
to woodsheds:
to artistically crafted woodpiles. We opted to build a shed, your mileage may vary.
Do I store my wood bark up or bark down?
Before we moved into our house and became a wood burning family, I would have assumed the following quote from Norwegian Wood was a joke.
In Norway, discussions on the vexed question of whether logs should be stacked with the bark facing up or down have marred many a christening and spoiled many a wedding when wood enthusiasts are among the guests.
I understand now. If you store bark-down, you are dead to me.
How do I build a fire with my firewood?
If you’re starting fresh, my preferred method is top down. As a national campaign from Norway in 2010 argued, this is reliable and reduces emissions. It works like this:
- Bottom layer: logs
- Middle layer: large kindling or wood strips
- Top layer: newspaper and/or small kindling/shavings
You light the top and it burns its way down.
If you have coals from a previous fire, the easiest way to relight them is to rake them forward and put a piece of kindling behind it and then larger logs behind that. That way, the fire will burn from front to back, improving the aesthetics if you have a fireplace or your stove or insert has a glass door, and it burns more slowly than if all of the wood is exposed at once.
You said this would be everything I wanted to know about firewood, but I have other questions.
Then fire away in the comments and I’ll update the post accordingly.

Fun post! Though I live in an apartment now, I used to live in a house that happened to be surrounded by dead and dying ash trees, so free wood was easy to find.
Thanks for taking the time to write this up.
Nice Q&A! Re: chainsaws, I know it’s not manly but I’ve been pretty happy with my Poulan electric chainsaw. Obviously not useful if you’re actually going into the woods to fell trees, but good if you’re having logs delivered to within 100 ft of an electrical outlet. And the neighbors like it.
@coldhousejournal: manly or not, non-internal combustion chainsaws are definitely of interest. it’s not quite there for chainsaws from what i’ve read but given that the battery technology appears to pretty close for lawnmowers, i’m betting my next chainsaw will be powered by batteries rather than dinosaur juice.
Lol . This is a great and informative Q&A! Love the quote from norwegian wood. Call me a newbie or simpleton but I really have to know why it matters if you store the wood bark up. Could you shed a little light on this for me please 😊. And thank you for all the info can’t wait to put some of my new found knowledge to work!
The ignorant and uninformed dilettantes that store bark down will tell you that this helps allow for vertical moisture evaporation. The problem is that any such advantage is marginal and immaterial and absolutely overwhelmed by the advantages of storing bark up, which shields the wood from the penetration of collected moisture.