As some of you may have seen, I made a few cutting boards as Christmas gifts for family and friends this year. The boards were certainly not perfect, which irks me, but they at least came out well enough that I didn’t have to scramble at the last minute and swap in alternate gifts. This was actually the second batch of cutting boards I’ve made. I made two for my parents and my in-laws last year as well, and they were serviceable.
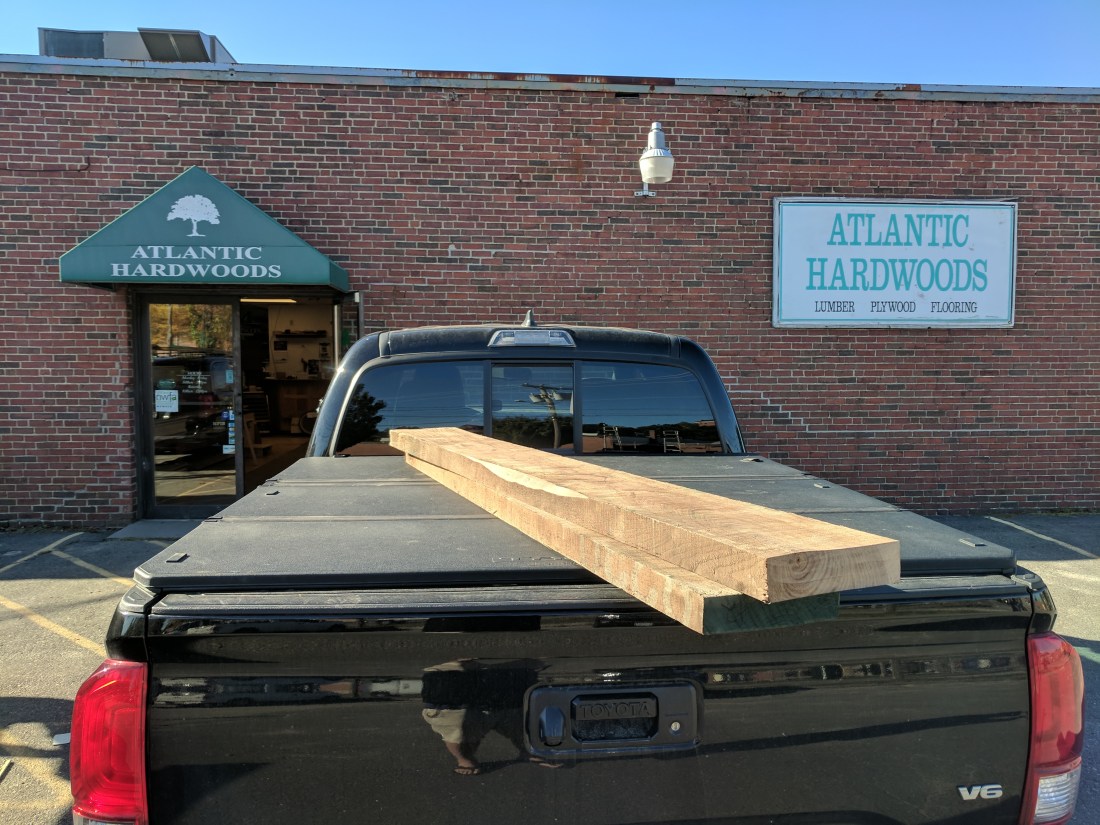
Because woodworking is not the most common hobby, people are maybe a little more impressed than they should be that boards like these are homemade. That being said, if you’re starting from rough sawn lumber as pictured above and you lack real, full size power tools some of the steps involved in making these can be a little tricky.
For anyone that’s interested but might lack some of the fancy tools common in other How To videos, then, here’s how I make cutting boards like these using the more basic tools I have in my shop. The tl;dr: if I can build one of these,
you can too.
The Type
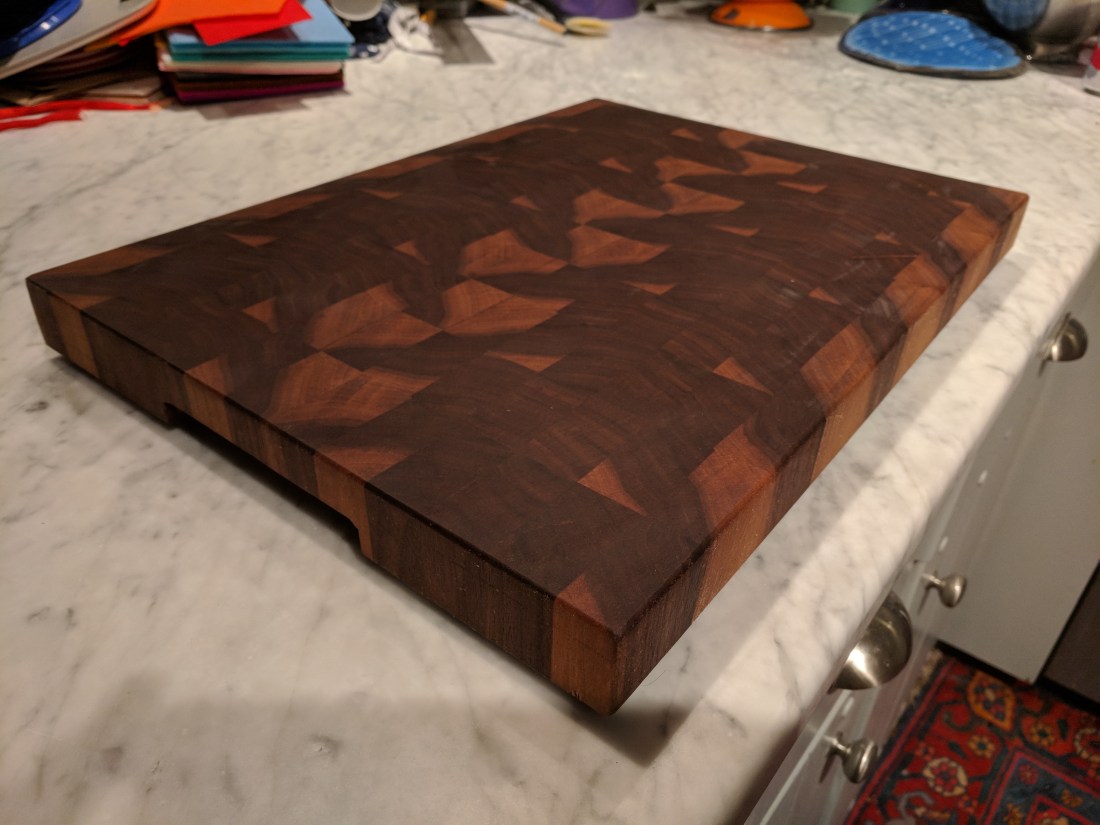
First, it’s important to understand what kind of cutting board you’re making. The boards above are what are called end grain cutting boards. This means exactly what it sounds like: the surface of the cutting board is the end grains of the wood. This is in contrast to most wooden cutting boards, which are edge grain.
In theory, the advantage to end grain boards is that they don’t cut across the grain, which is hard on both the board and the knife. Instead, each cut lands between individual wood fibers which naturally reseal themselves post-cut, in a manner which is impossible for severed edge grains. End grain is also supposed to provide less surface area for bacteria and other contaminants.
Whatever their functional advantages, however, end grain boards are, in my opinion at least, aesthetically superior. Exposing and contrasting the varied grain patterns of different sections of wood gives each board a unique and visually interesting appearance.
The process below will work for either type of board, however. If you prefer edge grain boards, you simply skip a few steps at the end.
What Actual Experts Can Do
If you really want to see what’s possible with these boards, check out
this Instagram account. This guy’s boards are legitimate works of art, and while some of the more complicated designs are rendered via a CNC machine, he’s able to make incredibly complex pieces using nothing more than basic power tools.
YouTube Can Help
Like everything else I build, when making cutting boards I started with YouTube. You’ll probably want to too. My playlist of cutting board videos, which includes one from the Instagram account mentioned above, is
here. The best balance between depth of content and accessibility, however, is probably
this one from the Wood Whisperer.
Notes on Wood Choice
There are dozens of types of wood that make for good cutting boards, so while I prefer walnut because it’s distinct from more traditional maple boards, you can certainly get creative and use different woods and even different combinations of wood to achieve your desired look. Three quick caveats.
- Hardwoods are preferable. There are some manufacturers that produce cutting boards using softwoods like larch, but in general you’ll get much better life out of a hardwood.
- Certain hardwood species are no no’s for cutting boards, either because they have large pores like oak or because they have potentially toxic oil and resin issues like teak. Do your research if you’re using something exotic.
- You may see videos on making cutting boards out of scrap wood such as wood that came from pallets. Personally, while I use pallet wood for a variety of projects, I wouldn’t use it for anything that touches food because I don’t know what the pallet wood’s been exposed to.
What You’ll Need
In a perfect world, you have a full size cabinet saw for rips, a compound miter saw for crosscuts, jointers and planers wide enough for the boards, and an industrial drum sander. If you have access to all of that, skip the below and just go watch one of the videos. You don’t need this.
My shop, however, has none of those things. The following is what I used, and just FYI therse are Amazon referral links.
- Cuts: SawStop Jobsite Saw
I saved up for a SawStop mostly because I like having all of my fingers. If you haven’t seen it, their safety technology is like a magic trick. But it’s not just the safety; these are well designed saws, period. SawStop’s thoughtful about how the saw is put together, how accessories are attached and made available, etc. And while the included miter gauge is terrible, the fence is great. I would love to have one SawStop’s big cabinet saws, but even if my budget would have accommodated it my space wouldn’t: I just don’t have the room. Plus, there’s nothing better than working outside in the summer, and the jobsite saw lets me do that.The only question for this project was whether the smaller jobsite saw would have the horsepower to rip the thick, heavy 8/4 (2″) walnut stock I was working with. Turned out to not be an issue, the saw cut it up just fine.All of that being said, most tablesaws will be fine for this. They just might lop off a finger or two.
- Flattening: Bosch Colt Router with included Edge Guide and not included Plunge Base
Like my jobsite saw, this router was in part a budget driven purchase as I was just getting into woodworking when I bought it and I couldn’t justify a full size router so I picked up this cheaper trim router. The shocking thing is that for a tiny little trim router, it’s incredibly powerful. I used it to cut dadoes with a 3/4″ bit this summer – which the guy at Rockler bet me I couldn’t do – and it was used to do all of the actual board flattening. I might have been able to go a bit faster if I had something with a bit more juice under the hood, but I’m not sure that would have been advisable in any event.
- Glueing:
Most important, make sure your glue is food safe. I use Titebond III for my boards; this is pretty standard. As for clamps, I’ve got a mix of bar and pipe clamps, and for the jointer sled (see below) I used these toggle clamps.
- Sanding:
I have an old hand me down random orbit sander, so you don’t need anything particularly sophisticated for this job.
How to Build the Boards
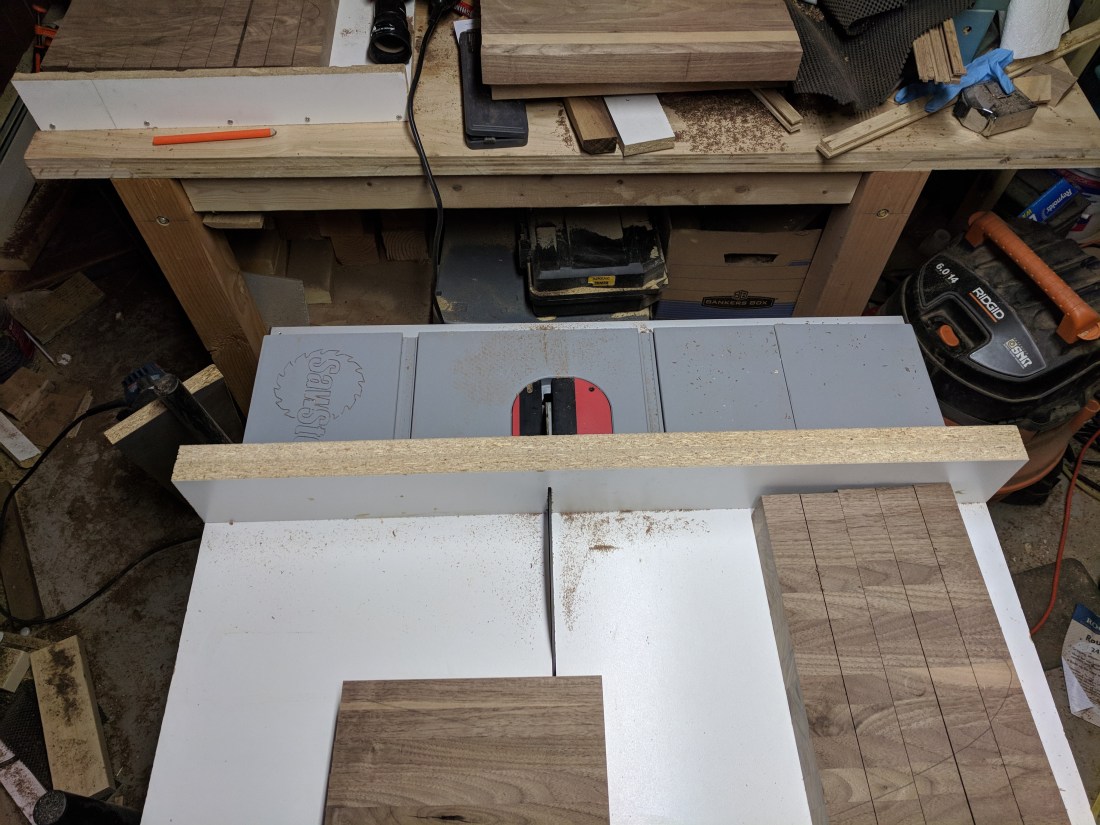
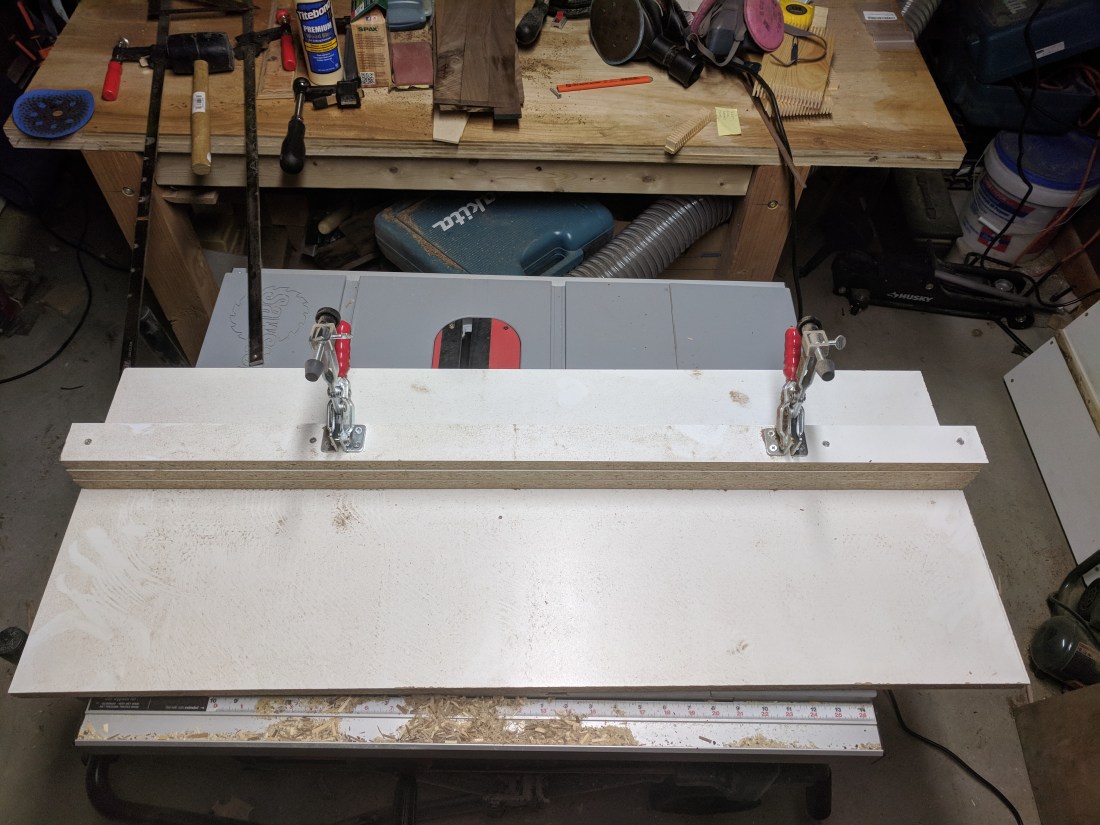
1. If you’re lucky enough to get your lumber dressed on four sides (i.e. flat on the sides, bottom and top, skip all this nonsense and go to Step #3). More likely, you’re picking it up from the lumber store rough sawn, which means you have to joint and plane it. Step one for me was jointing or flattening the sides. Normally, you’d do this on a jointer but I don’t have one. So instead I made a sled for my table saw that pinned the wood down so I could cut one clean edge that I could then place against the tablesaw fence to give me two clean sides. Here’s a YouTube describing this process. And here’s the sled.
As you can see, this is exceedingly primitive, and like the other sleds I used on this project it’s made from melamine plywood scrap I had left over from this summer’s closet organizer build. Basically, it’s a board wide enough for your lumber, with toggles on it to make sure it doesn’t move while being cut.
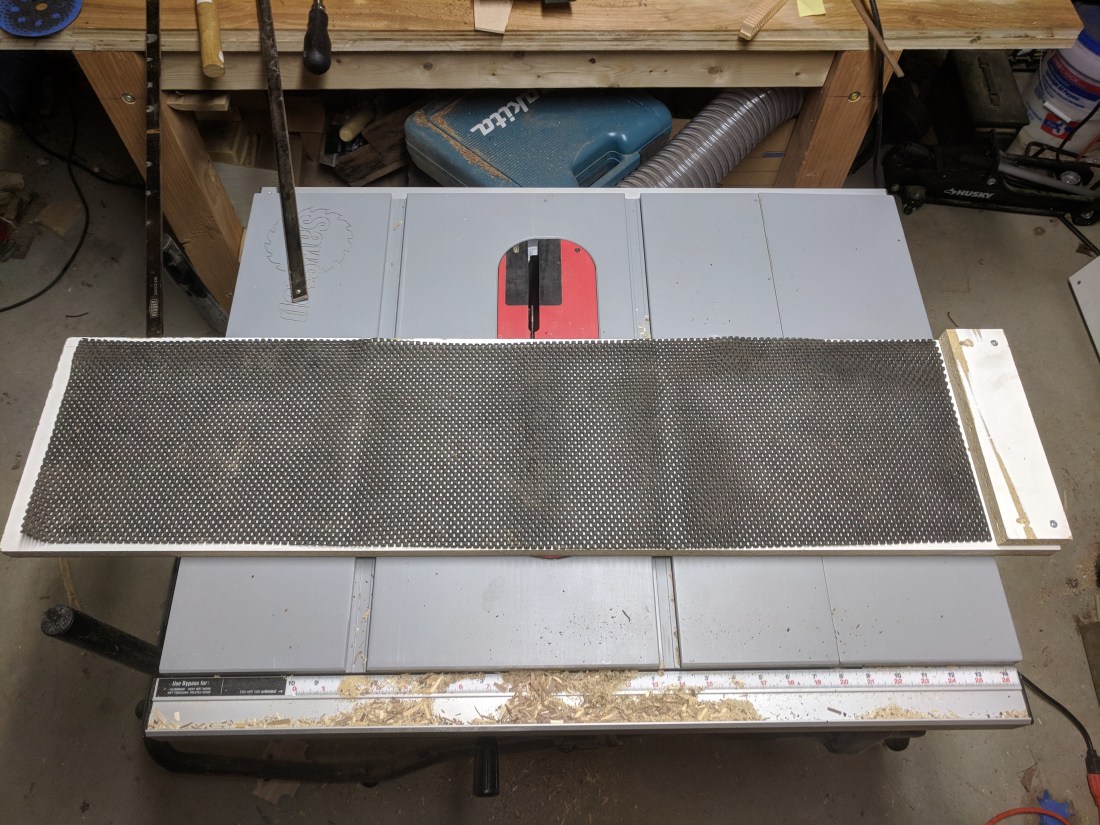
2. With the sides addressed, next up was flattening the boards top and bottom. Luckily for me, I have a small 10″ benchtop Ryobi planer. This worked, because my stock was between 7″ and 8″ wide. The only issue was that the infeed and outfeed supports for my small planer were nowhere near long enough, so I had to make a planer sled.
This was even more basic than the jointer sled. It’s literally a long piece of flat material, which a lip on to keep the material from sliding off the back. Here’s a useful
YouTube on building one of those.
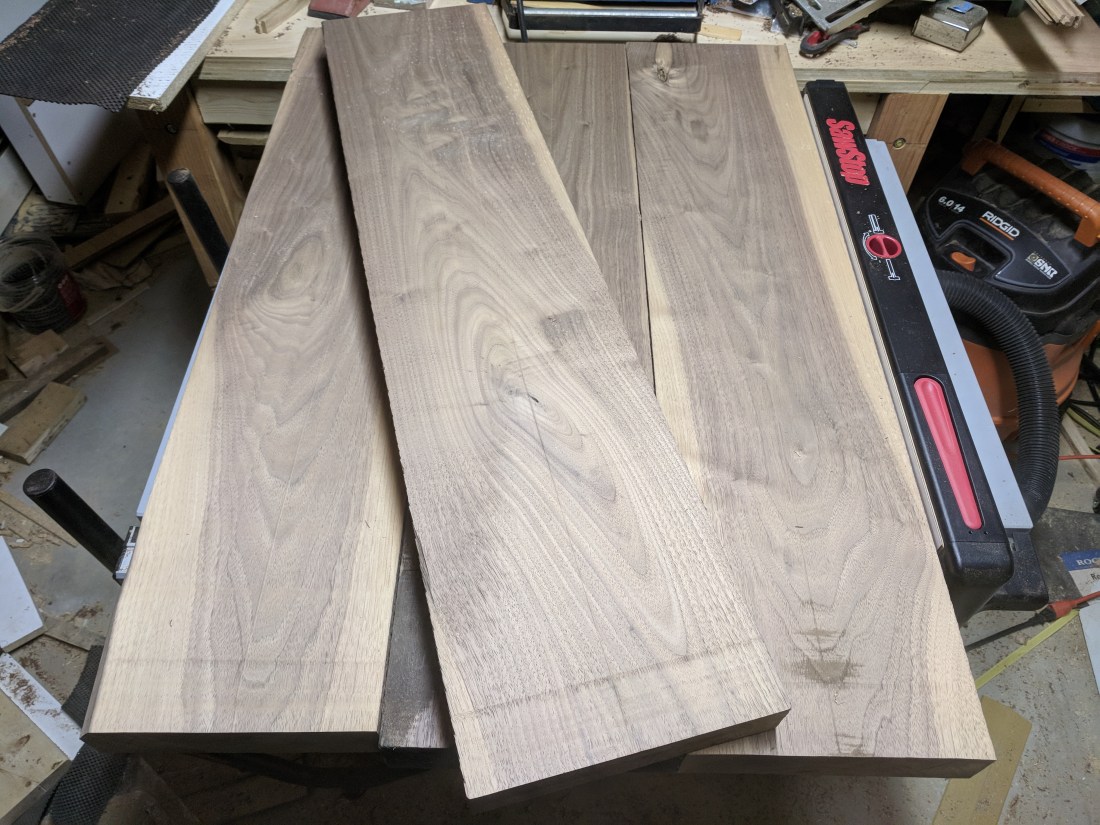
The end result of the “jointing” and planing of these boards looked like this.
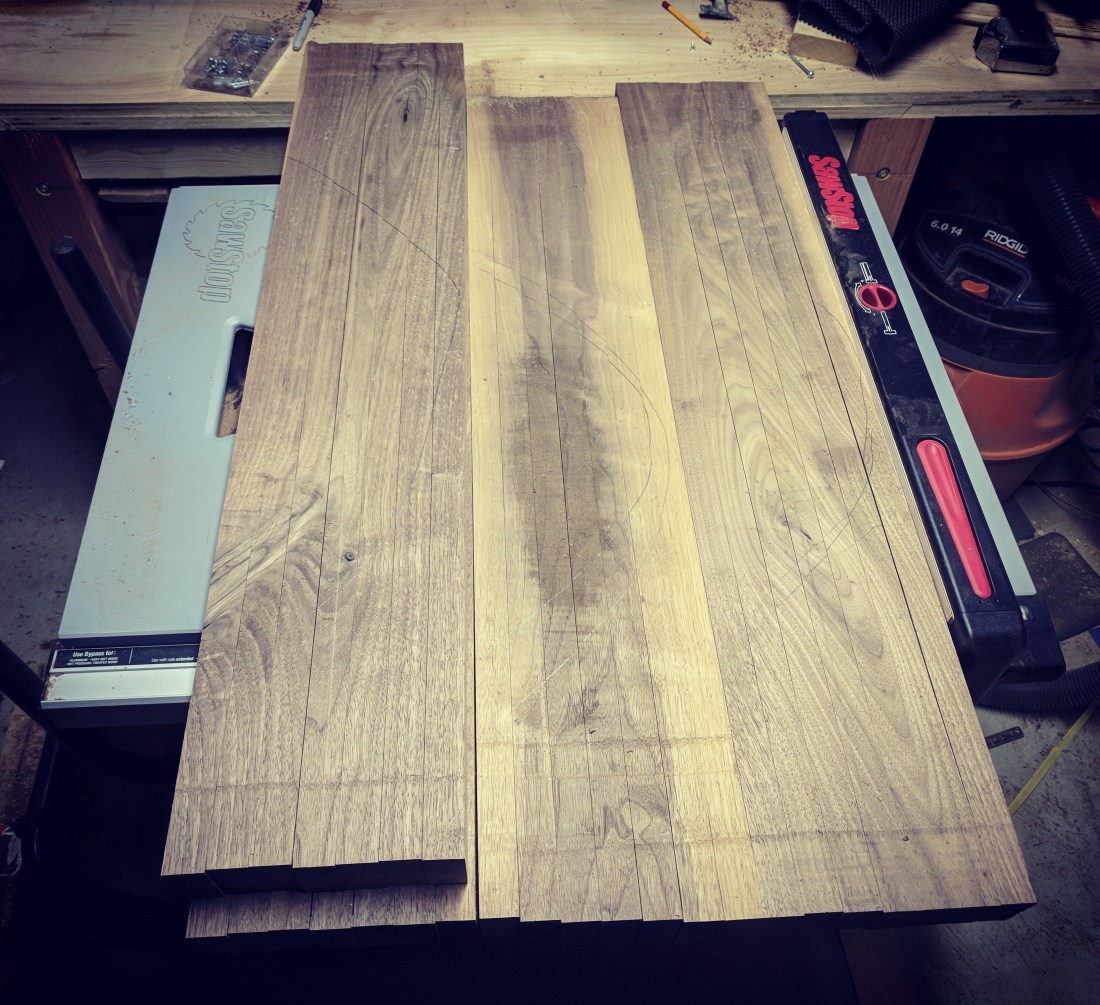
3. Next up is ripping these into strips using the tablesaw. This should be uncomplicated: you simply rip the individual boards into strips – 1″ strips in the case of my design. Note that this is not related to the ultimate thickness of the board.
The ripped strips will look like this.
You might notice the pencil marks on the above. This is because I personally prefer to try and keep the stock matched with the strips it came from, so this lets me reassemble them in exactly the correct order. You may prefer a completely random assortment, in which case don’t bother marking the ripped stock.
4. At this point, you’re probably left with strips that are much longer than your board requires. Which means that they must be cut down to length – 15.5″ in my case. In this case, you’re cross cutting the wood, which means that you either need a compound miter saw to crosscut your material, or as in my case, a crosscut sled for your table saw. To build my crosscut sled, I mostly followed the
design here, though my materials differed significantly. This allows you to use a table saw to make consistent cuts across the grain of the wood, and cut your lengths down to what you need.
On the sled, the process is simple. You measure out your required length, clamp down a stop block and start cutting.
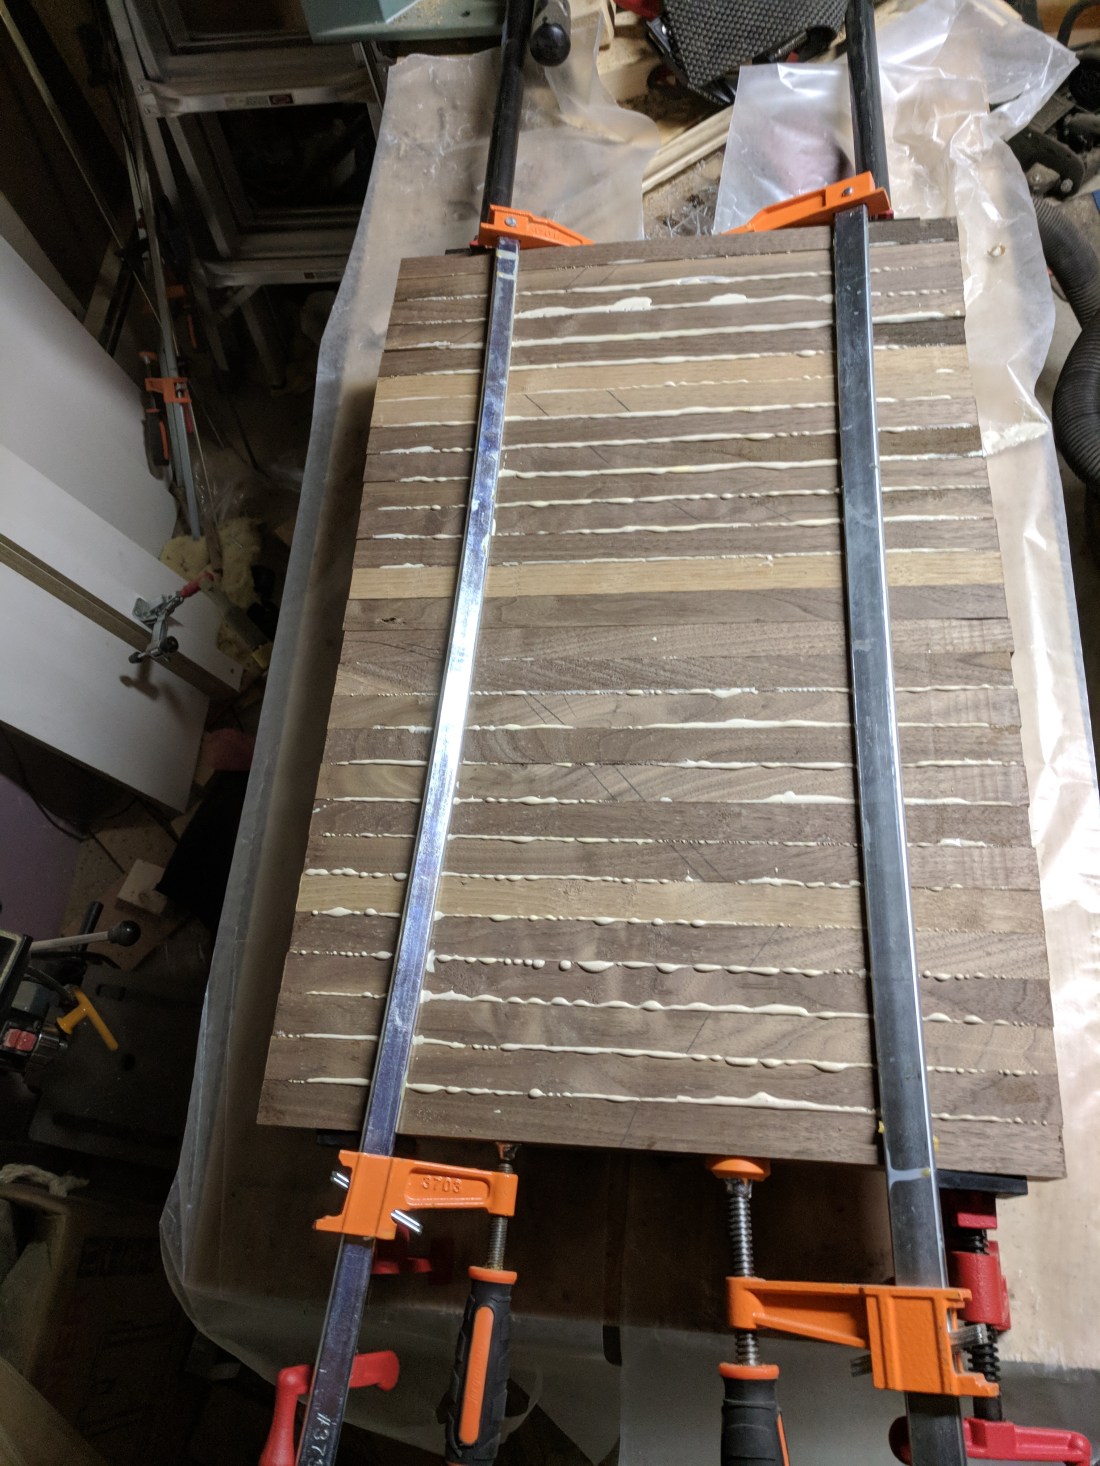
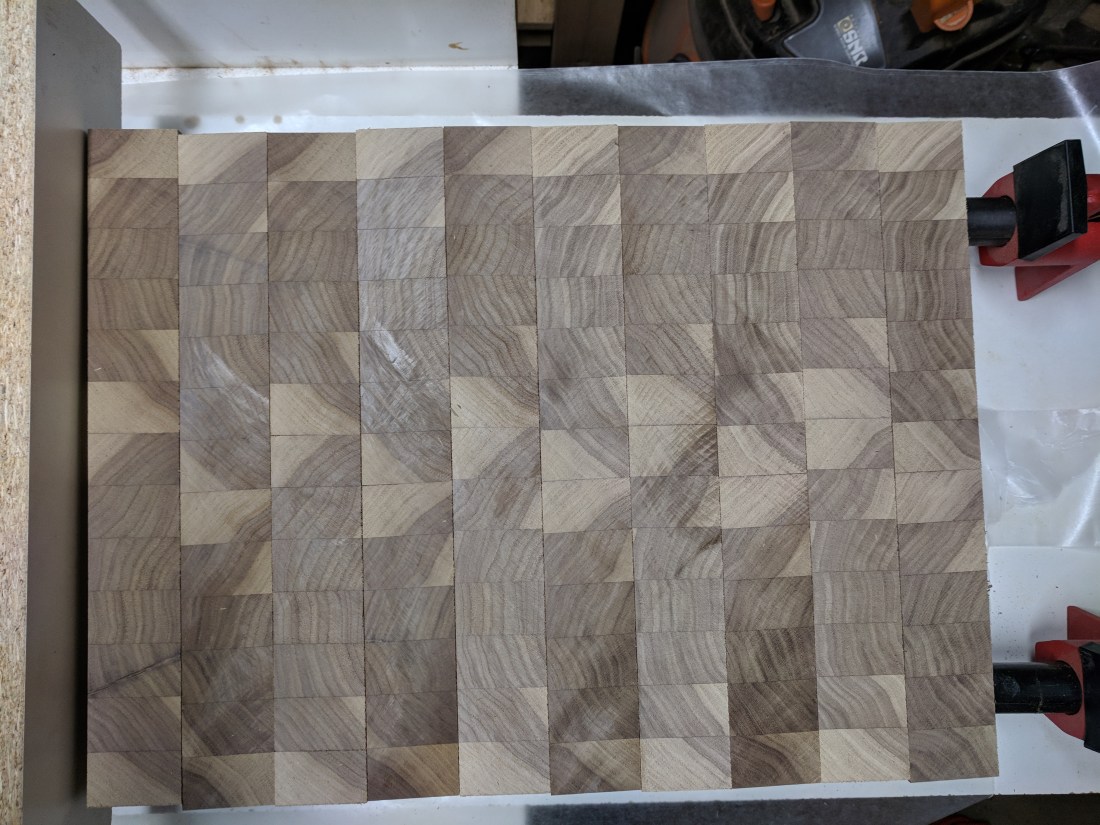
5. Eventually, you’ll be left with a bunch of strips. These are then laid out for the first glue up. In my case, I select 12 strips that are 1″ wide and 15.5″ long, and come from the same stock. I then rotate every other strip 90 degrees, so that the grain patterns now run against each other for visual contrast.
The primary rules for a successful glue up, from what I’ve learned, are a) make sure to use plenty of glue and b) make sure to use plenty of clamps.
Glue everything up, and let it drive overnight.
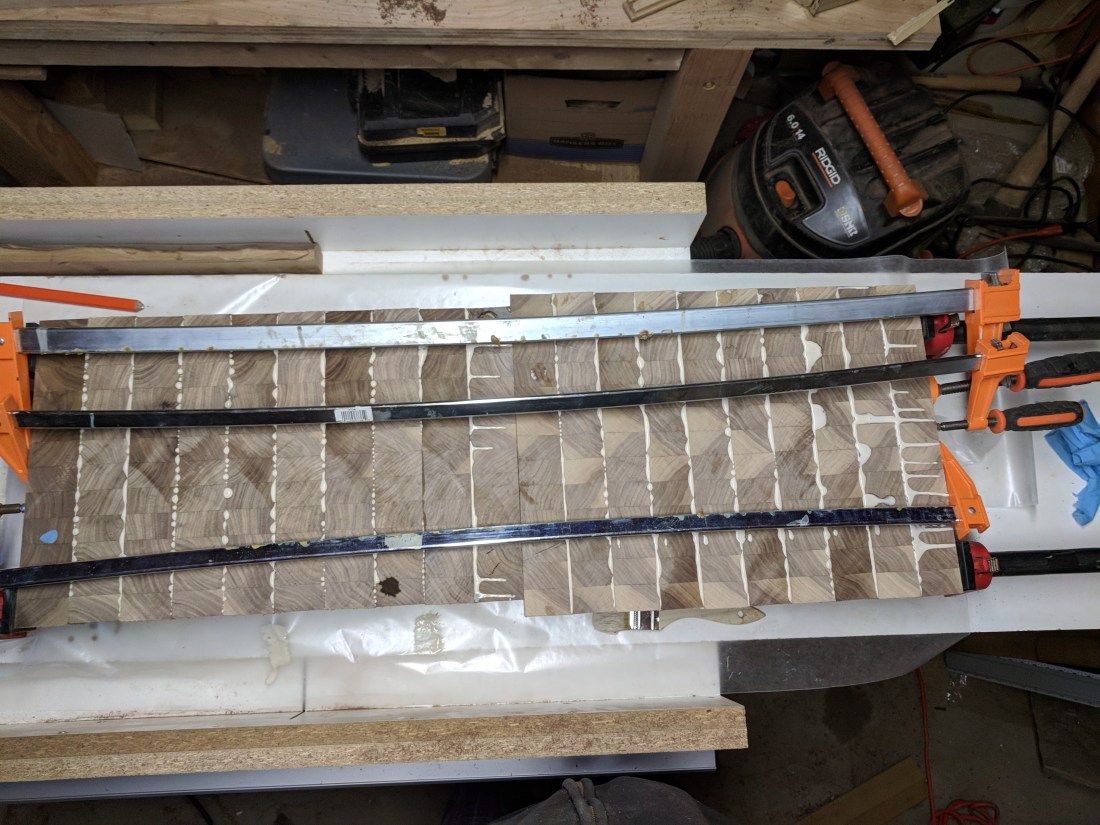
6. When you wake up the next day, your boards will look weird and ugly like this.
After you’ve chiseled or scraped off the excess glue residue, you need to clean up the edges with your crosscut sled. That done, it’s time to flatten the boards.
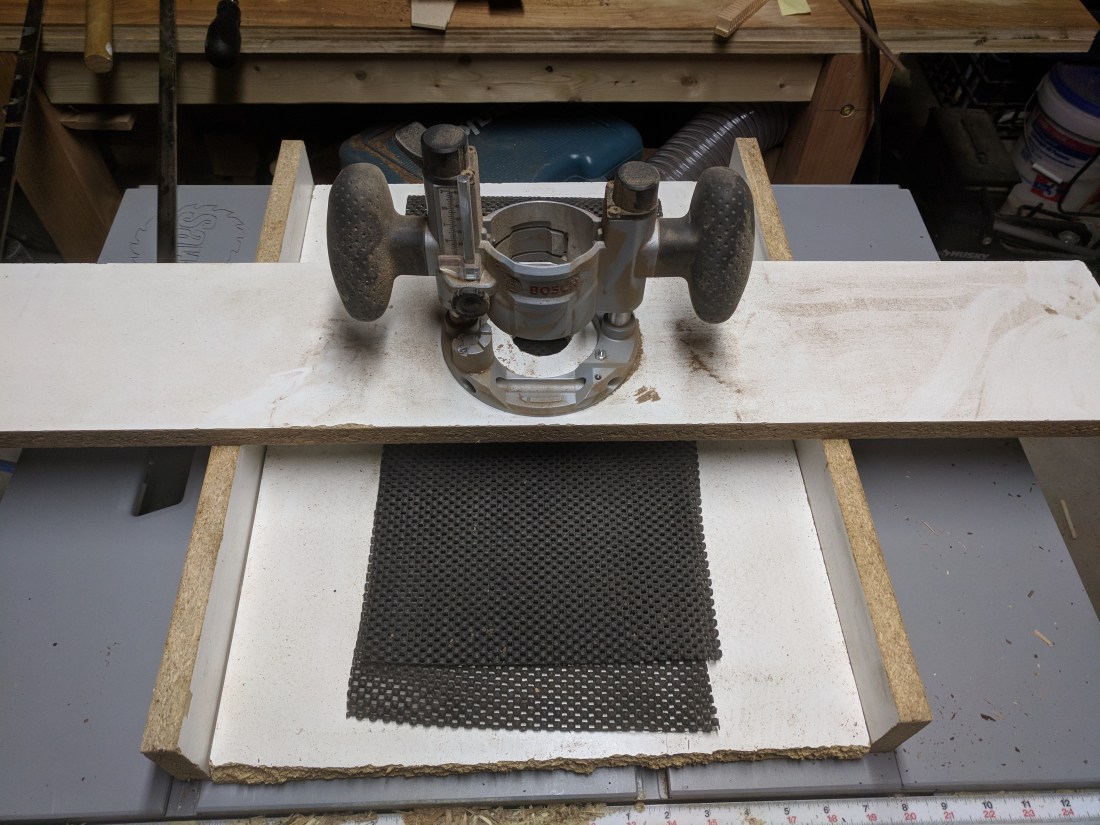
Unfortunately for me, these boards were now much too wide for my small planer, so I needed an alternate way to flatten them. Enter the router sled.
Basically, this is a flat surface with a non-skid pad (some people actually glue the boards down, but that seems like a major hassle) and two edges of exactly equal height. On top of that, you have a flat base for your router which allows the router to travel over the surface of the boards removing material until the surface is flat. Use the biggest straight bit you have and/or your router will drive. That was 3/4″ in my case.
At first, I followed the advice in
this video, but this left me with the grooved surface you see above. I eventually figured out that the uneven, looping clockwise circles left me with a smooth, flat surface.
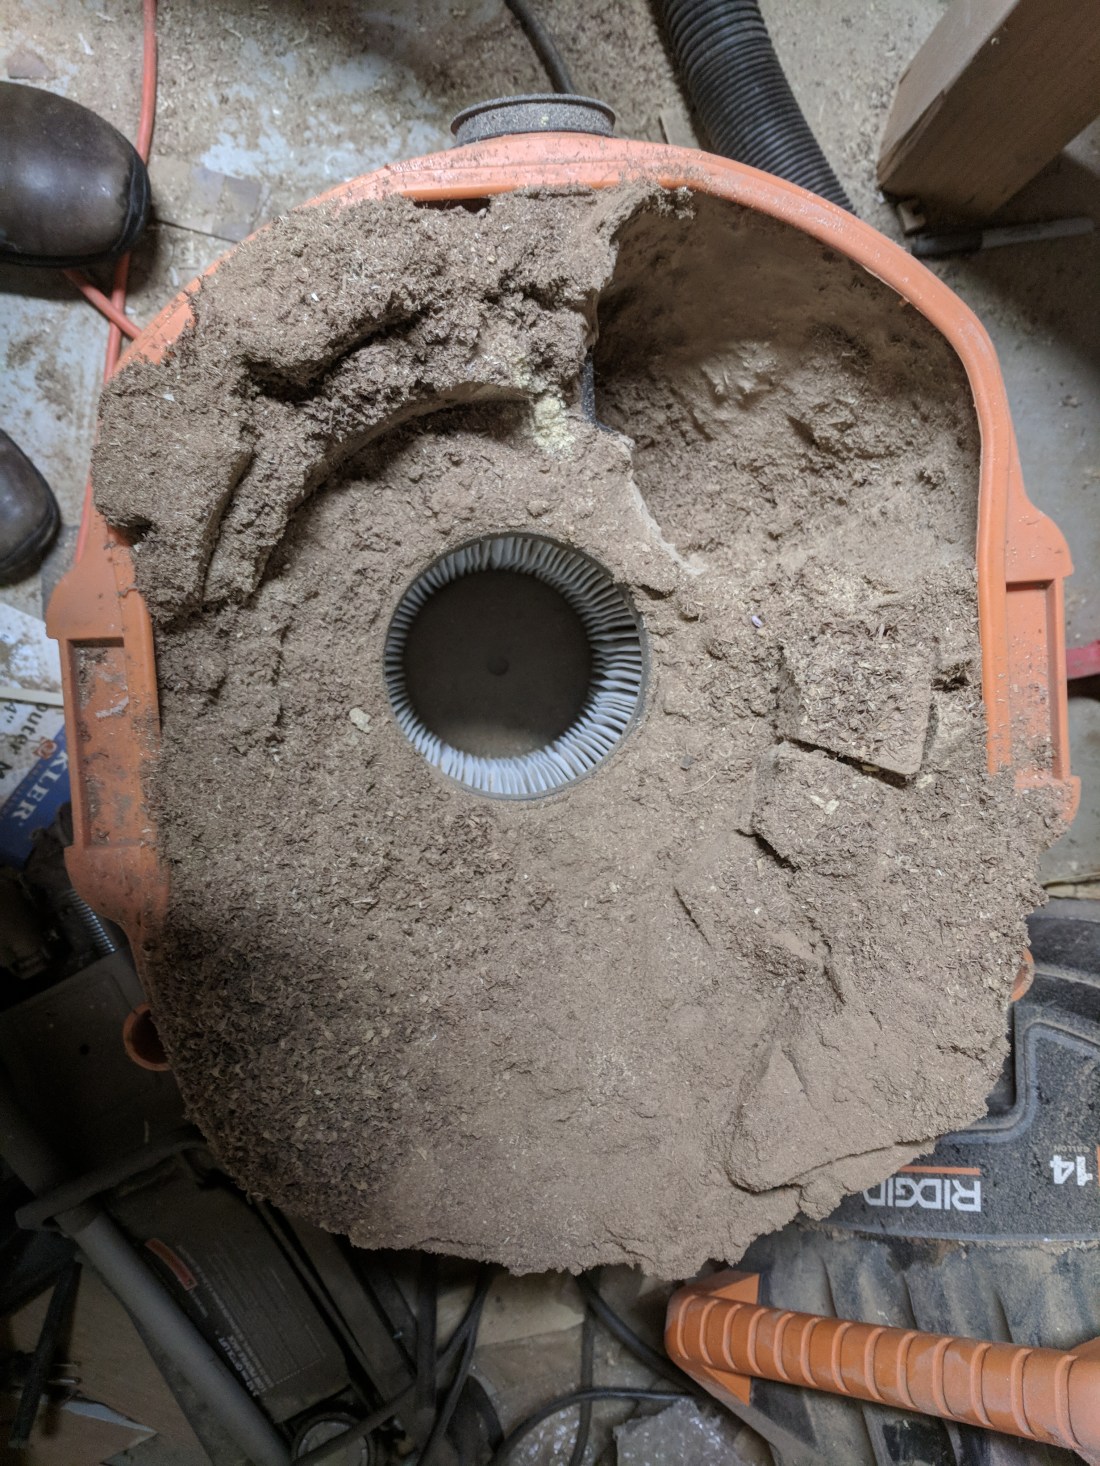
The good news is that this router sled approach works: it will flatten your boards effectively. The bad news is that it generates a shitload of dust. So be prepared for that.
7. Once you have your boards edged and flattened, it’s time to cut them up to expose the end grain. Throw them back in your crosscut sled and cut to a thickness slightly larger than what you intend for the board. I typically go for 1 1/2″ to 1 5/8″ to allow for a nice thick board even after losing material to planing and sanding.
Once you’ve cut up your strips, rotate them 90 degrees to expose the end grain. Then flip every other strip lengthwise to further break up the pattern on the board and introduce visual contrast.
Glue up the result.
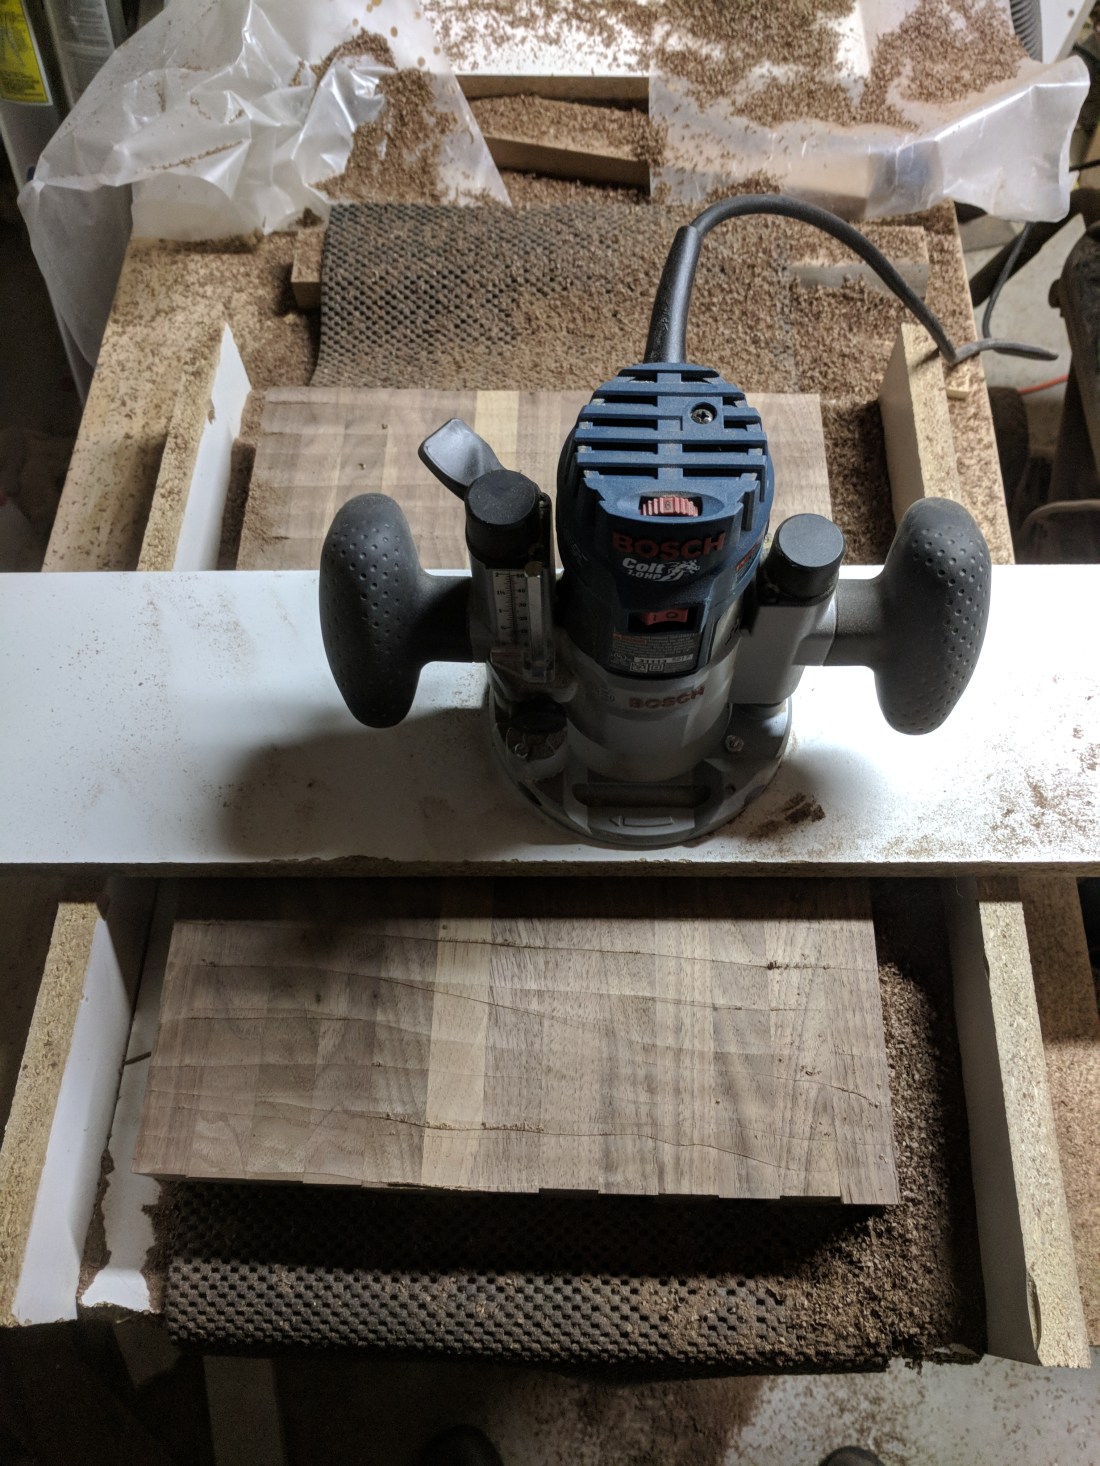
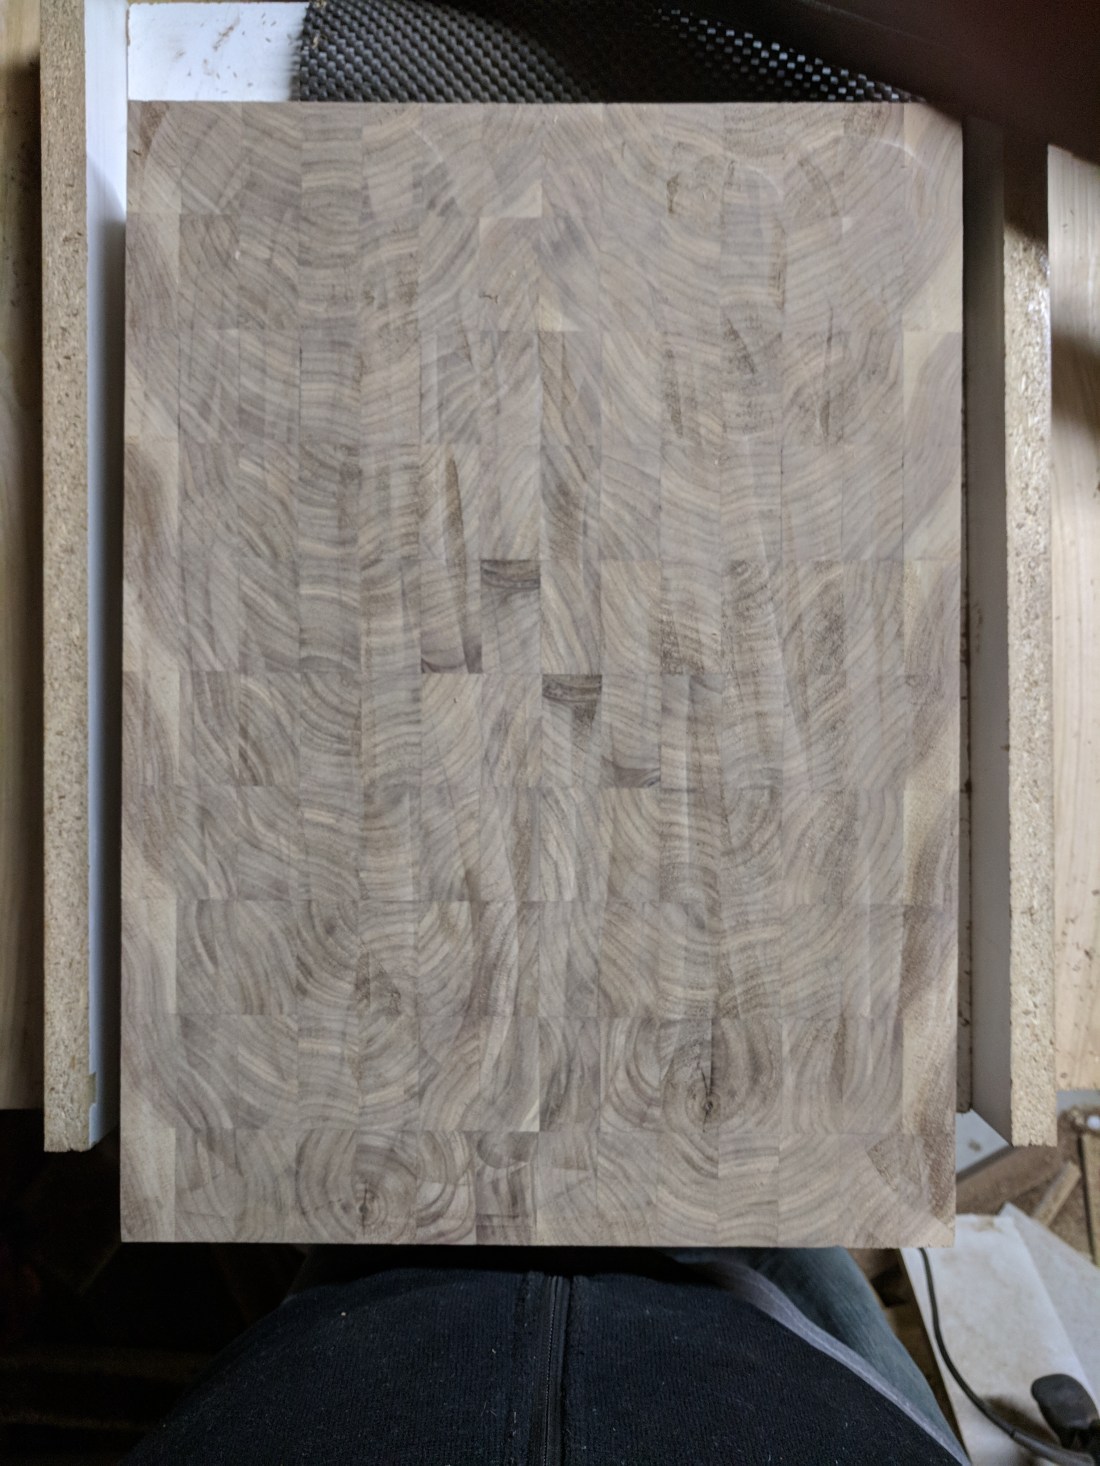
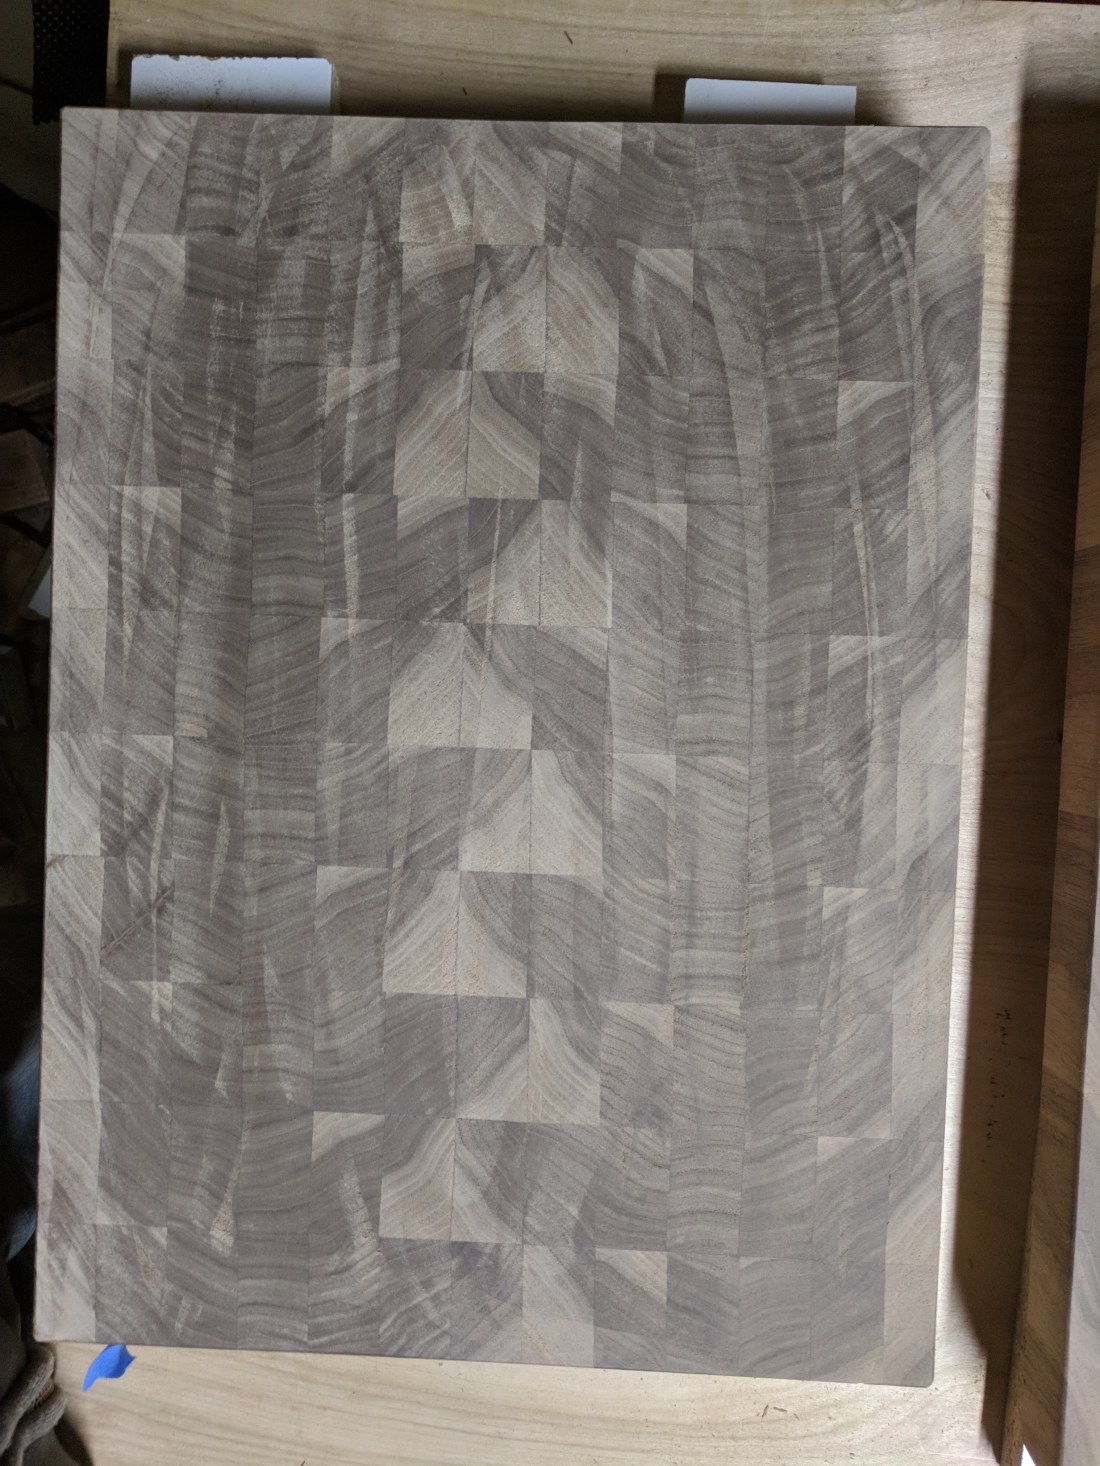
8. Now you’re on the home stretch. Re-flatten the newly glued board using the same process from Step #6.
You should have something that looks like this.
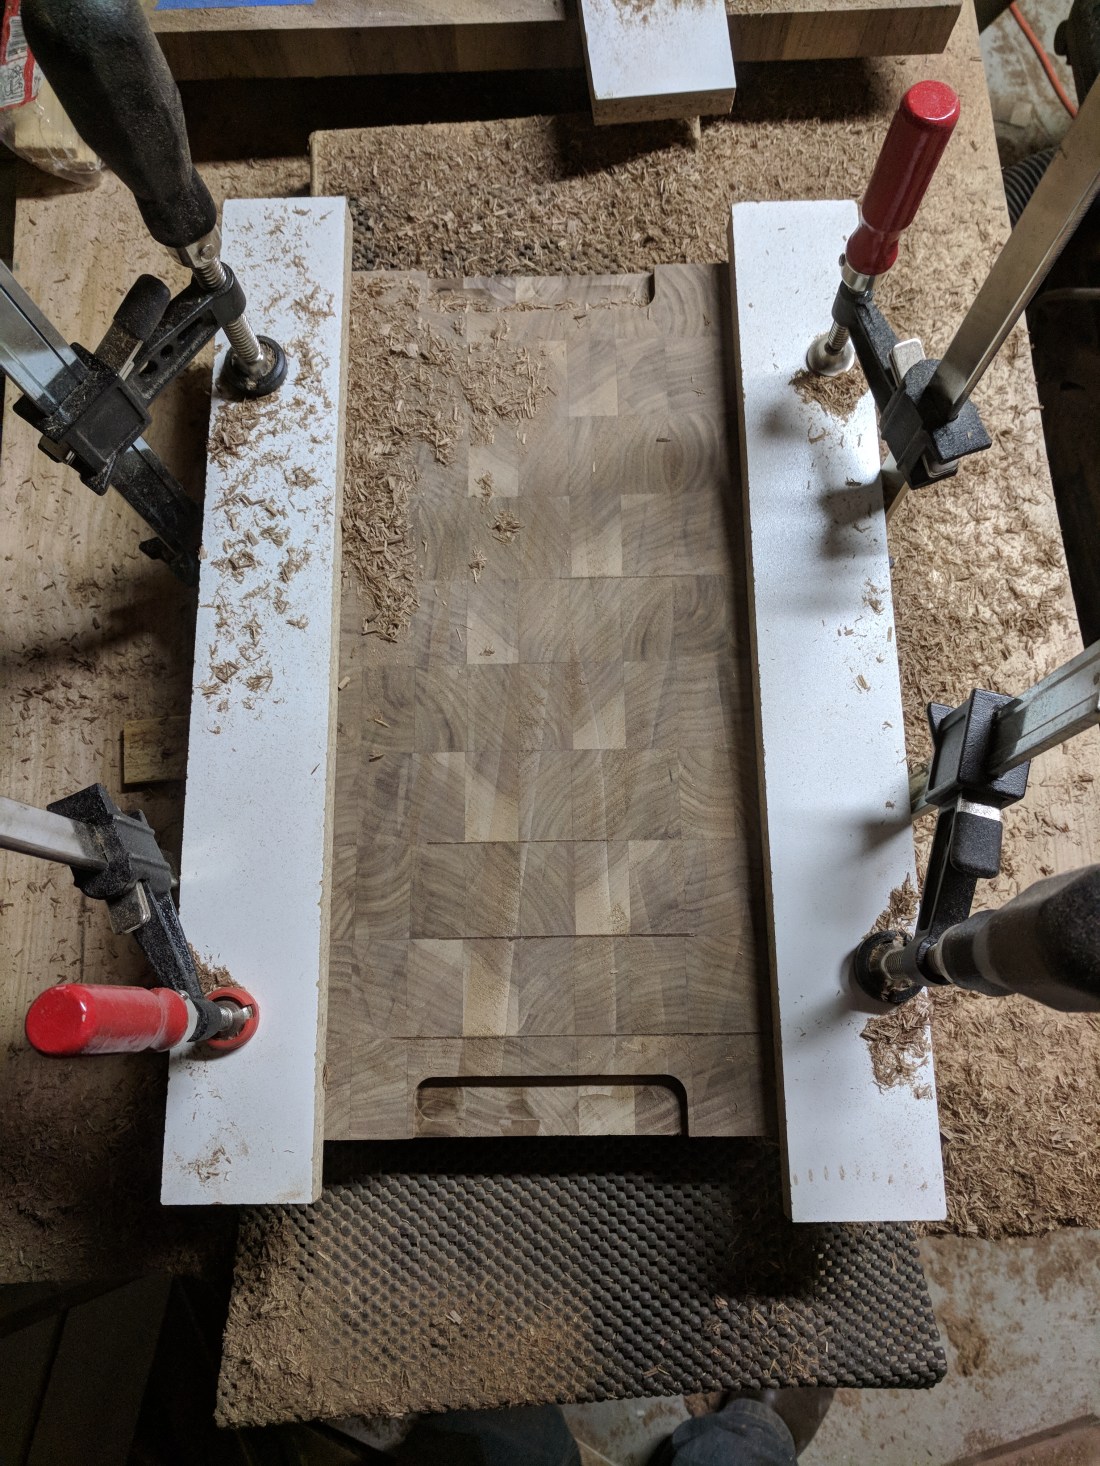
9. The board should be big enough to be somewhat difficult to handle, so you’ll want to carve out some hand holds. Pull your router out of the plunge base on its sled, and drop it into an edge guide set to a depth of 1/2″. I use the same 3/4″ bit as from the planing. The size of the hand holds isn’t terribly important, so I just cut two stop blocks that will give me a reasonable enough size, clamp them on, and route out my hand holds.
Get ready for a lot more dust.
10. With a flat board with hand holds cut, it’s time for the first sand. Assuming you don’t have a large drum sander, use a random orbital sander. Start with 80 grit, then work your way to 120 grit.
11. Now it’s time to swap out the straight bit on your router for a roundover bit. Pick your preferred size; personally, I like a minimal look so I stick to 1/8″, but 1/4″ is also common. Important note: be sure to test out your bit placement on a piece of scrap first. It has to be seated exactly right or you can carve out too much material. Once that’s down, roundover all edges on the board to make it more comfortable to handle.
12. Time for the final sand. Hit the board with 180, then 220 until it’s perfectly smooth. This will take longer with end grain than edge grain.
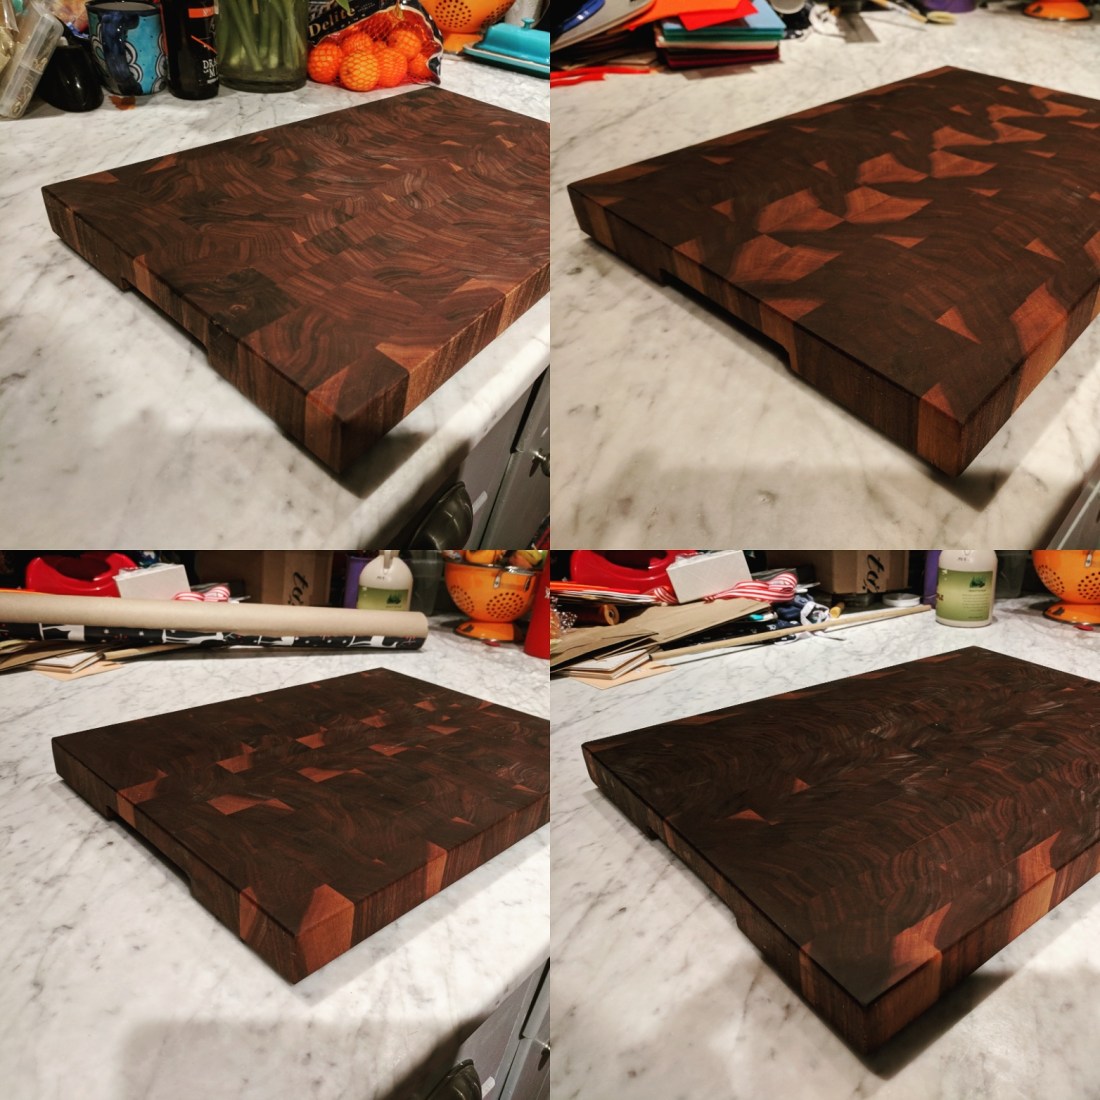
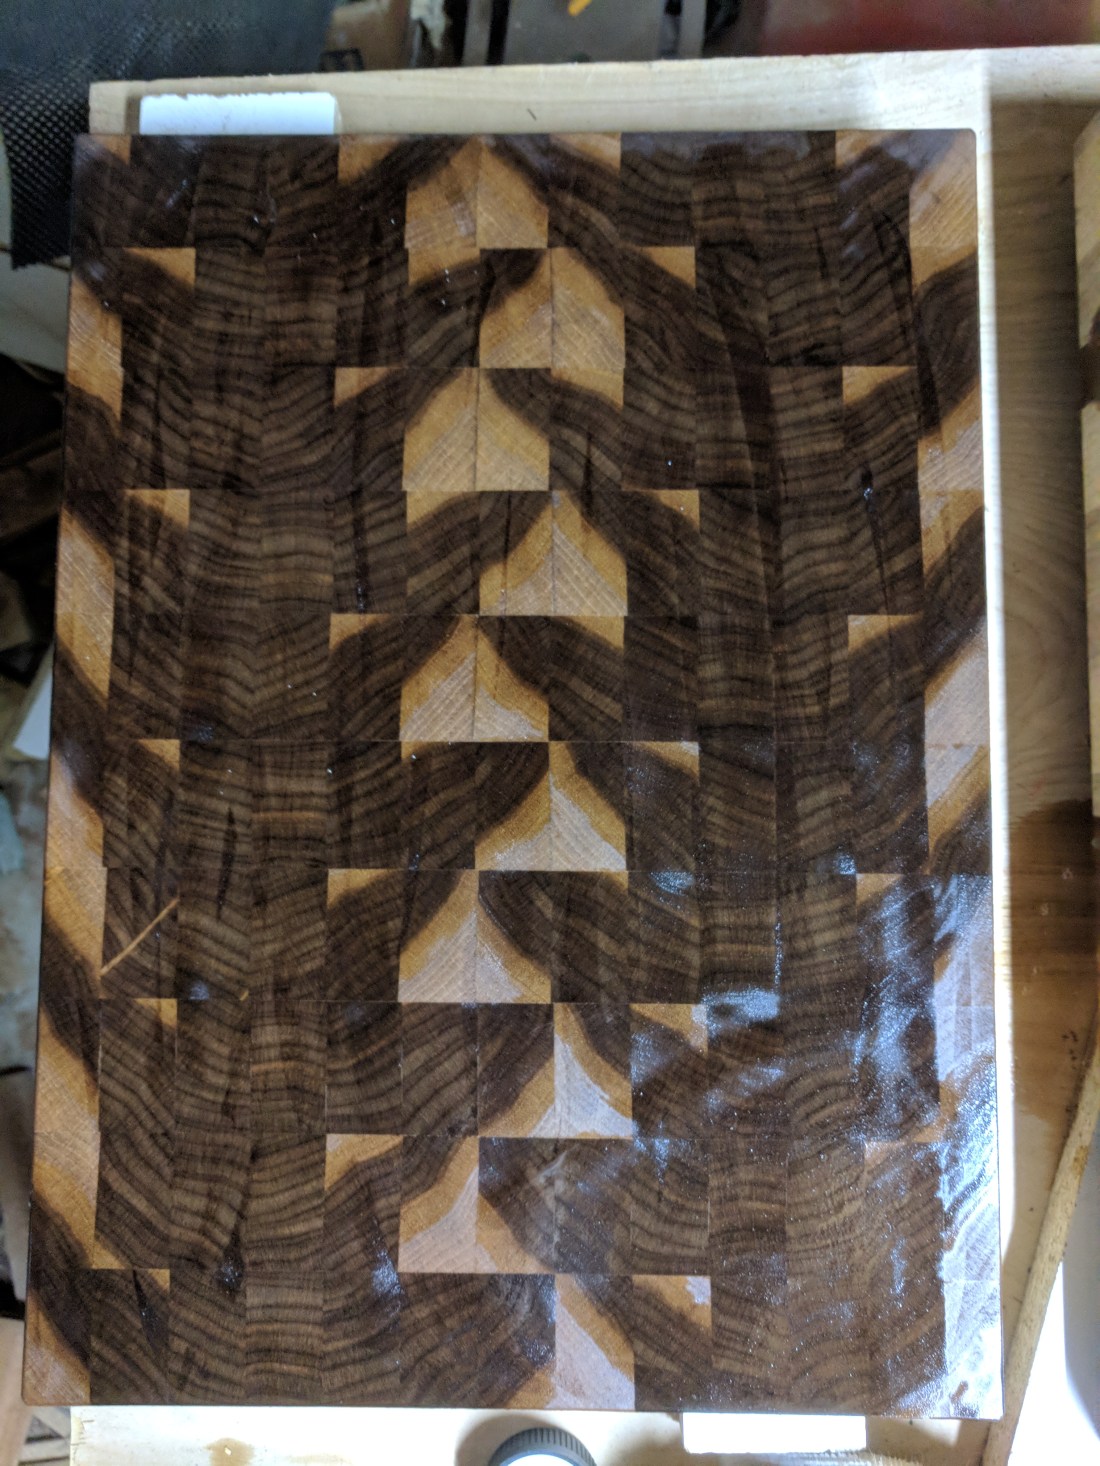
13. Now comes the fun part. You’ve put all this labor into a piece of wood that looks dusty and unimpressive. Like so.
But then you hit it with a coat of food grade mineral oil – commonly sold as “butcher’s block oil” or “cutting board oil” – and the grain pops and the board looks like an entirely different animal.
This is always my favorite part of the process. Anyway, you basically have three choices as far as finishes.
- Food grade varnish, e.g. salad bowl finish
- Mineral oil
- Wax and oil combination
I’ve done all three, but generally go with mineral oil because it’s the simplest and easiest for those receiving the board to maintain.
For a mineral oil finish, I hit the board four days in a row, and allow it to dry overnight in between.
14. After the fourth day’s oil has dried, I rub the board down with microfiber cloth to remove excess oil and dust, then screw on feet to keep the board off the counter and make it easier to pick up. These feet specifically.
And you’re done. Enjoy your new cutting board!


Amazing–the amount of work that goes into this. Beautiful boards!